发布NFT到电子钱包
这是本系列的最后一篇文章,会实现我们最终目标,发布NFT到电子钱包中。
这是本系列的最后一篇文章,前三篇文章部署了开发测试环境并编写了智能合约,这篇文章会实现我们最终目标:发布NFT到电子钱包中。但在发布NFT之前需要做一件事情,就是将一张图片上传到IPFS中。IPFS是一个分布式系统,用于存储和访问文件、网站、应用程序和数据,这有别于传统的文件存储,关于IPFS的内容,我们以后再讨论。目前互联网上有很多免费的IPFS服务提供商,比如:Pinata
准备制作NFT的图片
首先要准备一张图片,只要符合宽度在320和1080像素之间,长宽比在1.91:1和4:5之间的任何一张图片都可以。其次还要为这张图片制作一份Metadata文件,JSON格式如下:
{
  "name": "your NFT name",
  "description": "your NFT description",
  "image": "ipfs://CID",
  "attributes": [
    {
      "trait_type": "attributes1",
      "value": "attributes1 value"
    },
    {
      "trait_type": "attributes2",
      "value": "attributes1 value"
    }
  ]
}
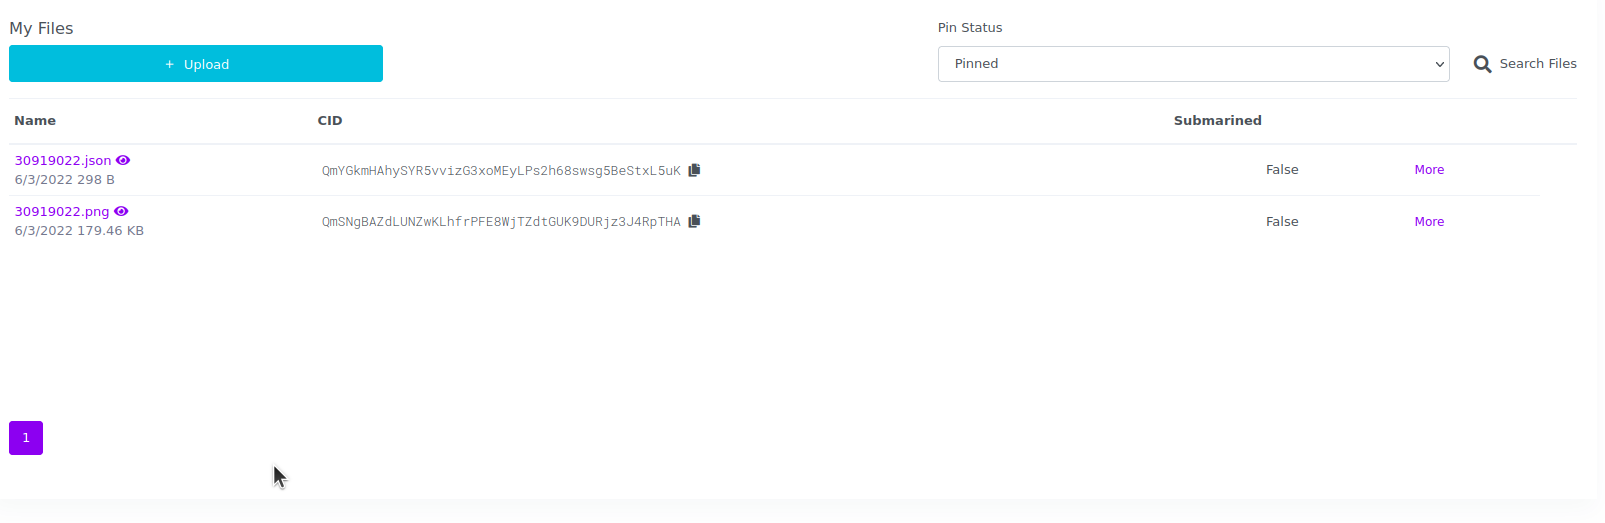
先上传图片到IPFS,以便获取图片的CID。然后将图片的CID填写到Metadata文件里,再将Metadata上传到IPFS中。这样两个文件就准备齐了,最终我们在合约中使用的是Metadata文件的CID,合约会解析Metadata获取到最终的图片CID
修改truffle配置文件
在修改配置文件之前,先安装依赖包
~/app $ npm install @truffle/hdwallet-provider
还需要再添加一份配置文件
~/app $ touch .env
~/app $ tree -Ial "node_modules"
.
├── contracts
│   ├── Migrations.sol
│   └── TestNFT.sol
├── .env
├── migrations
│   └── 1_initial_migration.js
├── package.json
├── package-lock.json
├── test
│   └── testnft_test.js
└── truffle-config.js

3 directories, 8 files
我们需要在配置文件中写入私钥和公钥。这两个值在Quorum VM的目录中查找:
/home/quorum/quorum-test-network/smart_contracts/permissioning/scripts
ls -al
total 40
drwxrwxr-x 2 quorum quorum 4096 Jun 13 12:19 .
drwxrwxr-x 4 quorum quorum 4096 Jun 13 12:19 ..
-rwxrwxr-x 1 quorum quorum  141 Jun 13 12:19 compile.sh
-rwxrwxr-x 1 quorum quorum  178 Jun 13 12:19 copyAndRestart.sh
-rw-rw-r-- 1 quorum quorum 5123 Jun 13 12:19 deploy.js
-rw-rw-r-- 1 quorum quorum 2219 Jun 13 12:19 deployEthers.js
-rw-rw-r-- 1 quorum quorum 3602 Jun 13 12:19 keys.js
-rw-rw-r-- 1 quorum quorum 5183 Jun 13 12:19 readme.md
在keys.js中可以找到3个accounts,任选一个:
module.exports = {
  quorum: {
    validator*: {}
    rpcnode: {}
    member*: {}
    accounts: {
    "0xfe3b557e8fb62b89f4916b721be55ceb828dbd73" : {
      "privateKey" : "0x8f2a55949038a9610f50fb23b5883af3b4ecb3c3bb792cbcefbd1542c692be63",
    },
    "0x627306090abaB3A6e1400e9345bC60c78a8BEf57" : {
      "privateKey" : "0xc87509a1c067bbde78beb793e6fa76530b6382a4c0241e5e4a9ec0a0f44dc0d3",
      },
    "0xf17f52151EbEF6C7334FAD080c5704D77216b732" : {
      "privateKey" : "0xae6ae8e5ccbfb04590405997ee2d52d2b330726137b875053c36d94e974d162f",
      },
    }
};
以下就是整个配置文件
MNEMONIC = "c87509a1c067bbde78beb793e6fa76530b6382a4c0241e5e4a9ec0a0f44dc0d3"
API_URL = "<https://chain.azure-api.net/testrpc>"
PRIVATE_KEY = "c87509a1c067bbde78beb793e6fa76530b6382a4c0241e5e4a9ec0a0f44dc0d3"
PUBLIC_KEY = "0x627306090abaB3A6e1400e9345bC60c78a8BEf57"
再次修改truffle配置文件,这次我们需要加上用于部署合约的配置
require("dotenv").config();
const HDWalletProvider = require("@truffle/hdwallet-provider");
const mnemonic = process.env.MNEMONIC;

module.exports = {

  networks: {
    development: {
      provider: () => new HDWalletProvider(mnemonic, `https://chain.azure-api.net/testrpc`),
      network_id: "1337",       // Quorum default network id 1337 (default: none)
    },
    polygon_testnet: {
      provider: () => new HDWalletProvider(mnemonic, `https://chain.azure-api.net/testrpc`),
      network_id: 1337,
      networkCheckTimeout: 9999,
      confirmations: 4,
      timeoutBlocks: 200,
      skipDryRun: true,
    }
  },

  mocha: {},

  compilers: {
    solc: {
      version: "0.8.14",      // Fetch exact version from solc-bin (default: truffle's version)
    }
  },
};
部署合约,当部署成功后我们会看到合约地址
~/app $ truffle migrate --network polygon_testnet
Compiling your contracts...
===========================
> Everything is up to date, there is nothing to compile.

Starting migrations...
======================
> Network name:    'polygon_testnet'
> Network id:      1337
> Block gas limit: 700000000 (0x29b92700)

1_initial_migration.js
======================

   Deploying 'Migrations'
   ----------------------
   > transaction hash:    0x12390dd2093089ebd304e16835173556d419bf876d051b2fdfb66a1ee2d10e7a
   > Blocks: 1            Seconds: 9
   > contract address:    0x68249ac64729F5e29f296ac0a670BDf9F6E6BeF9
   > block number:        13236
   > block timestamp:     1655274384
   > account:             0xf0E2Db6C8dC6c681bB5D6aD121A107f300e9B2b5
   > balance:             1000000000
   > gas used:            290582 (0x46f16)
   > gas price:           0 gwei
   > value sent:          0 ETH
   > total cost:          0 ETH

   Pausing for 4 confirmations...

   -------------------------------
   > confirmation number: 1 (block: 13237)
   > confirmation number: 2 (block: 13238)
   > confirmation number: 3 (block: 13239)
   > confirmation number: 4 (block: 13240)
   > Saving migration to chain.
   > Saving artifacts
   -------------------------------------
   > Total cost:                   0 ETH

Summary
=======
> Total deployments:   1
> Final cost:          0 ETH
发布NFT
先安装依赖包
~/app $ npm install @alch/alchemy-web3
新建一个JS文件,用来编写发布NFT的方法。我们还发现在部署合约的时候自动创建了一个build文件夹,这个是其实合约的编译目录。
~/app $ touch mint-nft.js
~/app $ tree -Ial "node_modules"
.
├── build
│   └── contracts
│       ├── Address.json
│       ├── Context.json
│       ├── Counters.json
│       ├── ERC165.json
│       ├── ERC721.json
│       ├── ERC721URIStorage.json
│       ├── IERC165.json
│       ├── IERC721.json
│       ├── IERC721Metadata.json
│       ├── IERC721Receiver.json
│       ├── Migrations.json
│       ├── Ownable.json
│       ├── Strings.json
│       └── TestNFT.json
├── contracts
│   ├── Migrations.sol
│   └── TestNFT.sol
├── .env
├── migrations
│   └── 1_initial_migration.js
├── mint-nft.js
├── package.json
├── package-lock.json
├── test
│   └── testnft_test.js
└── truffle-config.js

5 directories, 23 files
需要将之前部署合约后拿到的地址填写到发布代码中
require('dotenv').config();
const API_URL = process.env.API_URL;
const PUBLIC_KEY = process.env.PUBLIC_KEY;
const PRIVATE_KEY = process.env.PRIVATE_KEY;

const { createAlchemyWeb3 } = require("@alch/alchemy-web3");
const web3 = createAlchemyWeb3(API_URL);

const contract = require("./build/contracts/TestNFT.json");
const contractAddress = "0x68249ac64729F5e29f296ac0a670BDf9F6E6BeF9";
const nftContract = new web3.eth.Contract(contract.abi, contractAddress);

async function mintNFT(tokenURI) {
    const nonce = await web3.eth.getTransactionCount(PUBLIC_KEY, 'latest'); //get latest nonce

    //the transaction
    const tx = {
        'from': PUBLIC_KEY,
        'to': contractAddress,
        'nonce': nonce,
        'gas': 500000,
        'data': nftContract.methods.mintNFT(tokenURI, PUBLIC_KEY, web3.utils.toWei("12", "ether")).encodeABI()
    };

    const signPromise = web3.eth.accounts.signTransaction(tx, PRIVATE_KEY)

    signPromise.then((signedTx) => {
      web3.eth.sendSignedTransaction(
        signedTx.rawTransaction,
        function (err, hash) {
            if (!err) {
                console.log(
                "The hash of your transaction is: ",
                hash,
                "\\nCheck Alchemy's Mempool to view the status of your transaction!"
                )
            } else {
                console.log( "Something went wrong when submitting your transaction:",err)
            }
        })
    })
    .catch((err) => {
      console.log(" Promise failed:", err)
    })
}

mintNFT("ipfs://QmYGkmHAhySYR5vvizG4xoMEyLPs4h68swsg5BeStxL6uK")
执行代码,发布NFT
~/app $ node mint-nft.js
The hash of your transaction is:  0x04e22aace4a65f96c913441b8851ae855ae01cc48b023696f69805fcd1bea5d9
Check Alchemy's Mempool to view the status of your transaction!
将NFT加载到钱包中
在部署测试环境的最后我们已经将测试环境添加到了MetaMask中,我们还需要将部署合约所用的账户导入MetaMask,并在账户的收藏品中导入NFT,合约地址是部署合约时返回的地址,ID号默认从1开始,导入后就可以在钱包中看到收藏品了
<img src="https://img.learnblockchain.cn/attachments/2022/06/li5pYREz62bbd95ad3392.png" alt="图片替换文本" width="210" >
<img src="https://img.learnblockchain.cn/attachments/2022/06/3p1N6cZG62bbdb617cdca.png" alt="图片替换文本" width="210" >
<img src="https://img.learnblockchain.cn/attachments/2022/06/RiS6kvPh62bbd966bf642.png" alt="图片替换文本" width="210" >
 GitHub 登录
 Web3 钱包登录

我们是微软CSI(Micorosft China Strategic Incubator)团队,目前微软有孵化Startup项目的计划,如果大家有好的项目或者问题欢迎随时来跟我们聊一聊,我们很希望能和社区的开发者们一起探讨web3的新技术以及未来的发展方向,如果有机会合作并加入微软孵化计划还有免费的资源可以使用 联系邮箱:xiaopingfeng@microsoft.com