Web3系列教程之进阶篇---8. IPFS实战
了解以太坊生态系统,这样你就不会每次都重新发明轮子。使用Chainlink, ENS, The Graph, IPFS, Ceramic, Polygon, NEAR等开发吧!
现在是时候开发自己的 NFT 集合并将其元数据存储在 IPFS 上
要求
- 应该只存在 10 个 LearnWeb3 Punk NFT,并且每个都应该是唯一的。
- 用户应该能够在一次交易中只铸造一个NFT。
- NFT 的元数据应存储在 IPFS 上
- 你的 NFT 收藏应该有一个网站。
- NFT 合约应部署在Mumbai测试网上
让我们开始开发?
先决条件
- 你应该已经完成了IPFS 理论教程
构建
IPFS
- 现在是我们将文件上传到 ipfs 的时候了
- 我们将使用一项名为Pinata的服务,该服务将帮助我们将内容固定在 IPFS 上
- 转到Pinata 仪表板并单击
Upload,然后单击Folder
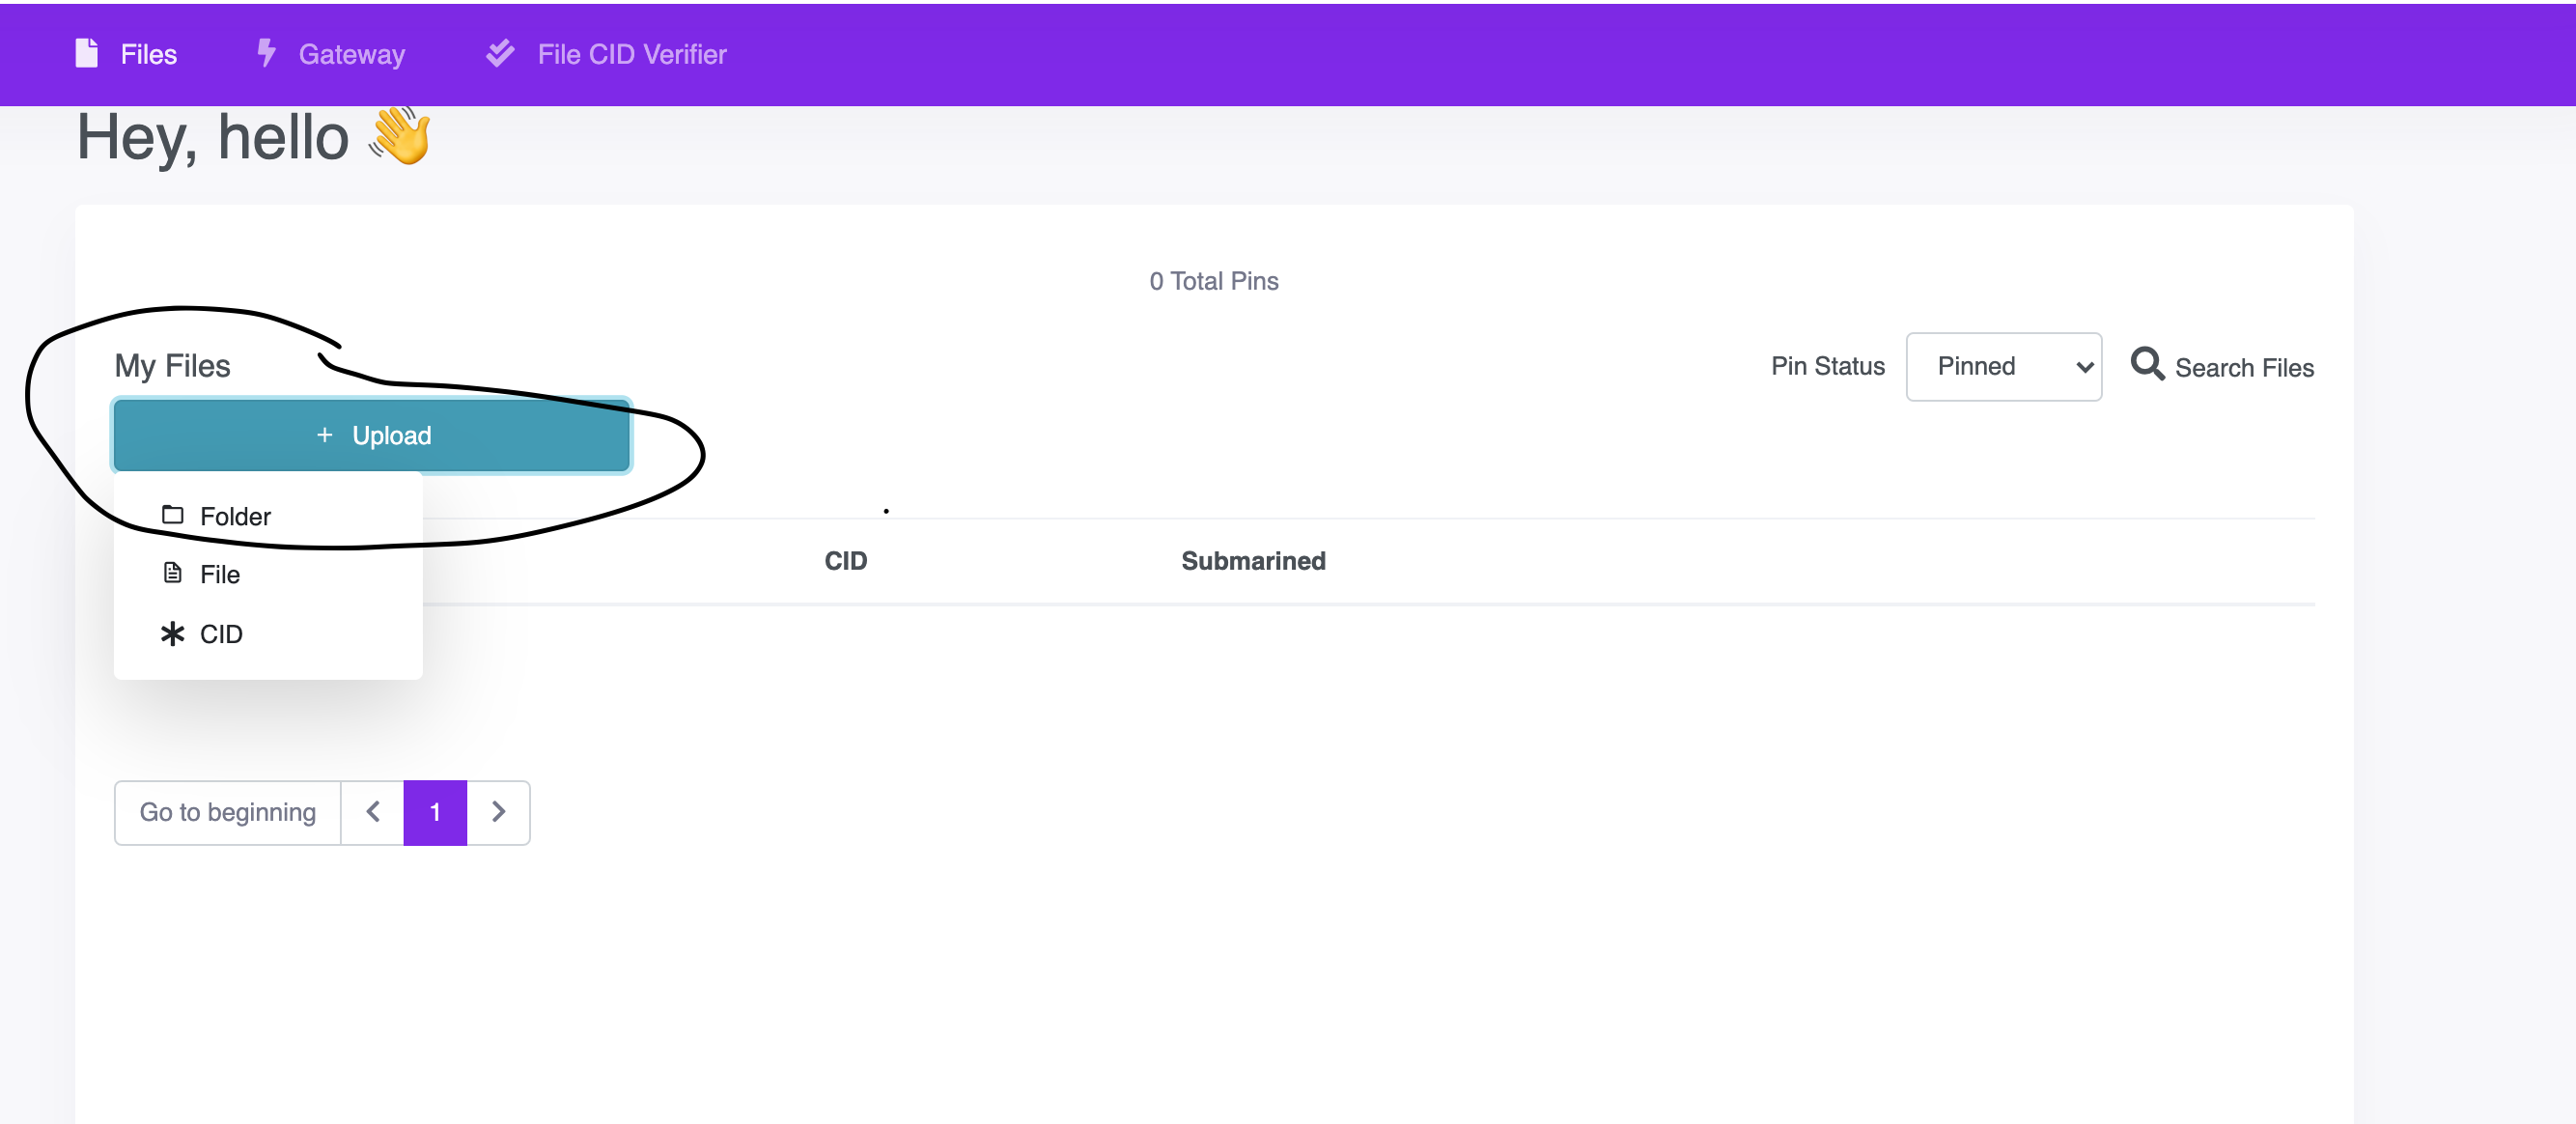
- 将 LW3Punks 文件夹下载到您的计算机,然后上传到它
Pinata,命名文件夹LW3Punks - 现在你应该可以看到你的文件夹的CID了,太棒了!
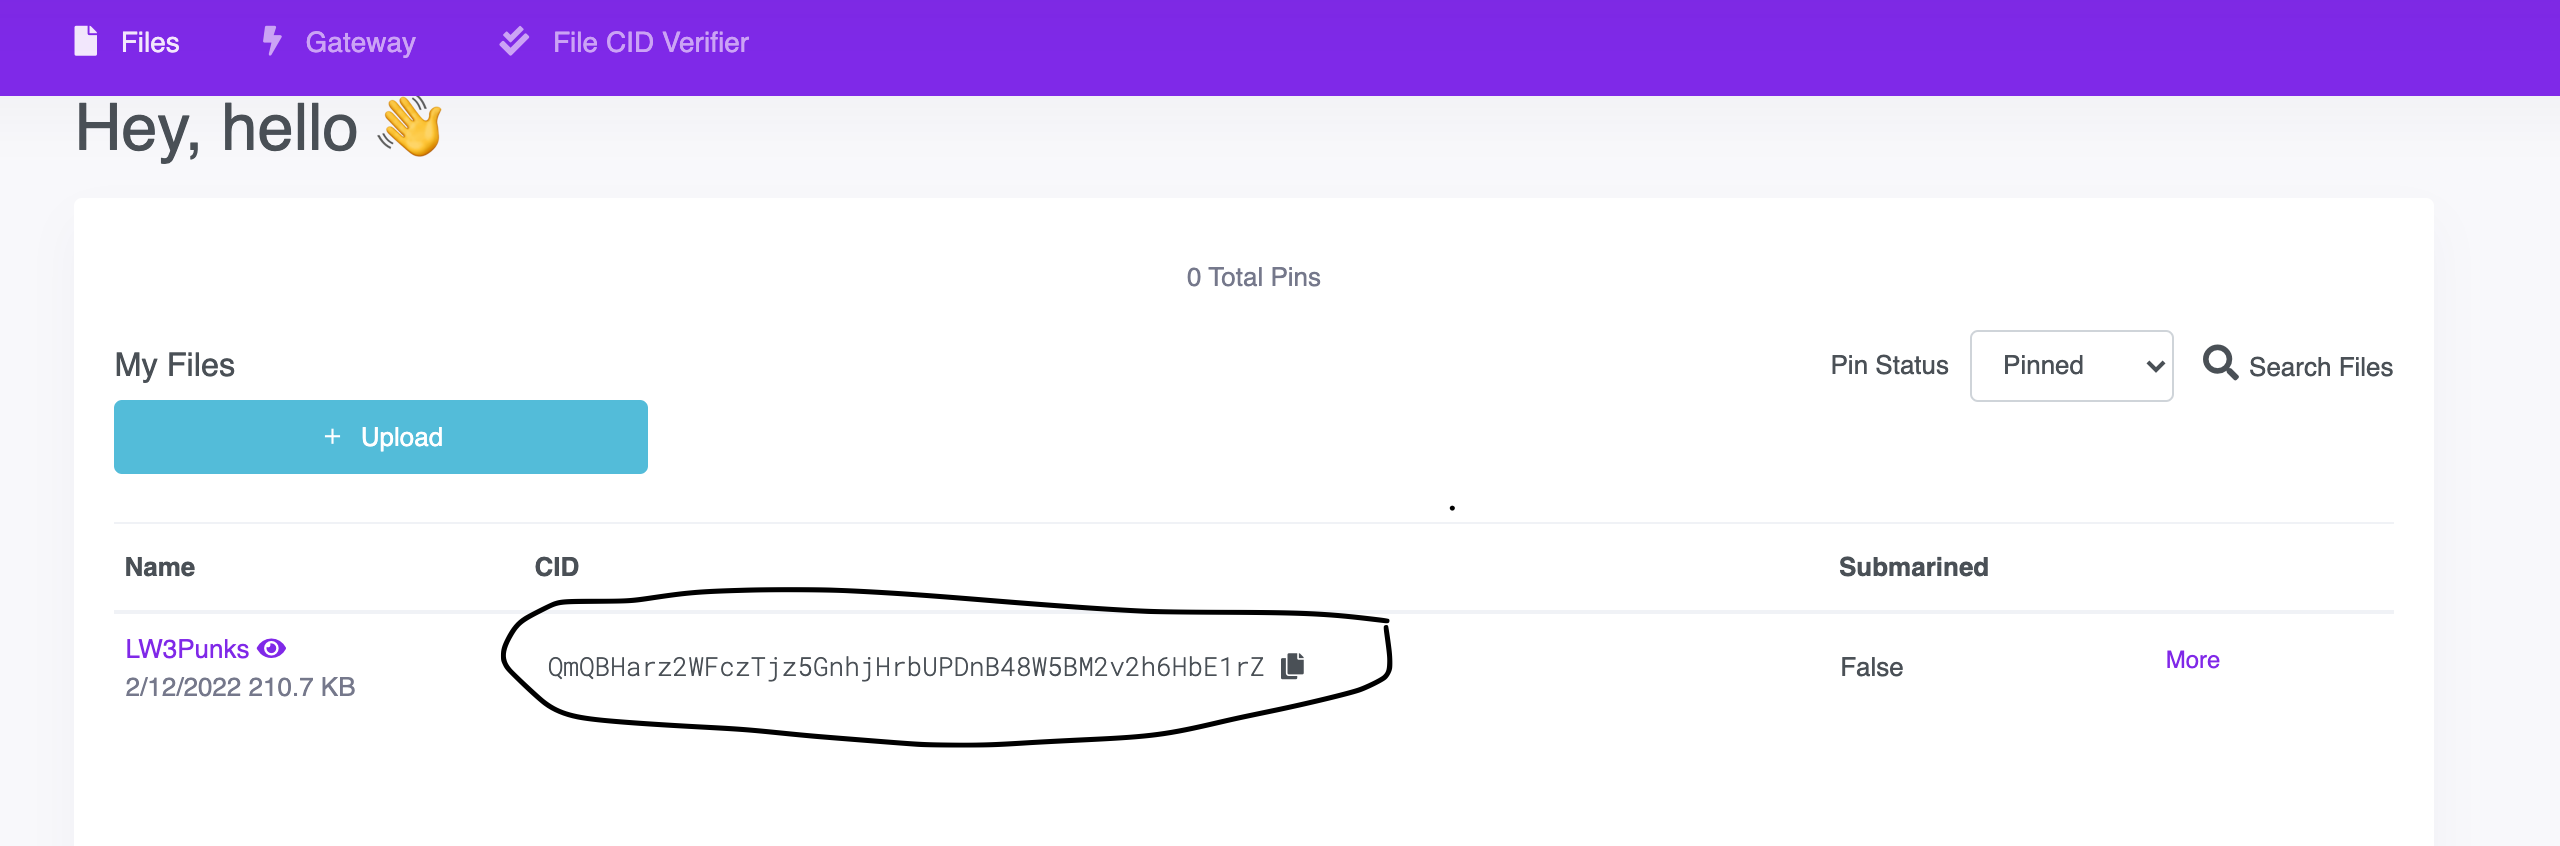
-
你可以通过打开这个链接来检查它是否真的被上传到了IPFS:https://ipfs.io/ipfs/your-nft-folder-cid 把
your-nft-folder-cid替换成你从pinata那里收到的CID。 -
我们现在将为每个NFT上传元数据到IPFS,每个元数据文件将是一个json文件。下面给出了NFT 1的元数据的例子。
{
 "name":"1",
 "description":"NFT Collection for LearnWeb3 Students",
 "image":"ipfs://QmQBHarz2WFczTjz5GnhjHrbUPDnB48W5BM2v2h6HbE1rZ/1.png"
}
-
请注意“图像”如何在其中包含 ipfs 位置而不是
httpsurl。另请注意,由于您上传了一个文件夹,因此您还需要指定文件夹中的哪个文件具有给定 NFT 的正确图像。因此,在我们的案例中,指定 NFT 图像位置的正确方法是ipfs://CID-OF-THE-LW3Punks-Folder/NFT-NAME.png -
我们为您预先生成了元数据文件,您可以从这里将它们下载到您的计算机,将这些文件上传到 pinata 并命名文件夹
metadata -
现在每个 NFT 的元数据都已上传到 IPFS,pinata 应该已经为你的元数据文件夹生成了一个 CID
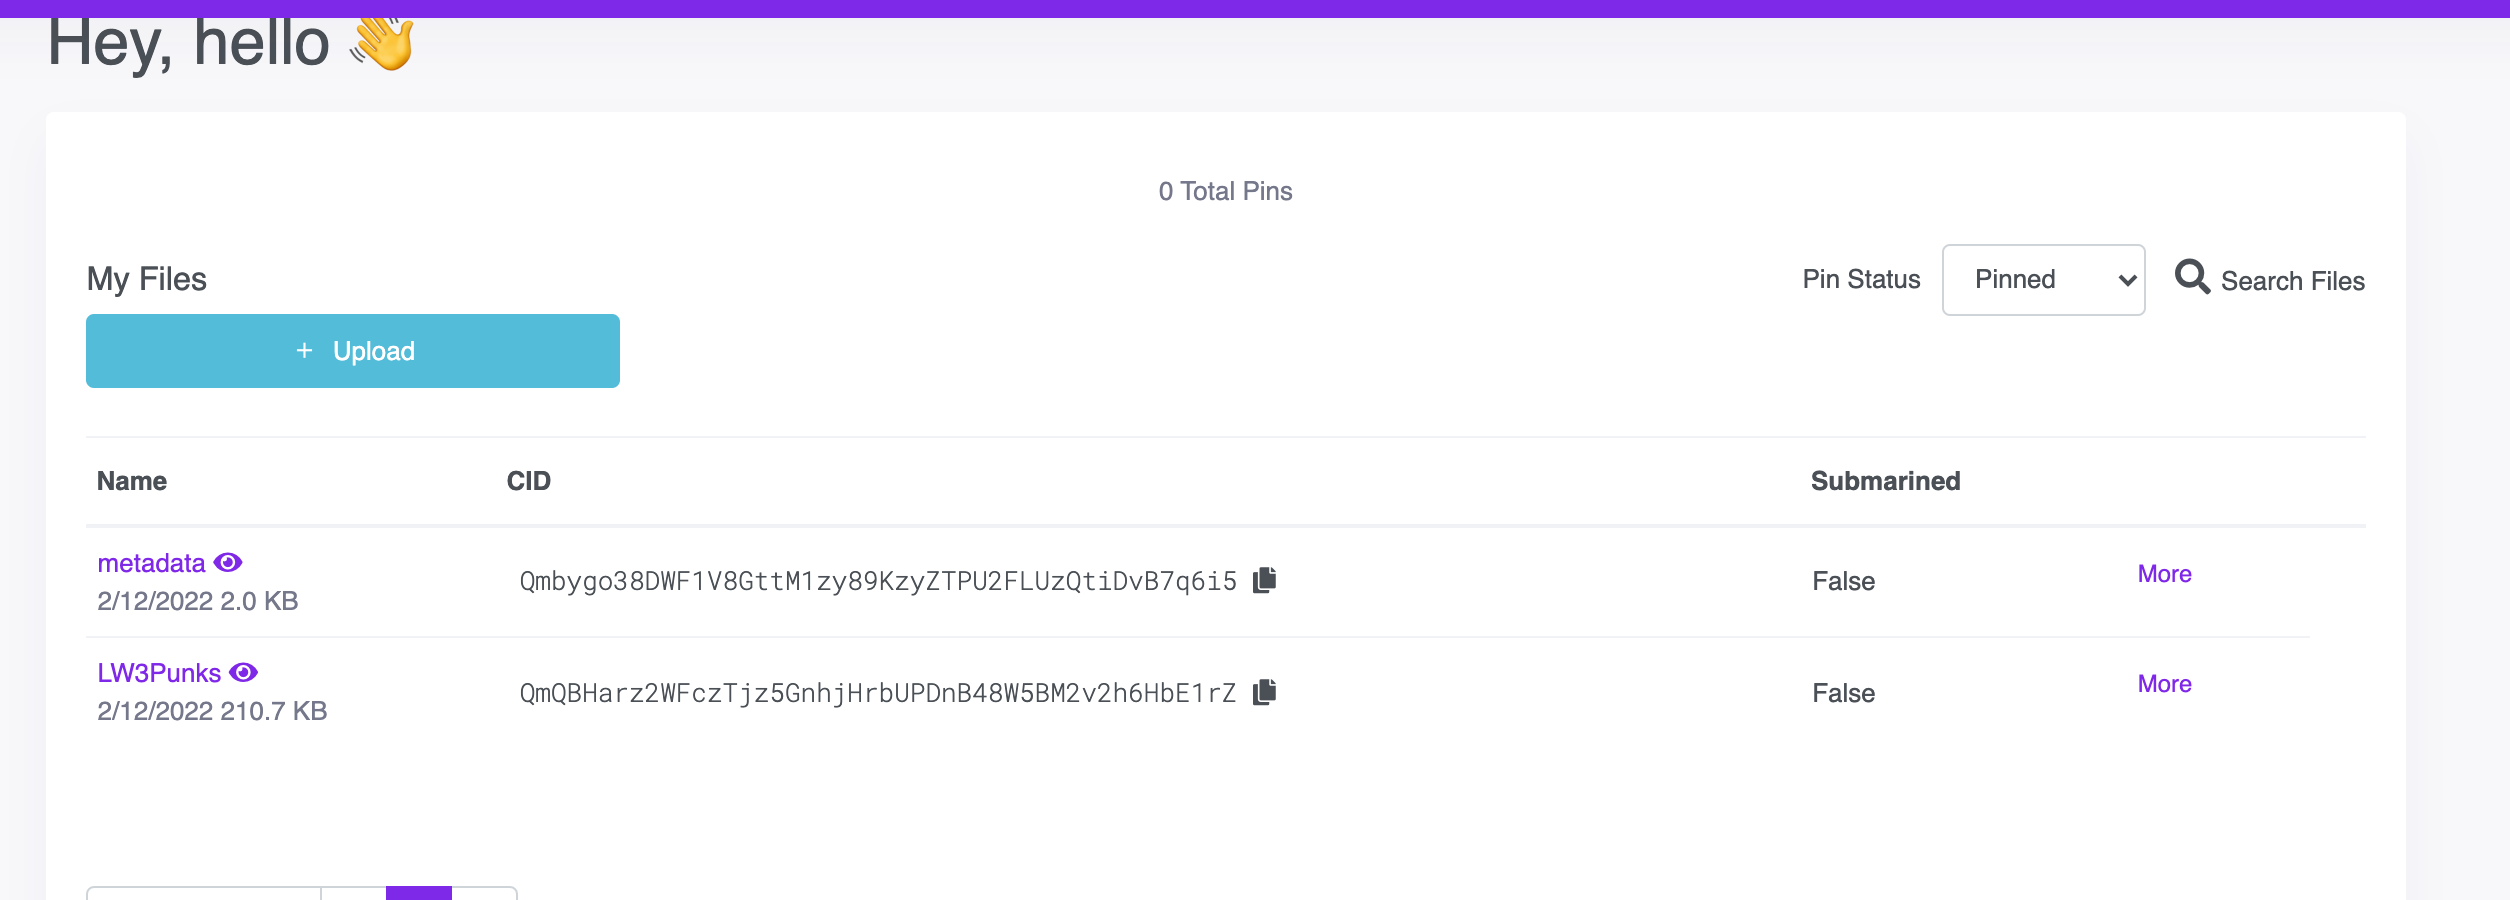
- 你可以通过打开这个来检查它是否真的被上传到了IPFS:https://ipfs.io/ipfs/your-metadata-folder-cid 把你的metadata-folder-cid替换成你从pinata收到的CID。
- 复制这个CID并将其保存在你的记事本上,你在接下来的教程中会需要它。
合约
- 是时候写我们的合约了?
- 我们还将使用Openzeppelin的
Ownable.sol,它可以帮助你管理合同的所有权。- 默认情况下,一个
Ownable的合同的所有者是部署它的账户,这通常正是你想要的。 - Ownable 还可以让您:
- 将所有权从所有者帐户转移到新帐户,以及
- renounceOwnership 让所有者放弃此管理特权,这是集中管理初始阶段结束后的常见模式。
- 默认情况下,一个
- 我们还将使用 ERC721 的扩展,称为ERC721 Enumerable
- ERC721 Enumerable 可帮助您跟踪合约中的所有 token Ids 以及给定合约的地址持有的 tokens Ids。
- 在继续之前,请先看看它实现的功能
为了构建智能合约,我们将使用Hardhat。Hardhat 是一个以太坊开发环境和框架,专为 Solidity 中的全栈开发而设计。简单来说,您可以编写智能合约、部署它们、运行测试和调试代码。
- 要设置Hardhat 项目,请打开终端并执行以下命令
mkdir hardhat-tutorial
cd hardhat-tutorial
npm init --yes
npm install --save-dev hardhat
- 在安装 Hardhat 的同一目录中运行:
npx hardhat
- 选择
Create a Javascript project - 按回车键已指定
Hardhat Project root - 如果您想添加一个问题,请按 Enter 键
.gitignore - 按回车键
Do you want to install this sample project's dependencies with npm (@nomicfoundation/hardhat-toolbox)?
现在你的Hardhat 项目准备好了!
如果您不在 Mac 上,请执行此额外步骤并安装这些库:)
npm install --save-dev @nomicfoundation/hardhat-toolbox
并按下enter所有问题。
- 在同一个终端,现在安装@openzeppelin/contracts,因为我们将在我们的LW3Punks合同中导入Openzeppelin的ERC721Enumerable合同。
npm install @openzeppelin/contracts
- 现在让我们在合同目录下创建一个新文件,并将其称为
LW3Punks.sol
    // SPDX-License-Identifier: MIT
    pragma solidity ^0.8.4;

    import "@openzeppelin/contracts/token/ERC721/extensions/ERC721Enumerable.sol";
    import "@openzeppelin/contracts/access/Ownable.sol";
    import "@openzeppelin/contracts/utils/Strings.sol";

    contract LW3Punks is ERC721Enumerable, Ownable {
        using Strings for uint256;
        /**
         * @dev _baseTokenURI for computing {tokenURI}. If set, the resulting URI for each
         * token will be the concatenation of the `baseURI` and the `tokenId`.
         */
        string _baseTokenURI;

        //  _price is the price of one LW3Punks NFT
        uint256 public _price = 0.01 ether;

        // _paused is used to pause the contract in case of an emergency
        bool public _paused;

        // max number of LW3Punks
        uint256 public maxTokenIds = 10;

        // total number of tokenIds minted
        uint256 public tokenIds;

        modifier onlyWhenNotPaused {
            require(!_paused, "Contract currently paused");
            _;
        }

        /**
         * @dev ERC721 constructor takes in a `name` and a `symbol` to the token collection.
         * name in our case is `LW3Punks` and symbol is `LW3P`.
         * Constructor for LW3P takes in the baseURI to set _baseTokenURI for the collection.
         */
        constructor (string memory baseURI) ERC721("LW3Punks", "LW3P") {
            _baseTokenURI = baseURI;
        }

        /**
        * @dev mint allows an user to mint 1 NFT per transaction.
        */
        function mint() public payable onlyWhenNotPaused {
            require(tokenIds < maxTokenIds, "Exceed maximum LW3Punks supply");
            require(msg.value >= _price, "Ether sent is not correct");
            tokenIds += 1;
            _safeMint(msg.sender, tokenIds);
        }

        /**
        * @dev _baseURI overides the Openzeppelin's ERC721 implementation which by default
        * returned an empty string for the baseURI
        */
        function _baseURI() internal view virtual override returns (string memory) {
            return _baseTokenURI;
        }

        /**
        * @dev tokenURI overides the Openzeppelin's ERC721 implementation for tokenURI function
        * This function returns the URI from where we can extract the metadata for a given tokenId
        */
        function tokenURI(uint256 tokenId) public view virtual override returns (string memory) {
            require(_exists(tokenId), "ERC721Metadata: URI query for nonexistent token");

            string memory baseURI = _baseURI();
            // Here it checks if the length of the baseURI is greater than 0, if it is return the baseURI and attach
            // the tokenId and `.json` to it so that it knows the location of the metadata json file for a given
            // tokenId stored on IPFS
            // If baseURI is empty return an empty string
            return bytes(baseURI).length > 0 ? string(abi.encodePacked(baseURI, tokenId.toString(), ".json")) : "";
        }

        /**
        * @dev setPaused makes the contract paused or unpaused
         */
        function setPaused(bool val) public onlyOwner {
            _paused = val;
        }

        /**
        * @dev withdraw sends all the ether in the contract
        * to the owner of the contract
         */
        function withdraw() public onlyOwner  {
            address _owner = owner();
            uint256 amount = address(this).balance;
            (bool sent, ) =  _owner.call{value: amount}("");
            require(sent, "Failed to send Ether");
        }

         // Function to receive Ether. msg.data must be empty
        receive() external payable {}

        // Fallback function is called when msg.data is not empty
        fallback() external payable {}
    }
- 现在我们将安装
dotenv包,以便能够导入env文件并在我们的配置中使用它。打开一个终端,指向thardhat-tutorial目录,执行以下命令
npm install dotenv
- 现在在
hardhat-tutorial文件夹下创建一个.env文件,并添加以下几行,使用注释中的说明来获得你的ALCHEMY_API_KEY_URL和MUMBAI_PRIVATE_KEY.如果你在MetaMask上没有Mumbai,你可以按照这个来添加到你的MetaMask,确保你获得Mumbai私钥的账户有Mumbai Matic的资金,你可以从这里得到一些。
// Go to https://www.alchemyapi.io, sign up, create
// a new App in its dashboard and select the chain as Polygon and network as Mumbai, and replace "add-the-alchemy-key-url-here" with its key url
ALCHEMY_API_KEY_URL="add-the-alchemy-key-url-here"

// Replace this private key with your MUMBAI account private key
// To export your private key from Metamask, open Metamask and
// go to Account Details > Export Private Key
// Be aware of NEVER putting real Ether into testing accounts
MUMBAI_PRIVATE_KEY="add-the-mumbai-private-key-here"
- 让我们把合同部署到
mumbai网络。在scripts文件夹下创建一个新文件,或替换现有的默认文件,命名为deploy.js。记住用你保存在记事本上的CID替换YOUR-METADATA-CID。
const { ethers } = require("hardhat");
require("dotenv").config({ path: ".env" });

async function main() {
  // URL from where we can extract the metadata for a LW3Punks
  const metadataURL = "ipfs://YOUR-METADATA-CID/";
  /*
  A ContractFactory in ethers.js is an abstraction used to deploy new smart contracts,
  so lw3PunksContract here is a factory for instances of our LW3Punks contract.
  */
  const lw3PunksContract = await ethers.getContractFactory("LW3Punks");

  // deploy the contract
  const deployedLW3PunksContract = await lw3PunksContract.deploy(metadataURL);

  await deployedLW3PunksContract.deployed();

  // print the address of the deployed contract
  console.log("LW3Punks Contract Address:", deployedLW3PunksContract.address);
}

// Call the main function and catch if there is any error
main()
  .then(() => process.exit(0))
  .catch((error) => {
    console.error(error);
    process.exit(1);
  });
- 现在打开
hardhat.config.js文件,我们将在这里添加mumbai网络,这样我们就可以将我们的合同部署到mumbai。将hardhat.config.js文件中的所有行替换为下面给出的行
require("@nomicfoundation/hardhat-toolbox");
require("dotenv").config({ path: ".env" });

const ALCHEMY_API_KEY_URL = process.env.ALCHEMY_API_KEY_URL;

const MUMBAI_PRIVATE_KEY = process.env.MUMBAI_PRIVATE_KEY;

module.exports = {
  solidity: "0.8.4",
  networks: {
    mumbai: {
      url: ALCHEMY_API_KEY_URL,
      accounts: [MUMBAI_PRIVATE_KEY],
    },
  },
};
- 编译合同,打开终端,指向
hardhat-tutorial目录,执行以下命令
npx hardhat compile
- 要部署,打开终端指向
hardhat-tutorial目录并执行以下命令
npx hardhat run scripts/deploy.js --network mumbai
- 将打印在终端上的LW3Punks合同地址保存在你的记事本中,你将在接下来的教程中需要它。
网站
- 为了开发网站,我们将使用React和Next Js。React 是一个用于制作网站的 javascript 框架,Next Js 构建在 React 之上。
- 首先,您需要创建一个新
next应用程序。您的文件夹结构应该类似于
   - IPFS-Practical
       - hardhat-tutorial
       - my-app
要创建my-app,请在终端指向 NFT-Collection 文件夹并键入
npx create-next-app@latest
并按下enter所有问题
- 现在运行应用程序,在终端中执行这些命令
cd my-app
npm run dev
- 现在转到
http://localhost:3000,您的应用程序应该正在运行? - 现在让我们安装 Web3Modal 库(https://github.com/Web3Modal/web3modal)。Web3Modal 是一个易于使用的库,可帮助开发人员通过简单的可自定义配置在其应用程序中添加对多个提供程序的支持。默认情况下,Web3Modal 库支持注入的提供程序,例如(Metamask、Dapper、Gnosis Safe、Frame、Web3 浏览器等),您还可以轻松配置库以支持 Portis、Fortmatic、Squarelink、Torus、Authereum、D'CENT 钱包和 Arkane。打开指向
my-app目录的终端并执行此命令
npm install web3modal
- 在同一个终端也安装
ethers.js
npm install ethers
- 在您的公共文件夹中,下载此文件夹和其中的所有图像LW3Punks 文件夹。确保下载的文件夹的名称是
LW3Punks - 现在转到样式文件夹并用
Home.modules.css以下代码替换文件的所有内容,这将为您的 dapp 添加一些样式:
.main {
  min-height: 90vh;
  display: flex;
  flex-direction: row;
  justify-content: center;
  align-items: center;
  font-family: "Courier New", Courier, monospace;
}

.footer {
  display: flex;
  padding: 2rem 0;
  border-top: 1px solid #eaeaea;
  justify-content: center;
  align-items: center;
}

.image {
  width: 70%;
  height: 50%;
  margin-left: 20%;
}

.title {
  font-size: 2rem;
  margin: 2rem 0;
}

.description {
  line-height: 1;
  margin: 2rem 0;
  font-size: 1.2rem;
}

.button {
  border-radius: 4px;
  background-color: blue;
  border: none;
  color: #ffffff;
  font-size: 15px;
  padding: 20px;
  width: 200px;
  cursor: pointer;
  margin-bottom: 2%;
}
@media (max-width: 1000px) {
  .main {
    width: 100%;
    flex-direction: column;
    justify-content: center;
    align-items: center;
  }
}
- 打开 pages 文件夹下的 index.js 文件并粘贴以下代码,代码解释可以在评论中找到。
import { Contract, providers, utils } from "ethers";
import Head from "next/head";
import React, { useEffect, useRef, useState } from "react";
import Web3Modal from "web3modal";
import { abi, NFT_CONTRACT_ADDRESS } from "../constants";
import styles from "../styles/Home.module.css";
export default function Home() {
// walletConnected keep track of whether the user's wallet is connected or not
const [walletConnected, setWalletConnected] = useState(false);
// loading is set to true when we are waiting for a transaction to get mined
const [loading, setLoading] = useState(false);
// tokenIdsMinted keeps track of the number of tokenIds that have been minted
const [tokenIdsMinted, setTokenIdsMinted] = useState("0");
// Create a reference to the Web3 Modal (used for connecting to Metamask) which persists as long as the page is open
const web3ModalRef = useRef();
/**
* publicMint: Mint an NFT
*/
const publicMint = async () => {
try {
console.log("Public mint");
// We need a Signer here since this is a 'write' transaction.
const signer = await getProviderOrSigner(true);
// Create a new instance of the Contract with a Signer, which allows
// update methods
const nftContract = new Contract(NFT_CONTRACT_ADDRESS, abi, signer);
// call the mint from the contract to mint the LW3Punks
const tx = await nftContract.mint({
// value signifies the cost of one LW3Punks which is "0.01" eth.
// We are parsing `0.01` string to ether using the utils library from ethers.js
value: utils.parseEther("0.01"),
});
setLoading(true);
// wait for the transaction to get mined
await tx.wait();
setLoading(false);
window.alert("You successfully minted a LW3Punk!");
} catch (err) {
console.error(err);
}
};
/*
connectWallet: Connects the MetaMask wallet
*/
const connectWallet = async () => {
try {
// Get the provider from web3Modal, which in our case is MetaMask
// When used for the first time, it prompts the user to connect their wallet
await getProviderOrSigner();
setWalletConnected(true);
} catch (err) {
console.error(err);
}
};
/**
* getTokenIdsMinted: gets the number of tokenIds that have been minted
*/
const getTokenIdsMinted = async () => {
try {
// Get the provider from web3Modal, which in our case is MetaMask
// No need for the Signer here, as we are only reading state from the blockchain
const provider = await getProviderOrSigner();
// We connect to the Contract using a Provider, so we will only
// have read-only access to the Contract
const nftContract = new Contract(NFT_CONTRACT_ADDRESS, abi, provider);
// call the tokenIds from the contract
const _tokenIds = await nftContract.tokenIds();
console.log("tokenIds", _tokenIds);
//_tokenIds is a `Big Number`. We need to convert the Big Number to a string
setTokenIdsMinted(_tokenIds.toString());
} catch (err) {
console.error(err);
}
};
/**
* Returns a Provider or Signer object representing the Ethereum RPC with or without the
* signing capabilities of metamask attached
*
* A `Provider` is needed to interact with the blockchain - reading transactions, reading balances, reading state, etc.
*
* A `Signer` is a special type of Provider used in case a `write` transaction needs to be made to the blockchain, which involves the connected account
* needing to make a digital signature to authorize the transaction being sent. Metamask exposes a Signer API to allow your website to
* request signatures from the user using Signer functions.
*
* @param {*} needSigner - True if you need the signer, default false otherwise
*/
const getProviderOrSigner = async (needSigner = false) => {
// Connect to Metamask
// Since we store `web3Modal` as a reference, we need to access the `current` value to get access to the underlying object
const provider = await web3ModalRef.current.connect();
const web3Provider = new providers.Web3Provider(provider);
// If user is not connected to the Mumbai network, let them know and throw an error
const { chainId } = await web3Provider.getNetwork();
if (chainId !== 80001) {
window.alert("Change the network to Mumbai");
throw new Error("Change network to Mumbai");
}
if (needSigner) {
const signer = web3Provider.getSigner();
return signer;
}
return web3Provider;
};
// useEffects are used to react to changes in state of the website
// The array at the end of function call represents what state changes will trigger this effect
// In this case, whenever the value of `walletConnected` changes - this effect will be called
useEffect(() => {
// if wallet is not connected, create a new instance of Web3Modal and connect the MetaMask wallet
if (!walletConnected) {
// Assign the Web3Modal class to the reference object by setting it's `current` value
// The `current` value is persisted throughout as long as this page is open
web3ModalRef.current = new Web3Modal({
network: "mumbai",
providerOptions: {},
disableInjectedProvider: false,
});
connectWallet();
getTokenIdsMinted();
// set an interval to get the number of token Ids minted every 5 seconds
setInterval(async function () {
await getTokenIdsMinted();
}, 5 * 1000);
}
}, [walletConnected]);
/*
renderButton: Returns a button based on the state of the dapp
*/
const renderButton = () => {
// If wallet is not connected, return a button which allows them to connect their wallet
if (!walletConnected) {
return (
<button onClick={connectWallet} className={styles.button}>
Connect your wallet
</button>
);
}
// If we are currently waiting for something, return a loading button
if (loading) {
return <button className={styles.button}>Loading...</button>;
}
return (
<button className={styles.button} onClick={publicMint}>
Public Mint ?
</button>
);
};
return (
<div>
<Head>
<title>LW3Punks</title>
<meta name="description" content="LW3Punks-Dapp" />
<link rel="icon" href="/favicon.ico" />
</Head>
<div className={styles.main}>
<div>
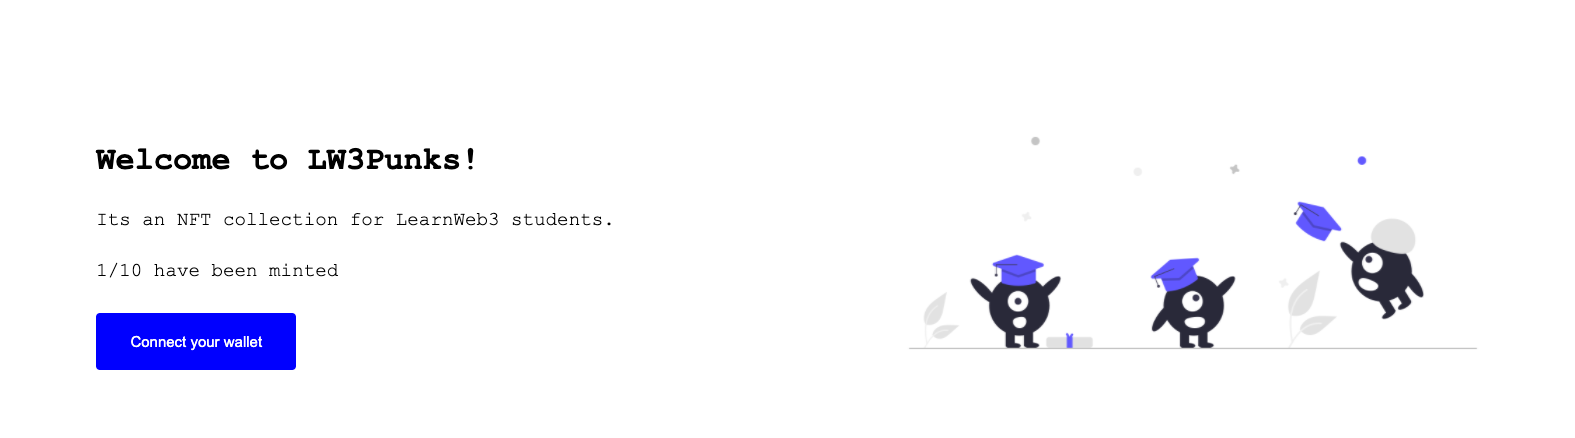
<h1 className={styles.title}>Welcome to LW3Punks!</h1>
<div className={styles.description}>
Its an NFT collection for LearnWeb3 students.
</div>
<div className={styles.description}>
{tokenIdsMinted}/10 have been minted
</div>
{renderButton()}
</div>
<div>
<img className={styles.image} src="./LW3punks/1.png" />
</div>
</div>
<footer className={styles.footer}>Made with ❤ by LW3Punks</footer>
</div>
);
}
- 现在在 my-app 文件夹下创建一个新文件夹并将其命名为
constants。 - 在常量文件夹中创建一个文件,
index.js然后粘贴以下代码。- 将 "address of your NFT contract"改为你部署并保存在记事本中的LW3Punks合同的地址。
- 用你的LW3Punks合同的ABI替换
---your abi---。要获得你的合同的abi,请到你的hardhat-tutorial/artifacts/contracts/LW3Punks.sol文件夹,从你的LW3Punks.json文件中获得 "abi "下的数组标记。
export const abi =---your abi---
export const NFT_CONTRACT_ADDRESS = "address of your NFT contract"
- 现在,在你的终端,也就是指向my-app文件夹,执行
npm run dev
- 你的LW3Punks NFT dapp现在应该没有错误地工作了
推送到github
确保在继续之前您已将所有代码推送到 github :)
部署你的 dApp
我们现在将部署您的 dApp,以便每个人都可以看到您的网站,并且您可以与所有 LearnWeb3 DAO 朋友分享它。
- 转到 https://vercel.com/ 并使用您的 GitHub 登录
- 然后单击
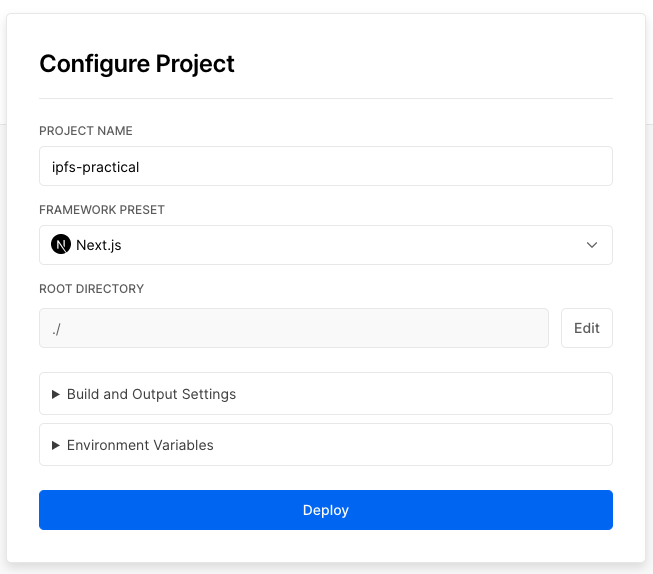
New Project按钮,然后选择您的 IPFS-Practical repo - 在配置您的新项目时,Vercel 将允许您自定义您的
Root Directory - 单击
Edit旁边Root Directory并将其设置为my-app - 选择框架为
Next.js - 点击
Deploy
- 现在,你可以通过进入你的仪表板,选择你的项目,并从那里复制域名来查看你部署的网站!把域名保存在记事本上,你以后会需要它。
 GitHub 登录
 Web3 钱包登录

