【Sui】 前端共学笔记(1)
- yuanchengjiayu
- 发布于 2025-01-08 15:40
- 阅读 2459
在本篇文章中,我们将介绍如何创建一个简单的前端应用并与Move合约进行交互,来实现一个用户档案创建的功能。你可以通过以下步骤,学习如何使用Sui区块链前端开发和Move合约语言。请关注sui前端共学营及其社区,在这里你可以学到前端和move合约语言的知识接下来我将进行一个简
在本篇文章中,我们将介绍如何创建一个简单的前端应用并与 Move 合约进行交互,来实现一个用户档案创建的功能。你可以通过以下步骤,学习如何使用 Sui 区块链前端开发和 Move 合约语言。
 请关注 sui 前端共学营及其社区,在这里你可以学到前端和 move 合约语言的知识
接下来我将进行一个简单的前端构建还有及其 week_one_alt 合约前端调用
请关注 sui 前端共学营及其社区,在这里你可以学到前端和 move 合约语言的知识
接下来我将进行一个简单的前端构建还有及其 week_one_alt 合约前端调用
第一步:创建 Sui 前端项目
- 首先,我们使用 Sui 提供的工具来创建一个新的前端dapp项目。在命令行中执行以下命令:
npm create @mysten/dapp
- 创建后,选择第一项,接着输入项目名称(也可以使用默认名称)。项目创建完成后,进入项目目录并安装依赖:
npm install- 根据READEME文档,使用以下命令启动项目:
pnpm dev- 启动成功后,前端页面应该类似于以下效果:
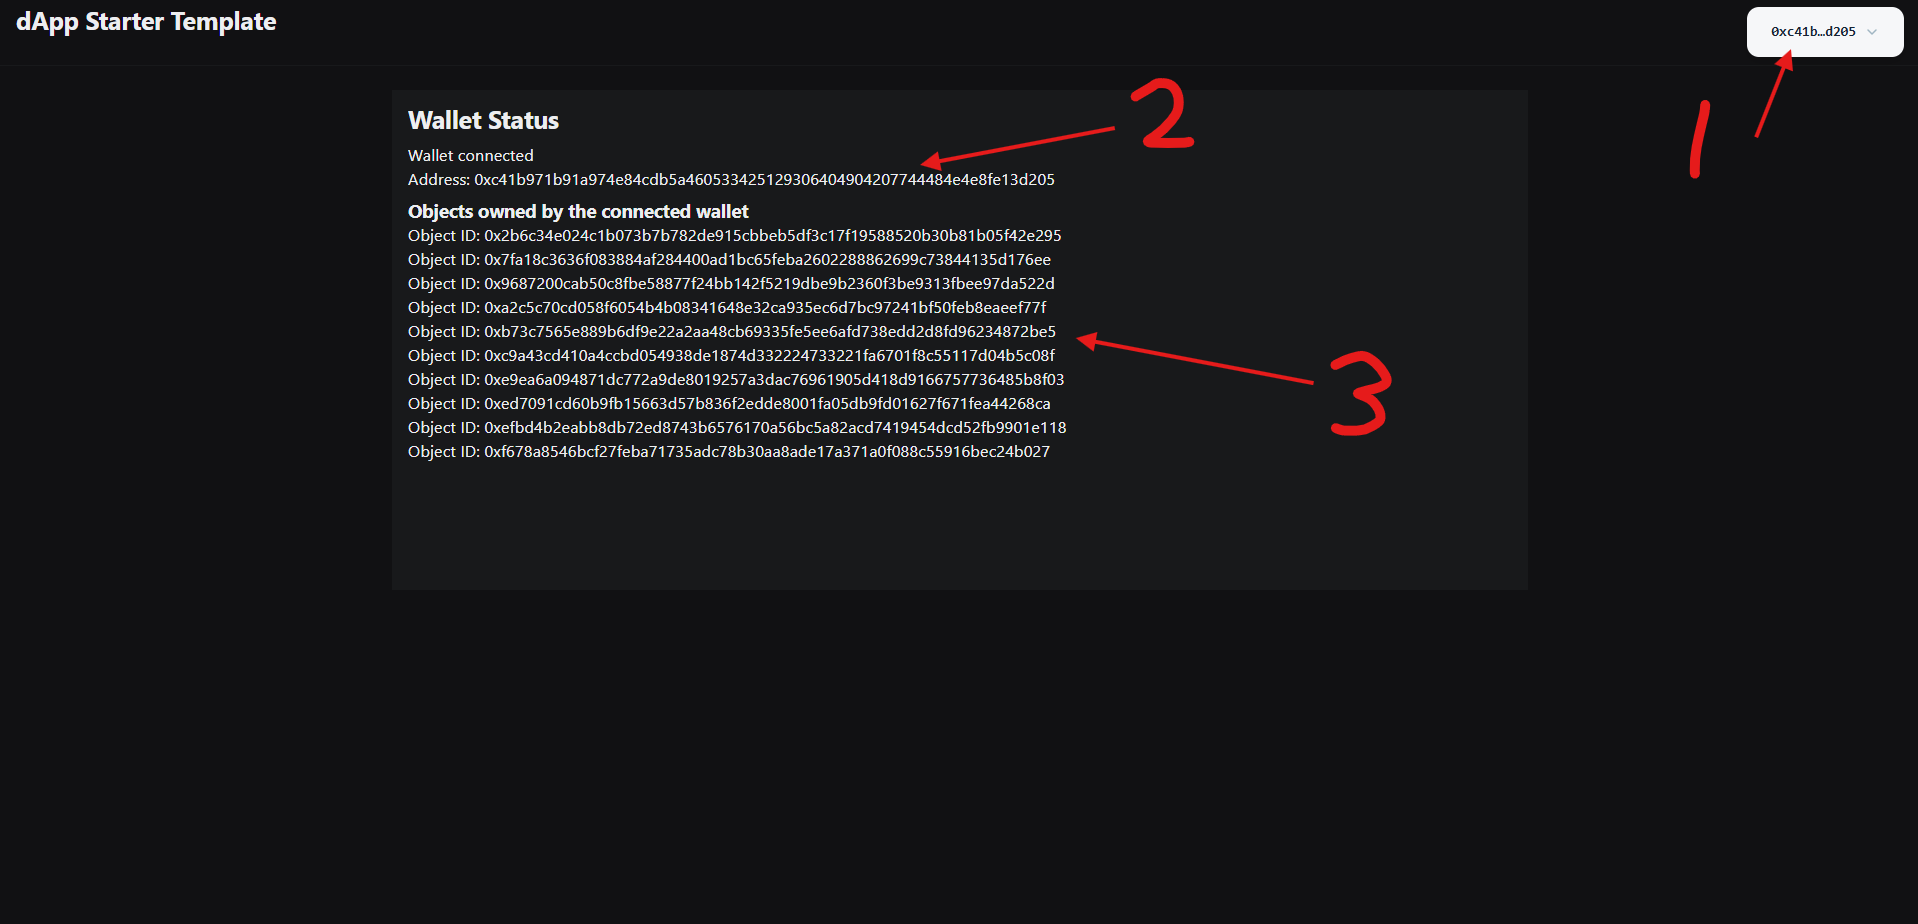
- 这个按钮连接钱包
- 这里将展示你的地址
- 这里显示你所拥有的
ObjectID
第二步:配置 NetworkConfig
为了与 Sui 区块链进行连接调用,我们需要在 networkConfig.ts 中配置相关的网络信息,包括目标的 packageID 和 state。这里我使用的是直播中的package:
import { getFullnodeUrl, SuiClient } from "@mysten/sui/client";
import { createNetworkConfig } from "@mysten/dapp-kit";

const { networkConfig, useNetworkVariable, useNetworkVariables } =
  createNetworkConfig({
    testnet: {
      url: getFullnodeUrl("testnet"),
      packageID: "0xe779c13bdddd16241896f15fc56bfa448d6e661b63df5e46be6ef31a063645e4",
      state: "0xa17ffd9916089dde4fae2e0b24a29ff858a7af787e635ccb7ed77bed5180ad6d",
    },
  });

const suiClient = new SuiClient({
  url: networkConfig.testnet.url,
});

export { useNetworkVariable, useNetworkVariables, networkConfig, suiClient };
第三步:创建合约交互功能
接下来,我们创建与区块链交互的逻辑文件,放在 src/contracts/index.ts 文件中。我们将实现两个主要功能:
- 查询状态:查询
ProfileCreated事件。 - 创建档案交易:提交一个交易来创建用户档案。
import { Transaction } from "@mysten/sui/transactions";
import { networkConfig, suiClient } from "../networkConfig";

// 查询状态
export const queryState = async () => {
    const state = await suiClient.queryEvents({
        query: {
            MoveEventType: `${networkConfig.testnet.packageID}::week_one_alt::ProfileCreated`
        }
    })
    return state;
}

// 创建档案交易
export const createProfileTx = async (name: string, description: string) => {
    const tx = new Transaction();
    tx.moveCall({
        package: networkConfig.testnet.packageID,
        module: "week_one_alt",
        function: "create_profile",
        arguments: [
            tx.pure.string(name),
            tx.pure.string(description),
            tx.object(networkConfig.testnet.state)
        ]
    });
    return tx;
};
第四步:创建前端界面
在 App.tsx 中,我们将设计一个表单界面,通过输入用户的 name 和 description 来创建一个档案。可以直接使用 Radix UI 库。
useState用来管理和暂存组件的状态数据useSignAndExecuteTransaction用于签名并执行交易handleCreateProfile创建交易对象调用合约中的createProfile
完整代码如下:
import { ConnectButton, useSignAndExecuteTransaction } from "@mysten/dapp-kit";
import { Box, Flex, Heading, Card, Text, TextArea, Button } from "@radix-ui/themes";
import { useState, useEffect } from "react";
import { createProfileTx, queryState } from "./contracts/index";

function App() {
  const [name, setName] = useState("");
  const [description, setDescription] = useState("");
  const { mutate: signAndExecute } = useSignAndExecuteTransaction();

  // 查询当前状态
  useEffect(() => {
    const fetchState = async () => {
      const state = await queryState();
      console.log(state);
    }
    fetchState();
  }, []);

  // 创建档案
  const handleCreateProfile = async () => {
    const tx = await createProfileTx(name, description);
    signAndExecute({ transaction: tx }, {
      onSuccess: () => { console.log("Success!"); },
      onError: (error) => { console.error("Error:", error); },
    });
  };

  return (
    <>
      <Flex position="sticky" px="4" py="2" justify="between">
        <Box><Heading>dApp</Heading></Box>
        <Box><ConnectButton /></Box>
      </Flex>

      <Flex justify="center" align="center" height="40%" style={{ marginTop: "5%" }}>
        <Box width="500px">
          <Card size="3">
            <Flex gap="6" justify="center" align="center" direction="column">
              <Text as="div" size="4" weight="bold">Create Profile</Text>
              <TextArea
                style={{ width: "400px" }}
                size="3"
                placeholder="Name"
                value={name}
                onChange={(e) => setName(e.target.value)}
              />
              <TextArea
                style={{ width: "400px" }}
                size="3"
                placeholder="Description"
                value={description}
                onChange={(e) => setDescription(e.target.value)}
              />
              <Button
                style={{ width: "400px" }}
                size="3"
                type="submit"
                onClick={handleCreateProfile}
              >
                Create
              </Button>
            </Flex>
          </Card>
        </Box>
      </Flex>
    </>
  );
}

export default App;
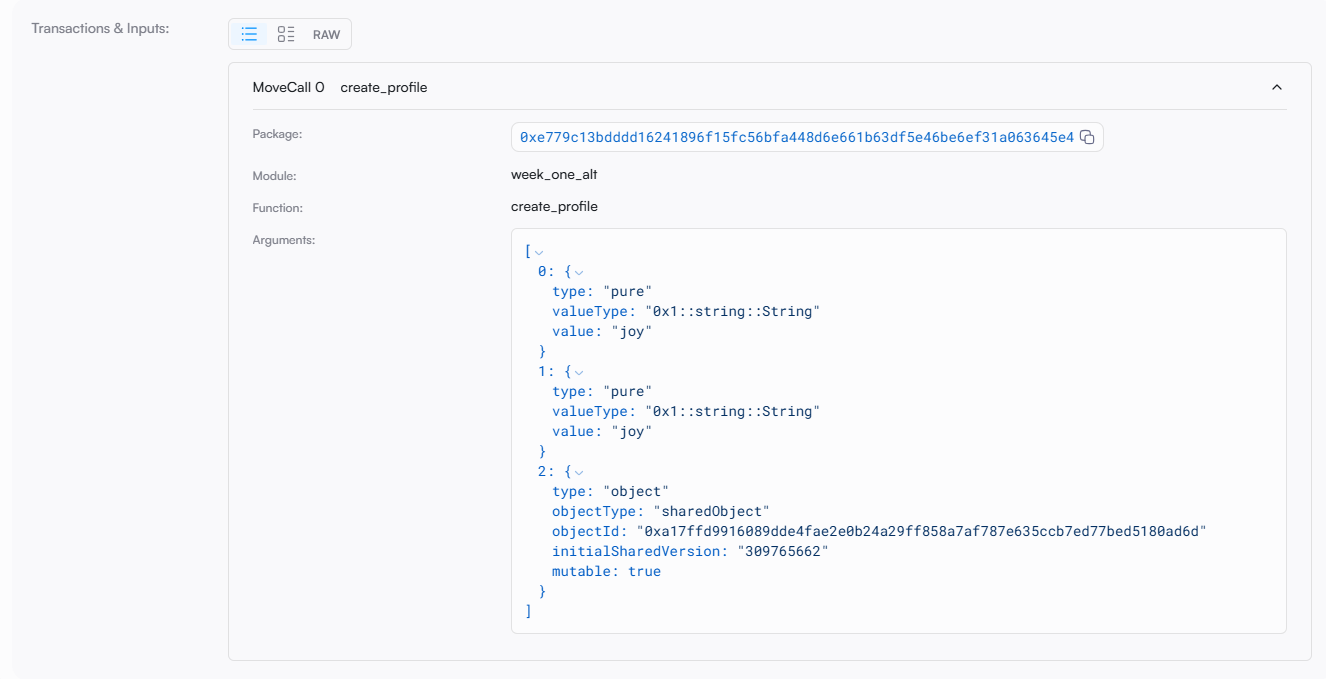
最后使用的效果在浏览器上进行查询:
总结
通过本教程,你已经学会了如何搭建一个简单的前端应用与 sui 区块链进行交互,并通过 Move 合约创建用户档案。你可以进一步扩展这个项目,添加更多的功能,如查询和修改档案等。
- 原创
- 学分: 25
- 分类: Sui
- 标签:


本文参与登链社区写作激励计划 ,好文好收益,欢迎正在阅读的你也加入。


