Graph开发和部署
- 小符
- 发布于 2023-12-22 14:25
- 阅读 5367
以开发一个friend.tech项目的子图为例子展示 subgraph 的开发和部署过程。
去中心化社交网络 friend.tech 建立在 Coinbase 的 L2 网络基础上,实现社交影响力的货币化;本节以开发一个 friend.tech 项目的子图为例子展示 subgraph 的开发和部署过程。
friend.tech智能合约
本节的关注点在graph的开发,了解 friend.tech 的项目的详细分析看这里。
合约信息:
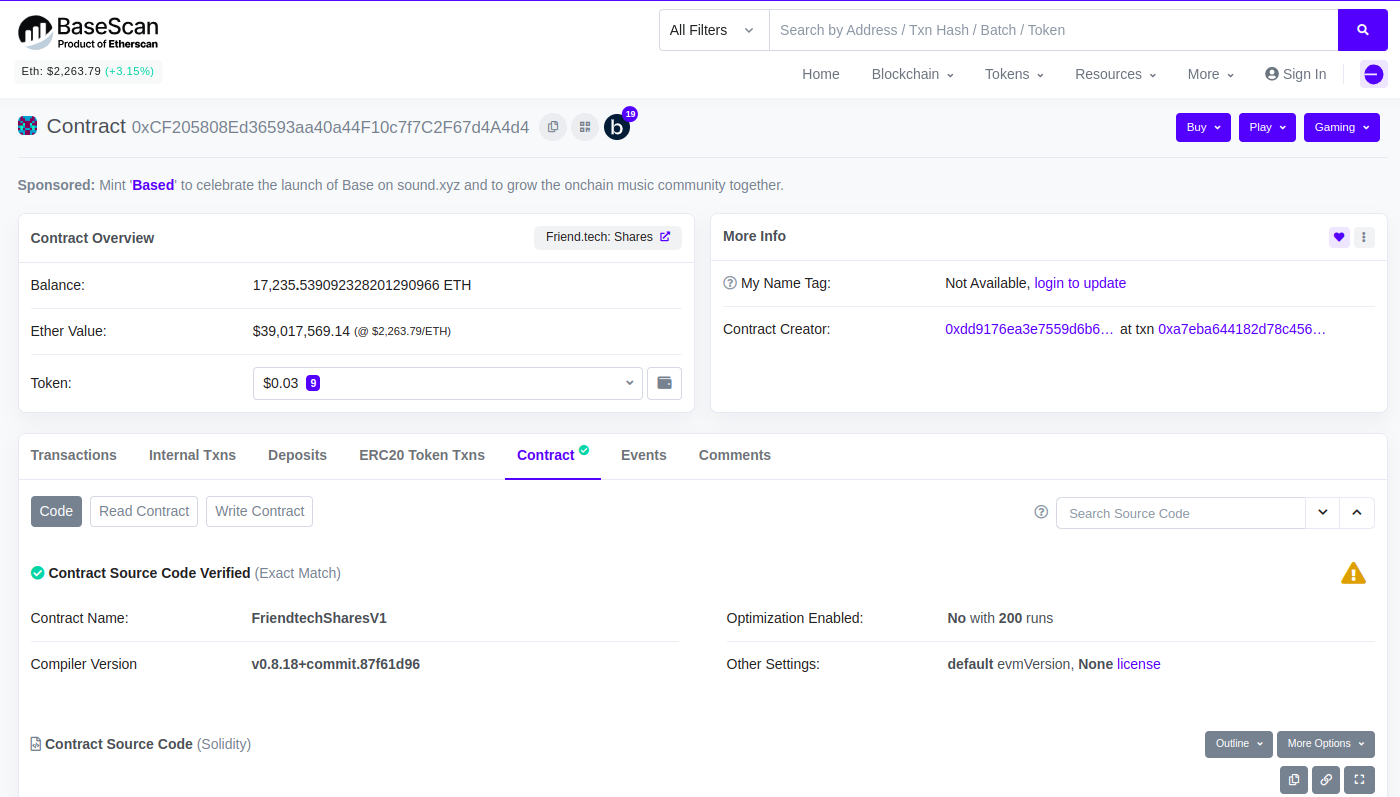 https://basescan.org/address/0xCF205808Ed36593aa40a44F10c7f7C2F67d4A4d4#code
\ 合约代码:
......
contract FriendtechSharesV1 is Ownable {

        ......
        event Trade(address trader, address subject, bool isBuy, uint256 shareAmount, uint256 ethAmount, uint256 protocolEthAmount, uint256 subjectEthAmount, uint256 supply);

        ......
    function buyShares(address sharesSubject, uint256 amount) public payable {
            uint256 supply = sharesSupply[sharesSubject];
            require(supply > 0 || sharesSubject == msg.sender, "Only the shares' subject can buy the first share");
            uint256 price = getPrice(supply, amount);
            uint256 protocolFee = price * protocolFeePercent / 1 ether;
            uint256 subjectFee = price * subjectFeePercent / 1 ether;
            require(msg.value >= price + protocolFee + subjectFee, "Insufficient payment");
            sharesBalance[sharesSubject][msg.sender] = sharesBalance[sharesSubject][msg.sender] + amount;
            sharesSupply[sharesSubject] = supply + amount;
            emit Trade(msg.sender, sharesSubject, true, amount, price, protocolFee, subjectFee, supply + amount);
            (bool success1, ) = protocolFeeDestination.call{value: protocolFee}("");
            (bool success2, ) = sharesSubject.call{value: subjectFee}("");
            require(success1 && success2, "Unable to send funds");
       }

       function sellShares(address sharesSubject, uint256 amount) public payable {
            uint256 supply = sharesSupply[sharesSubject];
            require(supply > amount, "Cannot sell the last share");
            uint256 price = getPrice(supply - amount, amount);
            uint256 protocolFee = price * protocolFeePercent / 1 ether;
            uint256 subjectFee = price * subjectFeePercent / 1 ether;
            require(sharesBalance[sharesSubject][msg.sender] >= amount, "Insufficient shares");
            sharesBalance[sharesSubject][msg.sender] = sharesBalance[sharesSubject][msg.sender] - amount;
            sharesSupply[sharesSubject] = supply - amount;
            emit Trade(msg.sender, sharesSubject, false, amount, price, protocolFee, subjectFee, supply - amount);
            (bool success1, ) = msg.sender.call{value: price - protocolFee - subjectFee}("");
            (bool success2, ) = protocolFeeDestination.call{value: protocolFee}("");
            (bool success3, ) = sharesSubject.call{value: subjectFee}("");
            require(success1 && success2 && success3, "Unable to send funds");
       }
}
friend.tech 项目的智能合约相对简单,主要有两个重要的函数 buyShares 和 sellShares; 用户的交易行为触发了 Trade 事件, Trade 事件函数的签名记录了交易相关的信息, 即需要索引的数据。
\ 创建合约的区块
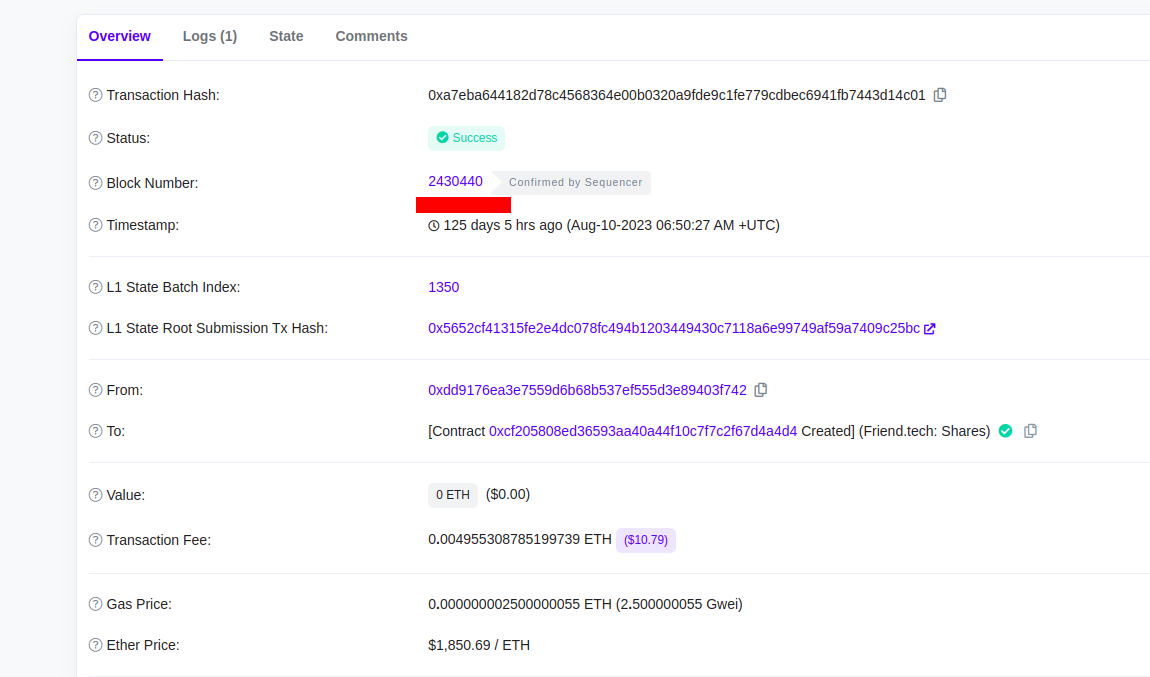 https://basescan.org/tx/0xa7eba644182d78c4568364e00b0320a9fde9c1fe779cdbec6941fb7443d14c01
安装依赖
yarn global add @graphprotocol/graph-cli
yarn global add @graphprotocol/graph-ts
初始化 subgraph 项目
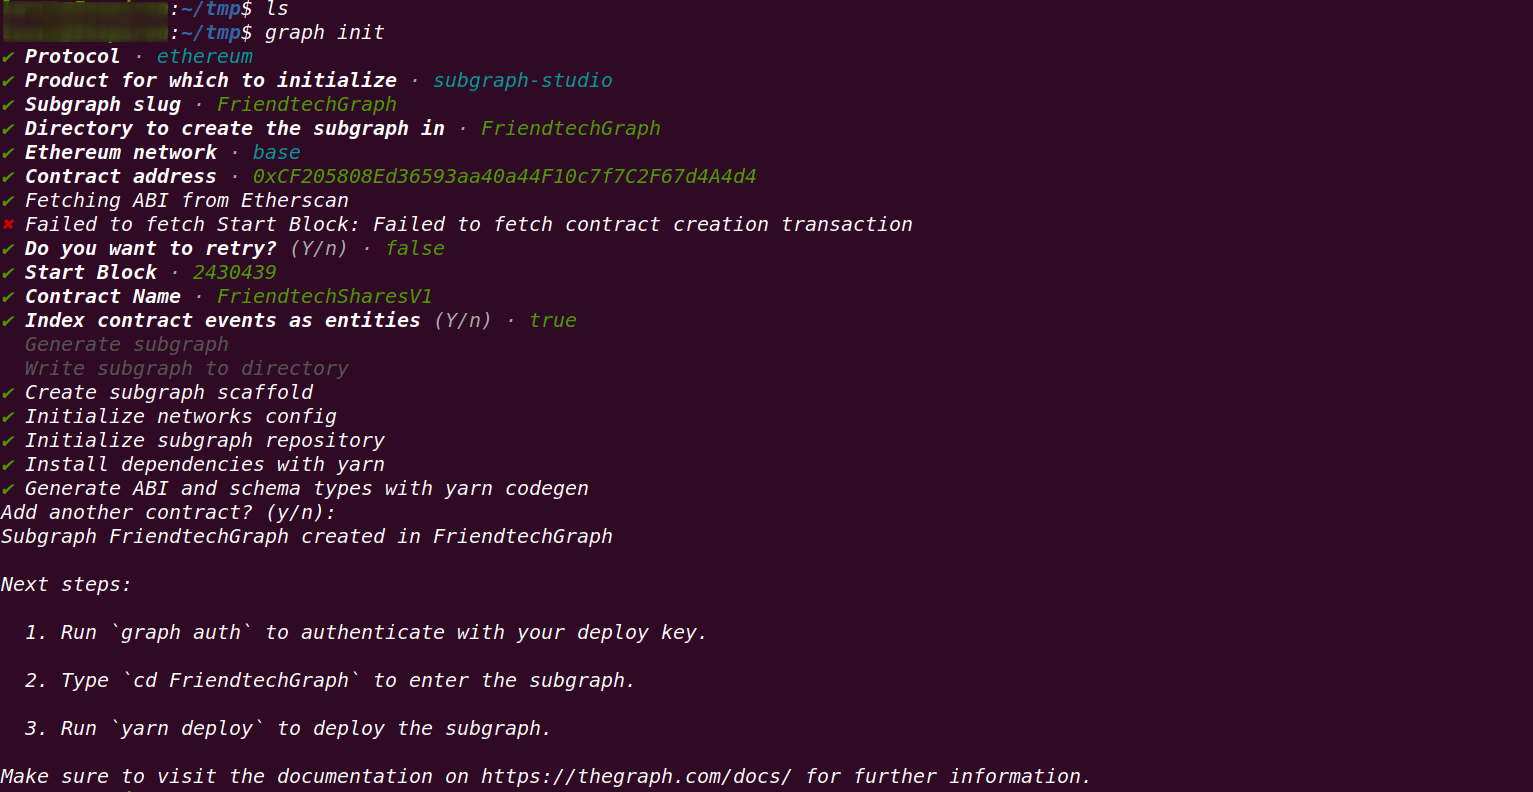
✔ Protocol · ethereum
✔ Product for which to initialize · subgraph-studio
✔ Subgraph slug · FriendtechGraph
✔ Directory to create the subgraph in · FriendtechGraph
✔ Ethereum network · base
✔ Contract address · 0xCF205808Ed36593aa40a44F10c7f7C2F67d4A4d4
✔ Fetching ABI from Etherscan
✖ Failed to fetch Start Block: Failed to fetch contract creation transaction
✔ Do you want to retry? (Y/n) · false
✔ Start Block · 2430439
✔ Contract Name · FriendtechSharesV1
✔ Index contract events as entities (Y/n) · true
  Generate subgraph
  Write subgraph to directory
✔ Create subgraph scaffold
✔ Initialize networks config
✔ Initialize subgraph repository
✔ Install dependencies with yarn
✔ Generate ABI and schema types with yarn codegen
Add another contract? (y/n):
Subgraph FriendtechGraph created in FriendtechGraph
第7步如果因为网络原因不能获取合约ABI文件,也可以使用本地文件。
\ 项目结构
cd FriendtechGraph
tree -L 1

├── abis
├── generated
├── networks.json
├── node_modules
├── package.json
├── schema.graphql
├── src
├── subgraph.yaml
├── tests
├── tsconfig.json
└── yarn.lock- schema.graphql:定义Graph实体,可以理解为web2中的模型。
- subgraph.yaml:子图清单,定义了子图索引的智能合约,这些合约中需要关注的事件,以及如何将事件数据映射到 Graph 节点存储并允许查询的实体。
- generated目录:生成的 AssemblyScript 类型,可以理解为模型的curd函数。
- src目录:业务逻辑代码。
schema.graphql
定义需要索引的数据实体,以及实体之间的关系;详细可参考: Graph模式
type OwnershipTransferred @entity(immutable: true) {
  id: Bytes!
  previousOwner: Bytes! # address
  newOwner: Bytes! # address
  blockNumber: BigInt!
  blockTimestamp: BigInt!
  transactionHash: Bytes!
}

type Trade @entity(immutable: true) {
  id: Bytes!
  trader: Bytes! # address
  subject: Bytes! # address
  isBuy: Boolean! # bool
  shareAmount: BigInt! # uint256
  ethAmount: BigInt! # uint256
  protocolEthAmount: BigInt! # uint256
  subjectEthAmount: BigInt! # uint256
  supply: BigInt! # uint256
  blockNumber: BigInt!
  blockTimestamp: BigInt!
  transactionHash: Bytes!
}
src/subgraph.yaml
从区块链事件中索引数据的具体逻辑, handleTrade 函数会在每次 Trade 事件触发时被调用,然后获取到链上数据存储到子图中。
import {
  OwnershipTransferred as OwnershipTransferredEvent,
  Trade as TradeEvent
} from "../generated/FriendtechSharesV1/FriendtechSharesV1"
import { OwnershipTransferred, Trade } from "../generated/schema"

export function handleOwnershipTransferred(
  event: OwnershipTransferredEvent
): void {
  let entity = new OwnershipTransferred(
    event.transaction.hash.concatI32(event.logIndex.toI32())
  )
  entity.previousOwner = event.params.previousOwner
  entity.newOwner = event.params.newOwner

  entity.blockNumber = event.block.number
  entity.blockTimestamp = event.block.timestamp
  entity.transactionHash = event.transaction.hash

  entity.save()
}

export function handleTrade(event: TradeEvent): void {
  let entity = new Trade(
    event.transaction.hash.concatI32(event.logIndex.toI32())
  )
  entity.trader = event.params.trader
  entity.subject = event.params.subject
  entity.isBuy = event.params.isBuy
  entity.shareAmount = event.params.shareAmount
  entity.ethAmount = event.params.ethAmount
  entity.protocolEthAmount = event.params.protocolEthAmount
  entity.subjectEthAmount = event.params.subjectEthAmount
  entity.supply = event.params.supply

  entity.blockNumber = event.block.number
  entity.blockTimestamp = event.block.timestamp
  entity.transactionHash = event.transaction.hash

  entity.save()
}
代码生成
每次修改完subgraph.yaml 和scheme.graphql 文件后都要执行 yarn codegen,用来生成 generated 目录中对应的 AssemblyScript 文件。
xxx@Inspiron:~/tmp/FriendtechGraph$ yarn codegen
yarn run v1.22.5
$ graph codegen
  Skip migration: Bump mapping apiVersion from 0.0.1 to 0.0.2
  Skip migration: Bump mapping apiVersion from 0.0.2 to 0.0.3
  Skip migration: Bump mapping apiVersion from 0.0.3 to 0.0.4
  Skip migration: Bump mapping apiVersion from 0.0.4 to 0.0.5
  Skip migration: Bump mapping apiVersion from 0.0.5 to 0.0.6
  Skip migration: Bump manifest specVersion from 0.0.1 to 0.0.2
  Skip migration: Bump manifest specVersion from 0.0.2 to 0.0.4
✔ Apply migrations
✔ Load subgraph from subgraph.yaml
  Load contract ABI from abis/FriendtechSharesV1.json
✔ Load contract ABIs
  Generate types for contract ABI: FriendtechSharesV1 (abis/FriendtechSharesV1.json)
  Write types to generated/FriendtechSharesV1/FriendtechSharesV1.ts
✔ Generate types for contract ABIs
✔ Generate types for data source templates
✔ Load data source template ABIs
✔ Generate types for data source template ABIs
✔ Load GraphQL schema from schema.graphql
  Write types to generated/schema.ts
✔ Generate types for GraphQL schema

Types generated successfully
编译
将 subgraph 编译为 WebAssembly 等待部署。
xxx@Inspiron:~/tmp/FriendtechGraph$ yarn build
yarn run v1.22.5
$ graph build
  Skip migration: Bump mapping apiVersion from 0.0.1 to 0.0.2
  Skip migration: Bump mapping apiVersion from 0.0.2 to 0.0.3
  Skip migration: Bump mapping apiVersion from 0.0.3 to 0.0.4
  Skip migration: Bump mapping apiVersion from 0.0.4 to 0.0.5
  Skip migration: Bump mapping apiVersion from 0.0.5 to 0.0.6
  Skip migration: Bump manifest specVersion from 0.0.1 to 0.0.2
  Skip migration: Bump manifest specVersion from 0.0.2 to 0.0.4
✔ Apply migrations
✔ Load subgraph from subgraph.yaml
  Compile data source: FriendtechSharesV1 => build/FriendtechSharesV1/FriendtechSharesV1.wasm
✔ Compile subgraph
  Copy schema file build/schema.graphql
  Write subgraph file build/FriendtechSharesV1/abis/FriendtechSharesV1.json
  Write subgraph manifest build/subgraph.yaml
✔ Write compiled subgraph to build/

Build completed: build/subgraph.yaml
部署
可以把 subgraph 部署到本地,也可以使用托管服务,这里演示使用 graph 官网提供的托管服务——子图工作室 。
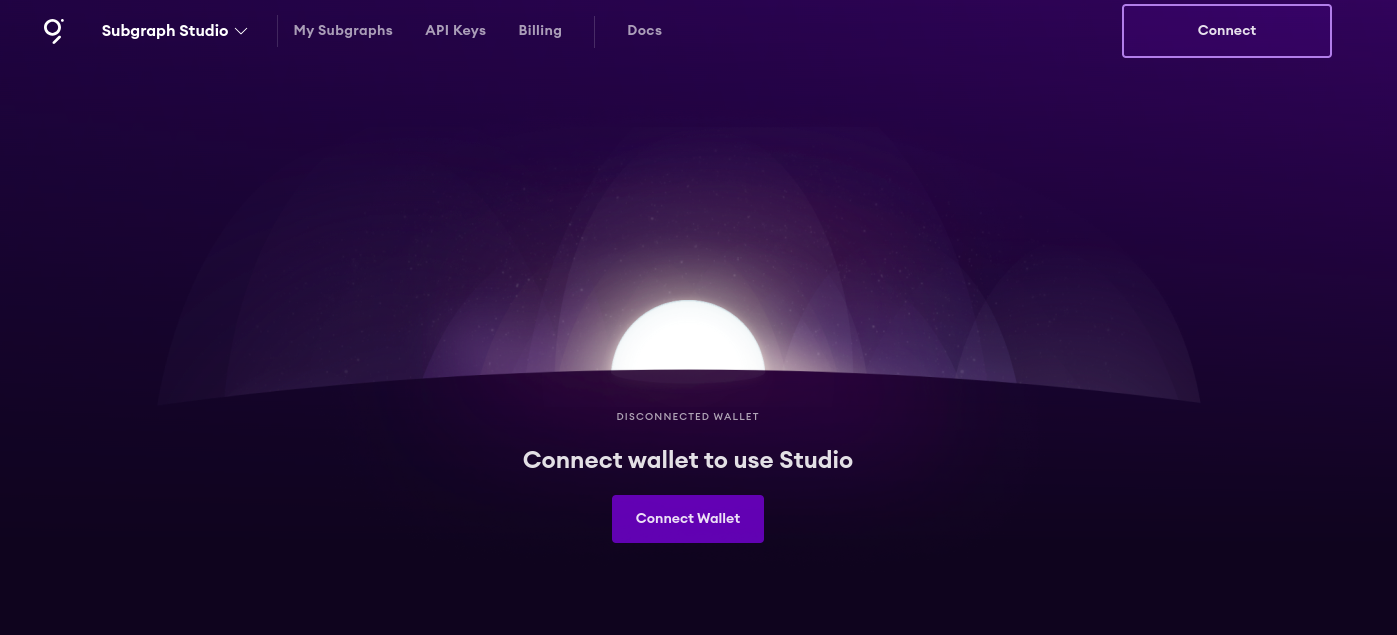
\ 连接钱包并签名后,就可以创建子图项目了。
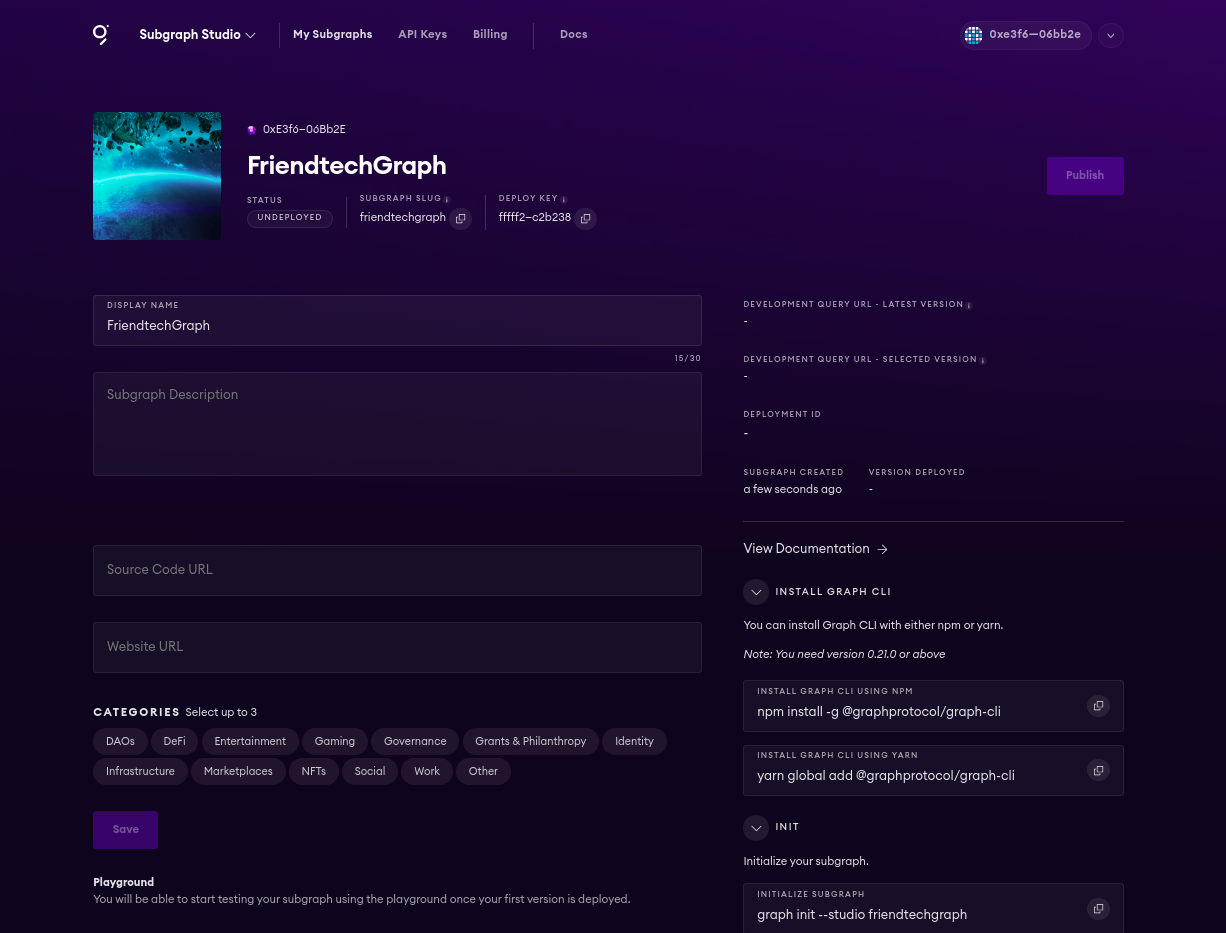
\ 右边可以看到相关的操作命令:
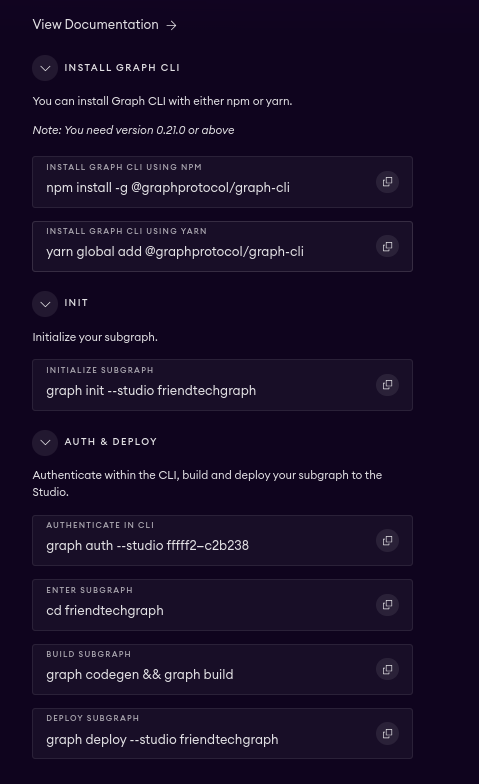
\ 使用 AUTH & DEPLOY 栏的示例命令进行部署,因为已经编译过,下面跳过编译命令:
xxx@Inspiron:~/tmp/FriendtechGraph$ graph auth --studio fffff2e2e969c873d1daf88c27c2b238
Deploy key set for https://api.studio.thegraph.com/deploy/
xxx@Inspiron:~/tmp/FriendtechGraph$ graph deploy --studio friendtechgraph
Which version label to use? (e.g. "v0.0.1"): v0.0.1
Skip migration: Bump mapping apiVersion from 0.0.1 to 0.0.2
Skip migration: Bump mapping apiVersion from 0.0.2 to 0.0.3
Skip migration: Bump mapping apiVersion from 0.0.3 to 0.0.4
Skip migration: Bump mapping apiVersion from 0.0.4 to 0.0.5
Skip migration: Bump mapping apiVersion from 0.0.5 to 0.0.6
Skip migration: Bump manifest specVersion from 0.0.1 to 0.0.2
Skip migration: Bump manifest specVersion from 0.0.2 to 0.0.4
✔ Apply migrations
✔ Load subgraph from subgraph.yaml
Compile data source: FriendtechSharesV1 => build/FriendtechSharesV1/FriendtechSharesV1.wasm
✔ Compile subgraph
Copy schema file build/schema.graphql
Write subgraph file build/FriendtechSharesV1/abis/FriendtechSharesV1.json
Write subgraph manifest build/subgraph.yaml
✔ Write compiled subgraph to build/
Add file to IPFS build/schema.graphql
.. QmU2ns3ySUcCQ7ZRcY4qUDnaToSwx1nxGuagFHBJWg9UFZ
Add file to IPFS build/FriendtechSharesV1/abis/FriendtechSharesV1.json
.. QmfA1DYEazwF9cx6rJy1hTj5ToVTz1GySGeaETJ25S7hJR
Add file to IPFS build/FriendtechSharesV1/FriendtechSharesV1.wasm
.. QmU3PEhQaZ2PqZiEfreGvSSSXAMhgVpbygbJbL8uTy9FLy
✔ Upload subgraph to IPFS
Build completed: QmW1eEAf6aeS11kjGgZFfA9Y1E1t3gNFmHYuvX1sZvbcbk
Deployed to https://thegraph.com/studio/subgraph/friendtechgraph
Subgraph endpoints:
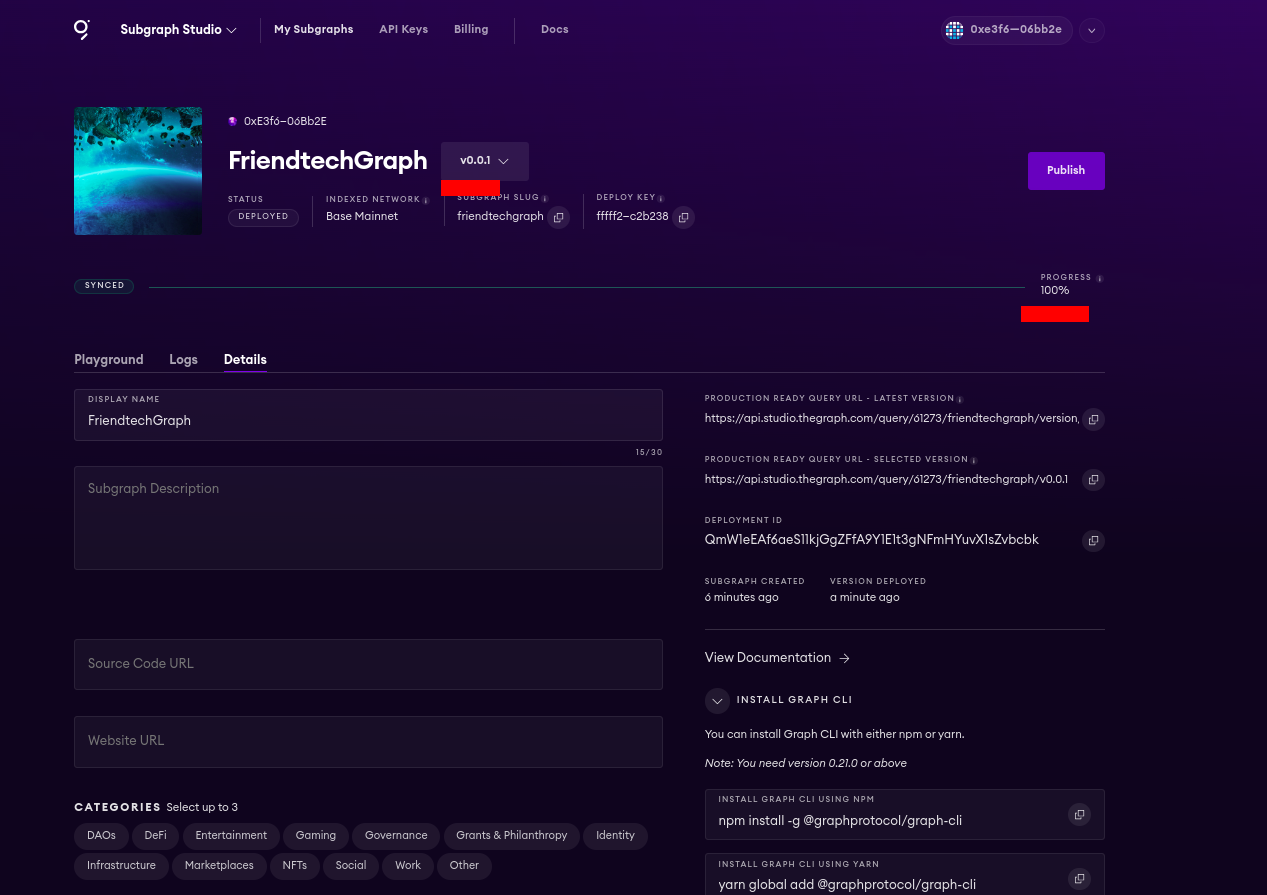
Queries (HTTP): https://api.studio.thegraph.com/query/61273/friendtechgraph/v0.0.1\ 可以在子图工作室看到已经完成了部署,且数据已经完成了同步。
查询数据
可以使用提供的 QUERY URL 在 GraphiQL 中查询数据:
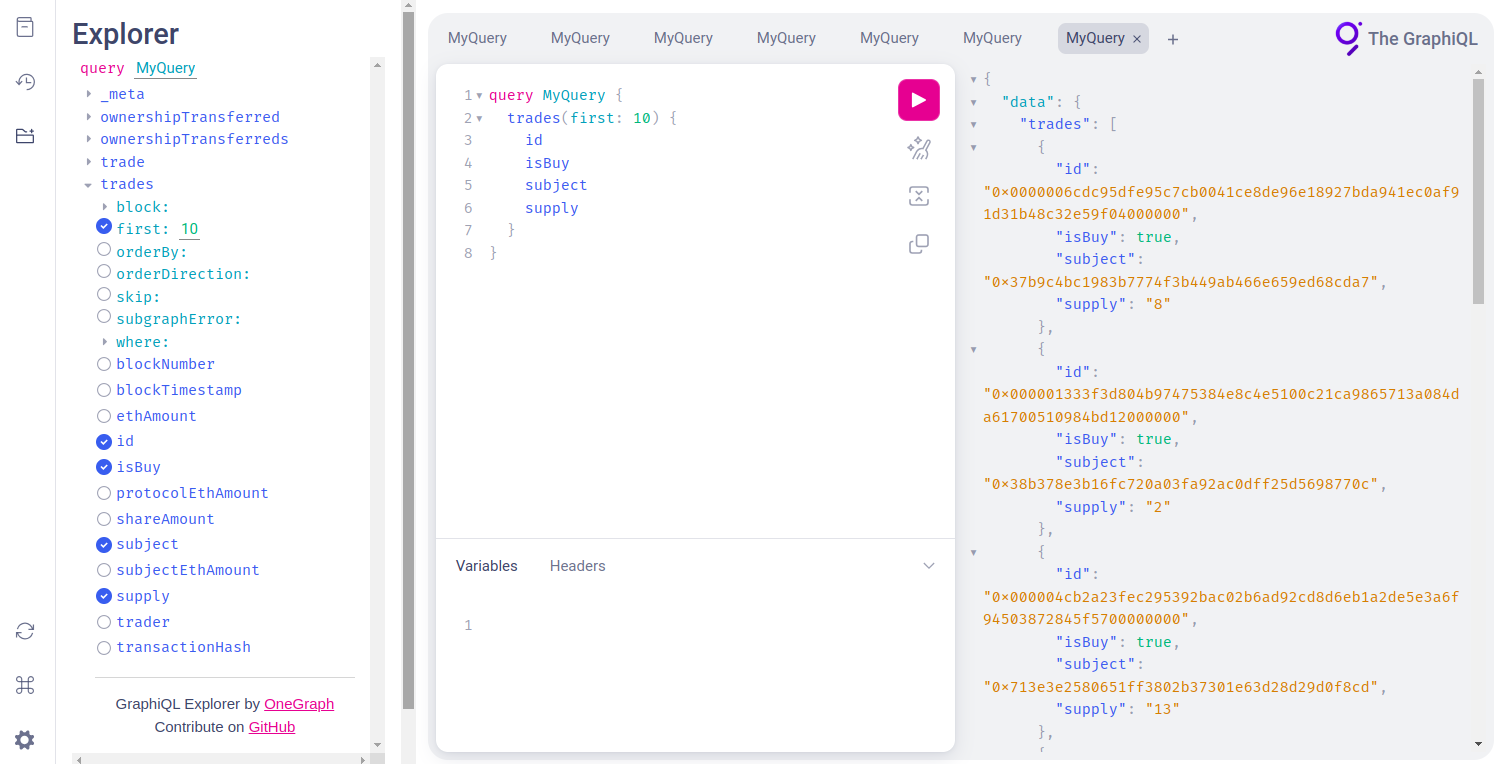
\ 部署完后可以进行测试,如果想在将子图发布到网络之前对其进行测试,也可以在 Subgraph Playground 中执行此操作或查看日志。
- 原创
- 学分: 110
- 分类: TheGraph
- 标签: graph friend.tech Web3