Let's Move - 学 Move 得 Sui(二):完成 Coin 合约的上链部署
- Alva
- 发布于 2024-03-26 22:39
- 阅读 4220
letsmove 是一个激励计划,鼓励人们学习 Move 语言。 任务包括完成两个 Coin 合约的上链部署,学习 Coin 相关知识,完成 My Coin 和 Faucet Coin 的学习并部署主网 测试代码模拟了多重交易场景来进行铸造和销毁操作。
Let's Move 一项学Move获得SUI的激励计划,鼓励更多的人学习Move语言
学习日志 (alva-lin)
本文首发于 xLOG,如需转载,请联系作者
Task 2 - 完成两个 Coin 合约的上链部署(mainnet)
任务
完成 Coin相关知识的学习
完成
My Coin的学习并部署主网完成
Faucet Coin的学习并部署主网提交
My Coin和Faucet Coin合约发布package id发送
My Coin给地址0x7b8e0864967427679b4e129f79dc332a885c6087ec9e187b53451a9006ee15f2
主要参照 Managed Coin 案例 - Sui Move 导论 一文
sui::coin 库
Coin
Coin 合约的编写,主要使用了 sui::coin 库中提供的结构体和方法。
struct Coin<phantom T> has key, store {
    id: UID,
    balance: Balance<T>
}

struct Balance<phantom T> has store {
    value: u64
}
Coin 拥有 key 和 store 能力,被视为资产,可以在不同地址间转移,后续在区块浏览器中可以查阅到自己拥有的所有 Coin。
create_currency
public fun create_currency<T: drop>(
    witness: T,
    decimals: u8,
    symbol: vector<u8>,
    name: vector<u8>,
    description: vector<u8>,
    icon_url: Option<Url>,
    ctx: &mut TxContext
): (TreasuryCap<T>, CoinMetadata<T>) {
    // Make sure there's only one instance of the type T
    assert!(sui::types::is_one_time_witness(&witness), EBadWitness);

    // Emit Currency metadata as an event.
    event::emit(CurrencyCreated<T> {
        decimals
    });

    (
        TreasuryCap {
            id: object::new(ctx),
            total_supply: balance::create_supply(witness)
        },
        CoinMetadata {
            id: object::new(ctx),
            decimals,
            name: string::utf8(name),
            symbol: ascii::string(symbol),
            description: string::utf8(description),
            icon_url
        }
    )
}
create_currency 方法参数中
| 参数 | 描述 |
|---|---|
| decimals | 精度,被分割的最小单位。 10^(-1*n) |
| symbol | 符号 |
| name | 名称 |
| description | 描述 |
| icon_url | 图片 |
方法的返回值是一个元组,包含两个值,TreasuryCap 和 CoinMetadata,
其中 TreasuryCap 是一种资产,通过一次性见证模式保证是一个单体对象,其类型声明如下
/// Capability allowing the bearer to mint and burn
/// coins of type `T`. Transferable
struct TreasuryCap<phantom T> has key, store {
        id: UID,
        total_supply: Supply<T>
}
/// A Supply of T. Used for minting and burning.
/// Wrapped into a `TreasuryCap` in the `Coin` module.
struct Supply<phantom T> has store {
    value: u64
}
这个 total_supply 值跟踪了当前货币 T 的发行总量,所以 TreasuryCap 只需要一个即可。而 CoinMetadata 可以简单看出,其保存了当前货币的元数据。
coin 合约代码
得益于 sui 框架库的完善,想要创建一个拥有 mint (铸造) 和 burn (销毁) 功能的代币合约,所需代码很少。
// file: my_coin.move
module new_coin::my_coin {
    use std::option;
    use sui::coin::{Self, Coin, TreasuryCap};
    use sui::transfer;
    use sui::tx_context::{Self, TxContext};

    struct MY_COIN has drop {}

    fun init(witness: MY_COIN, ctx: &mut TxContext) {
        let (treasury_cap, metadata) = coin::create_currency<MY_COIN>(
            witness,
            2,
            b"MY_COIN",
            b"MC",
            b"learning for letsmove, power by alva-lin",
            option::none(),
            ctx
        );

        transfer::public_freeze_object(metadata);
        transfer::public_transfer(treasury_cap, tx_context::sender(ctx));
    }

    public fun mint(
        treasury_cap: &mut TreasuryCap<MY_COIN>,
        amount: u64,
        recipient: address,
        ctx: &mut TxContext
    ) {
        coin::mint_and_transfer(treasury_cap, amount, recipient, ctx);
    }

    public fun burn(treasury_cap: &mut TreasuryCap<MY_COIN>, coin: Coin<MY_COIN>) {
        coin::burn(treasury_cap, coin);
    }

    #[test_only]
    public fun test_init(ctx: &mut TxContext) {
        init(MY_COIN {}, ctx);
    }
}
my_coin 模块先根据 Witness 模式 定义了名为 MY_COIN 的结构体。随后在 init 方法参数中,添加一个 MY_COIN 类型的 witness 资源,由模块推送后自动创建。
在 init 方法中,调用了 coin::create_currency 方法,获取 TreasuryCap 和 CoinMetadata 资源,并立即将 CoinMetadata 冻结。
而 TreasuryCap 作为控制调用 mint 方法和 burn 方法的凭证,被发送到了发布者的地址上。
测试
测试代码如下,模拟了一个多重交易时间,来进行 mint 操作和 burn 操作
#[test_only]
module new_coin::my_coin_tests {
    use new_coin::my_coin::{Self, MY_COIN};
    use sui::coin::{Coin, TreasuryCap};
    use sui::test_scenario::{Self, next_tx, ctx};

    #[test]
    fun mint_burn() {
        // Initialize a mock sender address
        let addr1 = @0xA;

        // Begins a multi transaction scenario with addr1 as the sender
        let scenario = test_scenario::begin(addr1);

        // Run the coin module init function
        {
            my_coin::test_init(ctx(&mut scenario))
        };

        // Mint a `Coin<MY_COIN>` object
        next_tx(&mut scenario, addr1);
        {
            let treasurycap = test_scenario::take_from_sender<TreasuryCap<MY_COIN>>(&scenario);
            my_coin::mint(&mut treasurycap, 100, addr1, test_scenario::ctx(&mut scenario));
            test_scenario::return_to_address<TreasuryCap<MY_COIN>>(addr1, treasurycap);
        };

        // Burn a `Coin<MY_COIN>` object
        next_tx(&mut scenario, addr1);
        {
            let coin = test_scenario::take_from_sender<Coin<MY_COIN>>(&scenario);
            let treasurycap = test_scenario::take_from_sender<TreasuryCap<MY_COIN>>(&scenario);
            my_coin::burn(&mut treasurycap, coin);
            test_scenario::return_to_address<TreasuryCap<MY_COIN>>(addr1, treasurycap);
        };

        // Cleans up the scenario object
        test_scenario::end(scenario);
    }
}
发布
先切换网络到所需的环境
sui client switch --env mainnet在项目文件夹下,执行以下命令,来发布包或单独发布模块
# publish package
sui client publish --gas-budget 30000

# 或者按需发布模块
# publish module
# sui client publish sources/my_coin.move --gas-budget 30000
发布后的输出结果中,包含了
-
Package: 位于
Object Changes > Published Objects块中 -
CoinMetadata: 位于
Object Changes > Created Objects块中其 ObjectType 为
0x2::coin::CoinMetadata<<Package ID>::<Module>::<Witness Type>> -
TreasuryCap: 位于
Object Changes > Created Objects其 ObjectType 为
0x2::coin::TreasuryCap<<Package ID>::<Module>::<Witness Type>>
将 Package ID 和 TreasuryCap ID 记录:
export PACKAGE_ID=0xf9623587d620d26024868578a3539642993e2da44598c3fcaa1f384f5327f6a5
export TREASURYCAP_ID=0x97233be4acd1688c93f2c60ce81350b993a810c6b4851e8cdf214402759fad88
铸造和销毁
使用 sui cli 来调用模块相应的模块函数即可。
需要注意,想要的代币数量 = 传入值 * 10^(-1*n),其中 n 为前面发布的合约代码中,decimals 的值
在本文中,decimals 的值为 2。如果想要铸造 100 枚代币,则需要传值 10000
# 转入的钱包地址
export RECIPIENT_ADDRESS=<YOUR_WALLET_ADDRESS>
# mint
sui client call --gas-budget 3000 --package $PACKAGE_ID --module my_coin --function mint --args $TREASURYCAP_ID \"10000\" $RECIPIENT_ADDRESS
在输出内容中,可以看到交易详情。
又或者是拿到交易 hash,可以去 SuiScan 或其他 sui 区块浏览器上查看交易详情。
# 交易 hash 的字样类似以下形式,一般在输出内容的最前面
Transaction Digest: <hash>
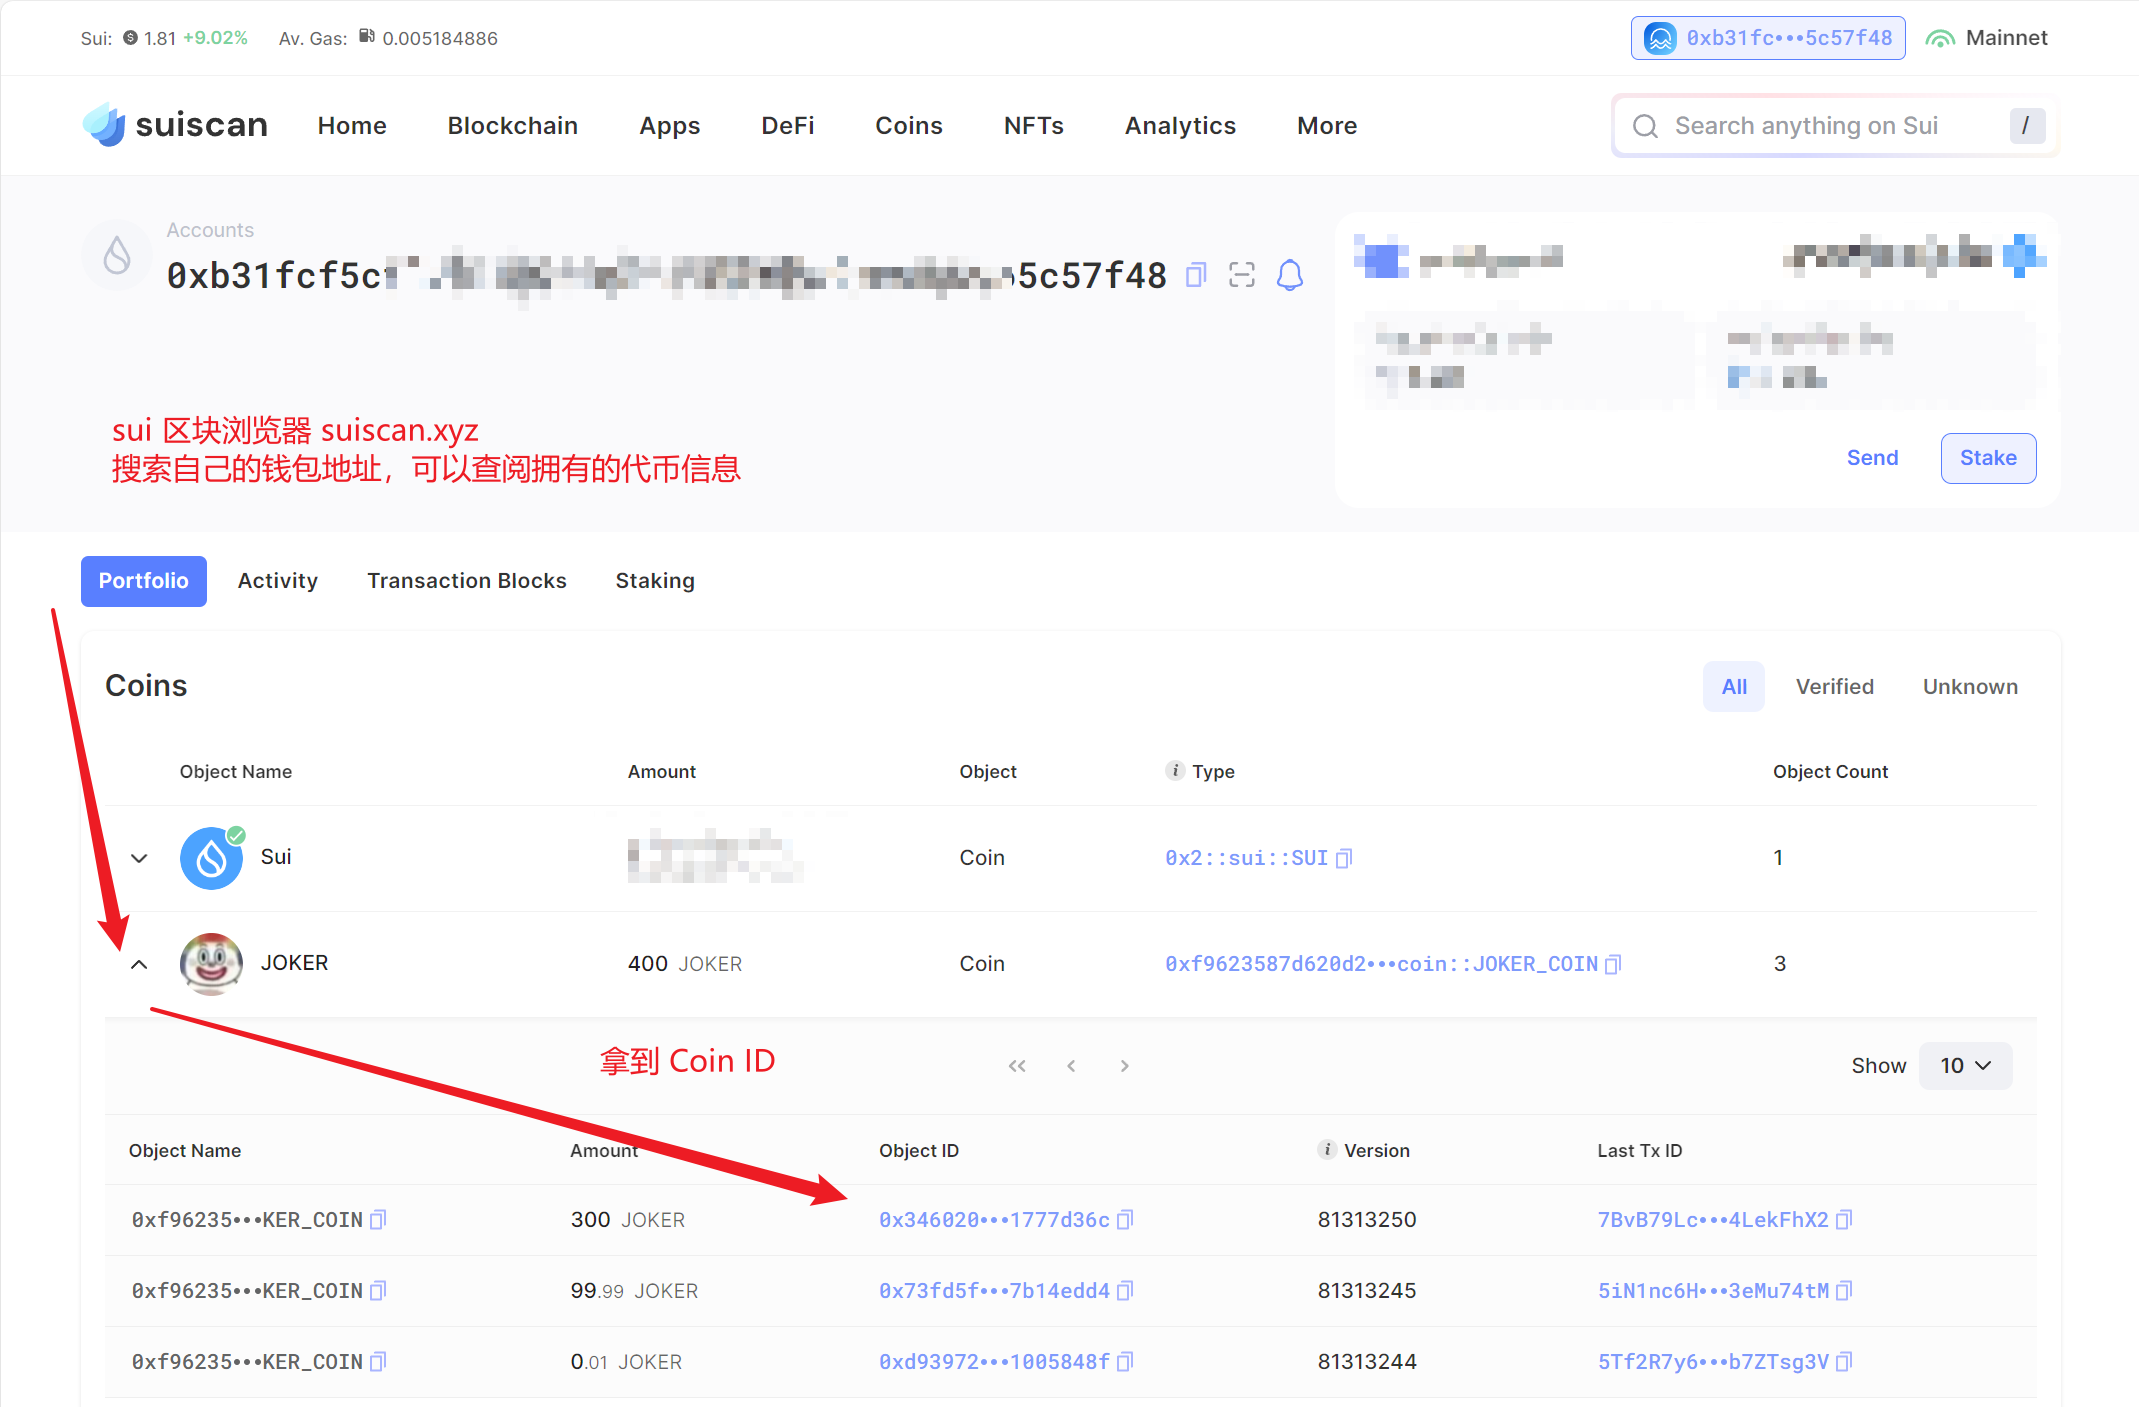
在铸造时的输出内容中,找到 Object Changes > Created Objects 块中,ObjectType 类型为 0x2::coin::Coin<<package>, <module>, <type>> 的对象,获取 ObjectID
这个 ObjectID 即为 CoinID,将其存为变量
如果找不到命令行输出的 coin id,也可以从区块浏览器中找到。

export COIN_ID=0x3460204ae7f9385df79dc963a17d8b11eb0fa7a699f7196fac80405e1777d36c调用 burn 方法,销毁货币
# 注意 gas 预算需要提高
# burn
sui client call --gas-budget 7500000 --package $PACKAGE_ID --module joker --function burn --args $TREASURYCAP_ID $COIN_ID
命令执行成功后,可以从钱包中看到,之前铸造的这笔金额被删除了
代币销毁后,不能使用 COIN ID 直接在区块浏览器中搜索到,只能从历史交易中间接找到其记录
- Sui Move安全研讨会总结与材料 316 浏览
- Move语言安全吗?Typus权限验证漏洞 2883 浏览
- EVM和SVM开发者的Sui Move指南:第一部分 - 心理模型 943 浏览
- go语言入门move ctf 2754 浏览
- Move智能合约初体验 - 第1部分 2586 浏览
- 随笔小记—Move篇(1) 2073 浏览
- 探索 Web3 新星:Sui 的 Object 架构与 Move 语言实践 2329 浏览
- Web3 实践:Sui 区块链交易全流程解析与实战指南 4253 浏览
- 六、Move Patterns 2951 浏览
- Web3 新玩法:用 Sui Move 打造 NFT 抽奖游戏 3307 浏览
- Web3新玩法:Sui区块链NFT创建与部署实战 2706 浏览
- 有关于kiosk的学习笔记(sui move) 2388 浏览

