Aptos
Aptos Move 开发入门:从环境搭建到合约部署全流程实录
- 寻月隐君
- 发布于 2025-08-20 19:51
- 阅读 1550
AptosMove开发入门:从环境搭建到合约部署全流程实录随着Aptos生态的蓬勃发展,Move语言作为其核心技术栈,以其出色的安全性和表现力吸引了越来越多的开发者。然而,对于初学者而言,从零开始搭建环境、编写并成功部署第一个智能合约,往往会遇到教程中未曾提及的细节问题。本文并非一篇理
Aptos Move 开发入门:从环境搭建到合约部署全流程实录
随着 Aptos 生态的蓬勃发展,Move 语言作为其核心技术栈,以其出色的安全性和表现力吸引了越来越多的开发者。然而,对于初学者而言,从零开始搭建环境、编写并成功部署第一个智能合约,往往会遇到教程中未曾提及的细节问题。
本文并非一篇理论文章,而是一份真实、完整、未经剪辑的“第一人称”实操记录。我们将跟随一个开发者的脚步,从安装 Aptos CLI 开始,一步步创建项目、编写代码、编译测试,直到最终将合约部署到测试网上。更重要的是,本文完整记录了部署过程中遇到的经典错误——“余额不足”,并详细展示了如何诊断问题、寻找解决方案(使用水龙头),最终扫清障碍。``
如果你正准备踏上 Aptos Move 的学习之旅,那么这篇充满“实战感”的笔记,希望能成为你手中最实用的地图。
环境安装实操
安装 Aptos CLI
brew update
brew install aptos
验证安装
aptos --version
aptos 7.7.0
升级 CLI
brew update
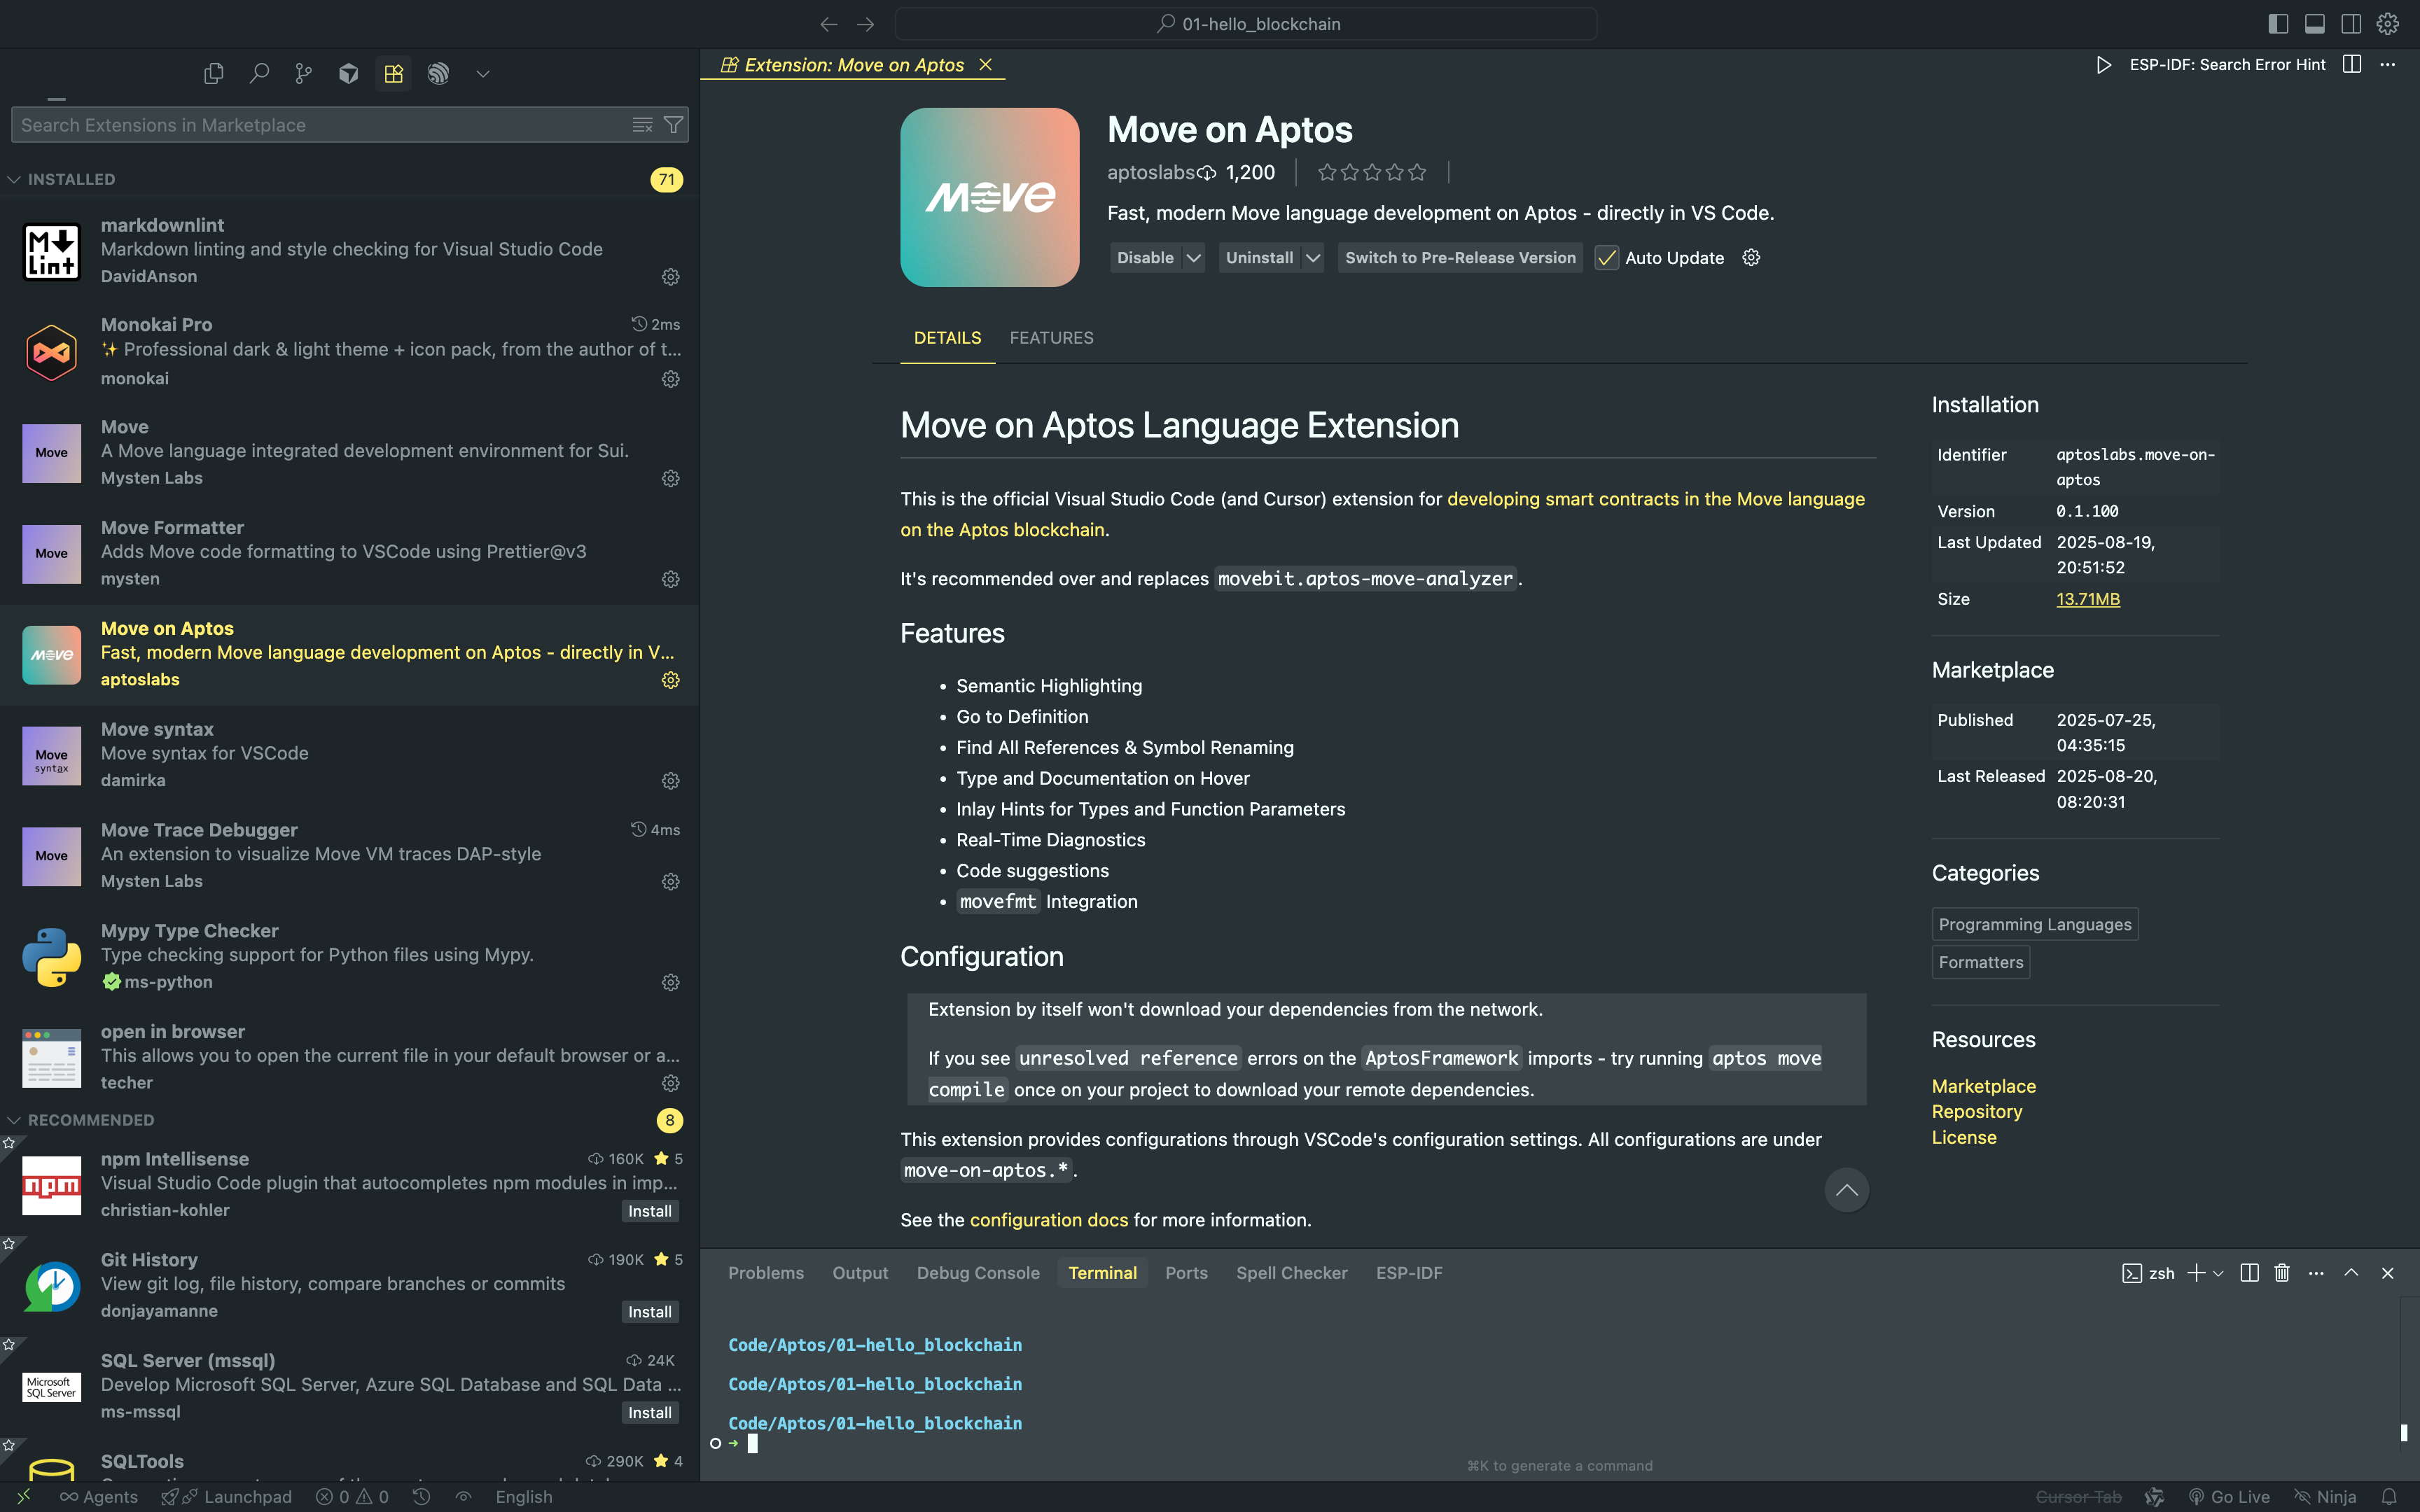
brew upgrade aptos安装插件Move on Aptos
https://marketplace.visualstudio.com/items?itemName=AptosLabs.move-on-aptos

编写第一个 Aptos Move 程序
创建项目并进入项目目录
mcd 01-hello_blockchain # mkdir 01-hello_blockchain && cd 01-hello_blockchain
/Users/qiaopengjun/Code/Aptos/01-hello_blockchain
初始化项目
初始化Aptos配置,生成账户密钥
aptos init: aptos Tool to initialize current directory for the aptos tool
Code/Aptos/01-hello_blockchain
➜ aptos init
Configuring for profile default
Choose network from [devnet, testnet, mainnet, local, custom | defaults to devnet]
testnet
Enter your private key as a hex literal (0x...) [Current: None | No input: Generate new key (or keep one if present)]

No key given, generating key...

---
Aptos CLI is now set up for account 0x1ff96e1010f6118a00bea0deb0139cdde087809e944638e12cbf70ce25a948fd as profile default!
---

The account has not been funded on chain yet. To fund the account and get APT on testnet you must visit https://aptos.dev/network/faucet?address=0x1ff96e1010f6118a00bea0deb0139cdde087809e944638e12cbf70ce25a948fd
Press [Enter] to go there now >
{
  "Result": "Success"
}
创建一个新的 Move package
aptos move init: Creates a new Move package at the given location
查看帮助信息
aptos move init -h
Creates a new Move package at the given location

Usage: aptos move init [OPTIONS] --name <NAME>

Options:
      --name <NAME>                                Name of the new Move package
      --package-dir <PACKAGE_DIR>                  Directory to create the new Move package
      --named-addresses <NAMED_ADDRESSES>          Named addresses for the move binary [default: ]
      --template <TEMPLATE>                        Template name for initialization [possible values: hello-blockchain]
      --assume-yes                                 Assume yes for all yes/no prompts
      --assume-no                                  Assume no for all yes/no prompts
      --framework-git-rev <FRAMEWORK_GIT_REV>      Git revision or branch for the Aptos framework
      --framework-local-dir <FRAMEWORK_LOCAL_DIR>  Local framework directory for the Aptos framework
      --skip-fetch-latest-git-deps                 Skip pulling the latest git dependencies
  -h, --help                                       Print help (see more with '--help')
  -V, --version                                    Print version
实操
Code/Aptos/01-hello_blockchain took 3m 8.1s
➜ aptos move init --name hello-blockchain --template hello-blockchain
{
  "Result": "Success"
}
查看项目目录结构
Code/Aptos/01-hello_blockchain
➜ tree . -L 6 -I "docs|target"
.
├── Move.toml
├── scripts
├── sources
│   └── hello_blockchain.move
└── tests

4 directories, 2 files
hello_blockchain.move 文件
module hello_blockchain::message {
    use std::error;
    use std::signer;
    use std::string;
    use aptos_framework::event;
    #[test_only]
    use std::debug;

    //:!:>resource
    struct MessageHolder has key {
        message: string::String,
    }
    //<:!:resource

    #[event]
    struct MessageChange has drop, store {
        account: address,
        from_message: string::String,
        to_message: string::String,
    }

    /// There is no message present
    const ENO_MESSAGE: u64 = 0;

    #[view]
    public fun get_message(addr: address): string::String acquires MessageHolder {
        assert!(exists<MessageHolder>(addr), error::not_found(ENO_MESSAGE));
        borrow_global<MessageHolder>(addr).message
    }

    public entry fun set_message(account: signer, message: string::String)
    acquires MessageHolder {
        let account_addr = signer::address_of(&account);
        if (!exists<MessageHolder>(account_addr)) {
            move_to(&account, MessageHolder {
                message,
            })
        } else {
            let old_message_holder = borrow_global_mut<MessageHolder>(account_addr);
            let from_message = old_message_holder.message;
            event::emit(MessageChange {
                account: account_addr,
                from_message,
                to_message: copy message,
            });
            old_message_holder.message = message;
        }
    }

    #[test(account = @0x1)]
    public entry fun sender_can_set_message(account: signer) acquires MessageHolder {
        let msg: string::String = string::utf8(b"Running test for sender_can_set_message...");
        debug::print(&msg);

        let addr = signer::address_of(&account);
        aptos_framework::account::create_account_for_test(addr);
        set_message(account, string::utf8(b"Hello, Blockchain"));

        assert!(
            get_message(addr) == string::utf8(b"Hello, Blockchain"),
            ENO_MESSAGE
        );
    }
}
这是一个简单的 Aptos Move 智能合约,它允许任何用户在区块链上为自己的账户存储一条个人专属的字符串消息。合约提供了两个主要功能:一个需要本人签名才能设置或更新这条消息的入口函数,以及一个任何人都可以调用的只读函数来查看任意地址存储的消息。每次消息被更新时,合约还会广播一个“事件”,方便链下应用追踪这些变化。
代码详细分解
这个合约就像一个为每个 Aptos 用户准备的“数字记事本”,我们来看看它是如何实现的。
1. 核心数据结构 (Structs)
合约定义了两种数据结构:
-
MessageHolder(消息持有者)struct MessageHolder has key { message: string::String, }- 这是真正用来存储数据的结构。你可以把它想象成一个“储物盒”。
has key是最重要的能力 (ability),它意味着每个账户地址下最多只能存放一个MessageHolder实例。这确保了每个用户只有一个专属的记事本。- 它内部只有一个字段
message,用来存放字符串。
-
MessageChange(消息变更事件)#[event] struct MessageChange has drop, store { account: address, from_message: string::String, to_message: string::String, }- 这是一个事件 (Event) 结构,由
#[event]注解标记。 - 它不像
MessageHolder那样永久存储状态,而是像一个“广播通知”。当一个用户的消息被修改时,合约就会发出这样一个事件。 - 链下的应用程序或索引器可以监听这些事件,从而知道“哪个账户 (
account) 把消息从from_message改成了to_message”。
- 这是一个事件 (Event) 结构,由
2. 主要功能函数 (Functions)
-
set_message(设置消息)public entry fun set_message(account: signer, message: string::String)- 这是一个入口函数 (
entry fun),意味着用户可以直接通过提交一笔交易来调用它。 - 参数
account: signer非常关键。signer代表着交易的签名者,它是一种密码学证明,确保了只有账户的拥有者(私钥持有者)才能调用这个函数来修改自己的消息。 - 函数逻辑:
- 检查该用户账户下是否已经存在
MessageHolder。 - 如果不存在(第一次设置消息):就用
move_to函数为该用户创建一个新的MessageHolder资源。 - 如果已存在:就用
borrow_global_mut“借用”已有的MessageHolder进行修改,先发出一个MessageChange事件通知外界,然后用新消息覆盖旧消息。
- 检查该用户账户下是否已经存在
- 这是一个入口函数 (
-
get_message(获取消息)#[view] public fun get_message(addr: address): string::String- 这是一个视图函数 (
#[view])。视图函数是只读的,调用它不需要提交交易,也不消耗 Gas 费(通过 RPC 节点查询时)。 - 它接受任何一个
address作为参数,意味着任何人都可以查询任何地址存储的消息,实现了数据的公开透明。 - 函数逻辑:
- 用
assert!(exists<...>)检查这个地址下是否存在MessageHolder。如果不存在,函数会报错。 - 如果存在,就用
borrow_global“借用”这个MessageHolder并返回其中的message字段。
- 用
- 这是一个视图函数 (
3. 测试函数 (Test Function)
-
sender_can_set_message#[test(account = @0x1)] public entry fun sender_can_set_message(account: signer)- 这是一个单元测试函数,由
#[test]注解标记。 - 它的代码不会被部署到区块链上,只在开发阶段运行
aptos move test命令时执行,用来验证合约逻辑的正确性。 - 测试逻辑:模拟一个账户 (
@0x1) 调用set_message设置一条消息,然后调用get_message读取它,最后用assert!确认读出来的消息和设置的完全一样。
- 这是一个单元测试函数,由
Move.toml 文件
[package]
name = "HelloBlockchainExample"
version = "1.0.0"
authors = []

[addresses]
hello_blockchain = "_"

[dev-addresses]

[dependencies.AptosFramework]
git = "https://github.com/aptos-labs/aptos-framework.git"
rev = "mainnet"
subdir = "aptos-framework"

[dev-dependencies]
项目根目录下的 Move.toml 文件是包的配置文件,它定义了项目名称、依赖项和地址别名等元数据。
编译项目
Code/Aptos/01-hello_blockchain
➜ aptos move build --named-addresses hello_blockchain=default
Compiling, may take a little while to download git dependencies...
UPDATING GIT DEPENDENCY https://github.com/aptos-labs/aptos-framework.git
INCLUDING DEPENDENCY AptosFramework
INCLUDING DEPENDENCY AptosStdlib
INCLUDING DEPENDENCY MoveStdlib
BUILDING HelloBlockchainExample
{
  "Result": [
    "1ff96e1010f6118a00bea0deb0139cdde087809e944638e12cbf70ce25a948fd::message"
  ]
}

Code/Aptos/01-hello_blockchain took 10.3s
➜ aptos move compile --named-addresses hello_blockchain=default --skip-fetch-latest-git-deps
Compiling, may take a little while to download git dependencies...
INCLUDING DEPENDENCY AptosFramework
INCLUDING DEPENDENCY AptosStdlib
INCLUDING DEPENDENCY MoveStdlib
BUILDING HelloBlockchainExample
{
  "Result": [
    "1ff96e1010f6118a00bea0deb0139cdde087809e944638e12cbf70ce25a948fd::message"
  ]
}
运行测试
Code/Aptos/01-hello_blockchain took 6.2s
➜ aptos move test --named-addresses hello_blockchain=default
INCLUDING DEPENDENCY AptosFramework
INCLUDING DEPENDENCY AptosStdlib
INCLUDING DEPENDENCY MoveStdlib
BUILDING HelloBlockchainExample
Running Move unit tests
[debug] "Running test for sender_can_set_message..."
[ PASS    ] 0x1ff96e1010f6118a00bea0deb0139cdde087809e944638e12cbf70ce25a948fd::message::sender_can_set_message
Test result: OK. Total tests: 1; passed: 1; failed: 0
{
  "Result": "Success"
}

Code/Aptos/01-hello_blockchain took 13.4s
➜ aptos move test --named-addresses hello_blockchain=default --skip-fetch-latest-git-deps
INCLUDING DEPENDENCY AptosFramework
INCLUDING DEPENDENCY AptosStdlib
INCLUDING DEPENDENCY MoveStdlib
BUILDING HelloBlockchainExample
Running Move unit tests
[debug] "Running test for sender_can_set_message..."
[ PASS    ] 0x1ff96e1010f6118a00bea0deb0139cdde087809e944638e12cbf70ce25a948fd::message::sender_can_set_message
Test result: OK. Total tests: 1; passed: 1; failed: 0
{
  "Result": "Success"
}
部署合约
部署失败余额不足 ❌
Code/Aptos/01-hello_blockchain took 12.6s
➜ aptos move deploy-object --address-name hello_blockchain
Compiling, may take a little while to download git dependencies...
UPDATING GIT DEPENDENCY https://github.com/aptos-labs/aptos-framework.git
INCLUDING DEPENDENCY AptosFramework
INCLUDING DEPENDENCY AptosStdlib
INCLUDING DEPENDENCY MoveStdlib
BUILDING HelloBlockchainExample
Do you want to deploy this package at object address 0x379e5f2fc6fef74c558ae4f27f8064866591f039fac09af6ee6ca2f9fe917bb6 [yes/no] >
yes
package size 1791 bytes
{
  "Error": "Simulation failed with status: MAX_GAS_UNITS_BELOW_MIN_TRANSACTION_GAS_UNITS"
}
查询并显示你当前 aptos 命令行工具配置的默认账户地址
aptos account lookup-address
{
  "Result": "1ff96e1010f6118a00bea0deb0139cdde087809e944638e12cbf70ce25a948fd"
}
查询余额发现为0️⃣
查询当前默认配置 (default profile) 中指定的账户的余额。
aptos account balance
{
  "Result": [
    {
      "asset_type": "coin",
      "coin_type": "0x1::aptos_coin::AptosCoin",
      "balance": 0
    }
  ]
}明确地、直接地查询地址为 1ff96e...fd 的这个账户的余额
aptos account balance --account 1ff96e1010f6118a00bea0deb0139cdde087809e944638e12cbf70ce25a948fd
{
  "Result": [
    {
      "asset_type": "coin",
      "coin_type": "0x1::aptos_coin::AptosCoin",
      "balance": 0
    }
  ]
}
第一条命令: aptos account balance
- 意思: 查询当前默认配置 (default profile) 中指定的账户的余额。
- 工作方式: 当你运行这个命令时,Aptos CLI 会自动查找
.aptos/config.yaml文件,找到default配置,然后使用其中记录的账户地址(也就是1ff96e...)去链上查询余额。 - 优点: 简洁方便。只要你设置好了默认账户,查询时就不需要每次都输入长长的地址。
第二条命令: aptos account balance --account 1ff96e...fd
- 意思: 明确地、直接地查询地址为
1ff96e...fd的这个账户的余额。 - 工作方式: 这个命令直接告诉 CLI 要查询哪个地址,CLI 不会再去查找配置文件来确定目标账户。它会忽略
default配置中的地址,直接使用你通过--account参数提供的地址。 - 优点: 精确、无歧义。当你需要查询一个非默认账户,或者想在脚本中确保查询的是某个特定地址时,这种方式更可靠。
区别总结
| 命令 | aptos account balance |
aptos account balance --account <地址> |
|---|---|---|
| 查询目标 | 默认配置文件中的账户 | 明确指定的账户地址 |
| 便利性 | 更高,无需输入地址 | 较低,需要输入完整地址 |
| 精确性 | 依赖于配置文件 | 更高,不依赖配置文件 |
| 使用场景 | 快速查询自己的默认钱包 | 查询任何人的钱包、在脚本中使用 |
解决方案:领水💡
https://aptos.dev/zh/network/faucet
领水成功查看余额
aptos account balance
{
  "Result": [
    {
      "asset_type": "coin",
      "coin_type": "0x1::aptos_coin::AptosCoin",
      "balance": 100000000
    }
  ]
}
再次部署合约 ✅
Code/Aptos/01-hello_blockchain
➜ aptos move deploy-object --address-name hello_blockchain
Compiling, may take a little while to download git dependencies...
UPDATING GIT DEPENDENCY https://github.com/aptos-labs/aptos-framework.git
INCLUDING DEPENDENCY AptosFramework
INCLUDING DEPENDENCY AptosStdlib
INCLUDING DEPENDENCY MoveStdlib
BUILDING HelloBlockchainExample
Do you want to deploy this package at object address 0x379e5f2fc6fef74c558ae4f27f8064866591f039fac09af6ee6ca2f9fe917bb6 [yes/no] >
yes
package size 1791 bytes
Do you want to submit a transaction for a range of [265700 - 398500] Octas at a gas unit price of 100 Octas? [yes/no] >
yes
Transaction submitted: https://explorer.aptoslabs.com/txn/0x4ee645dad8cf4f042bbf44ca0d3f0ca0222503ecf367ec3ba6d442d208207e9e?network=testnet
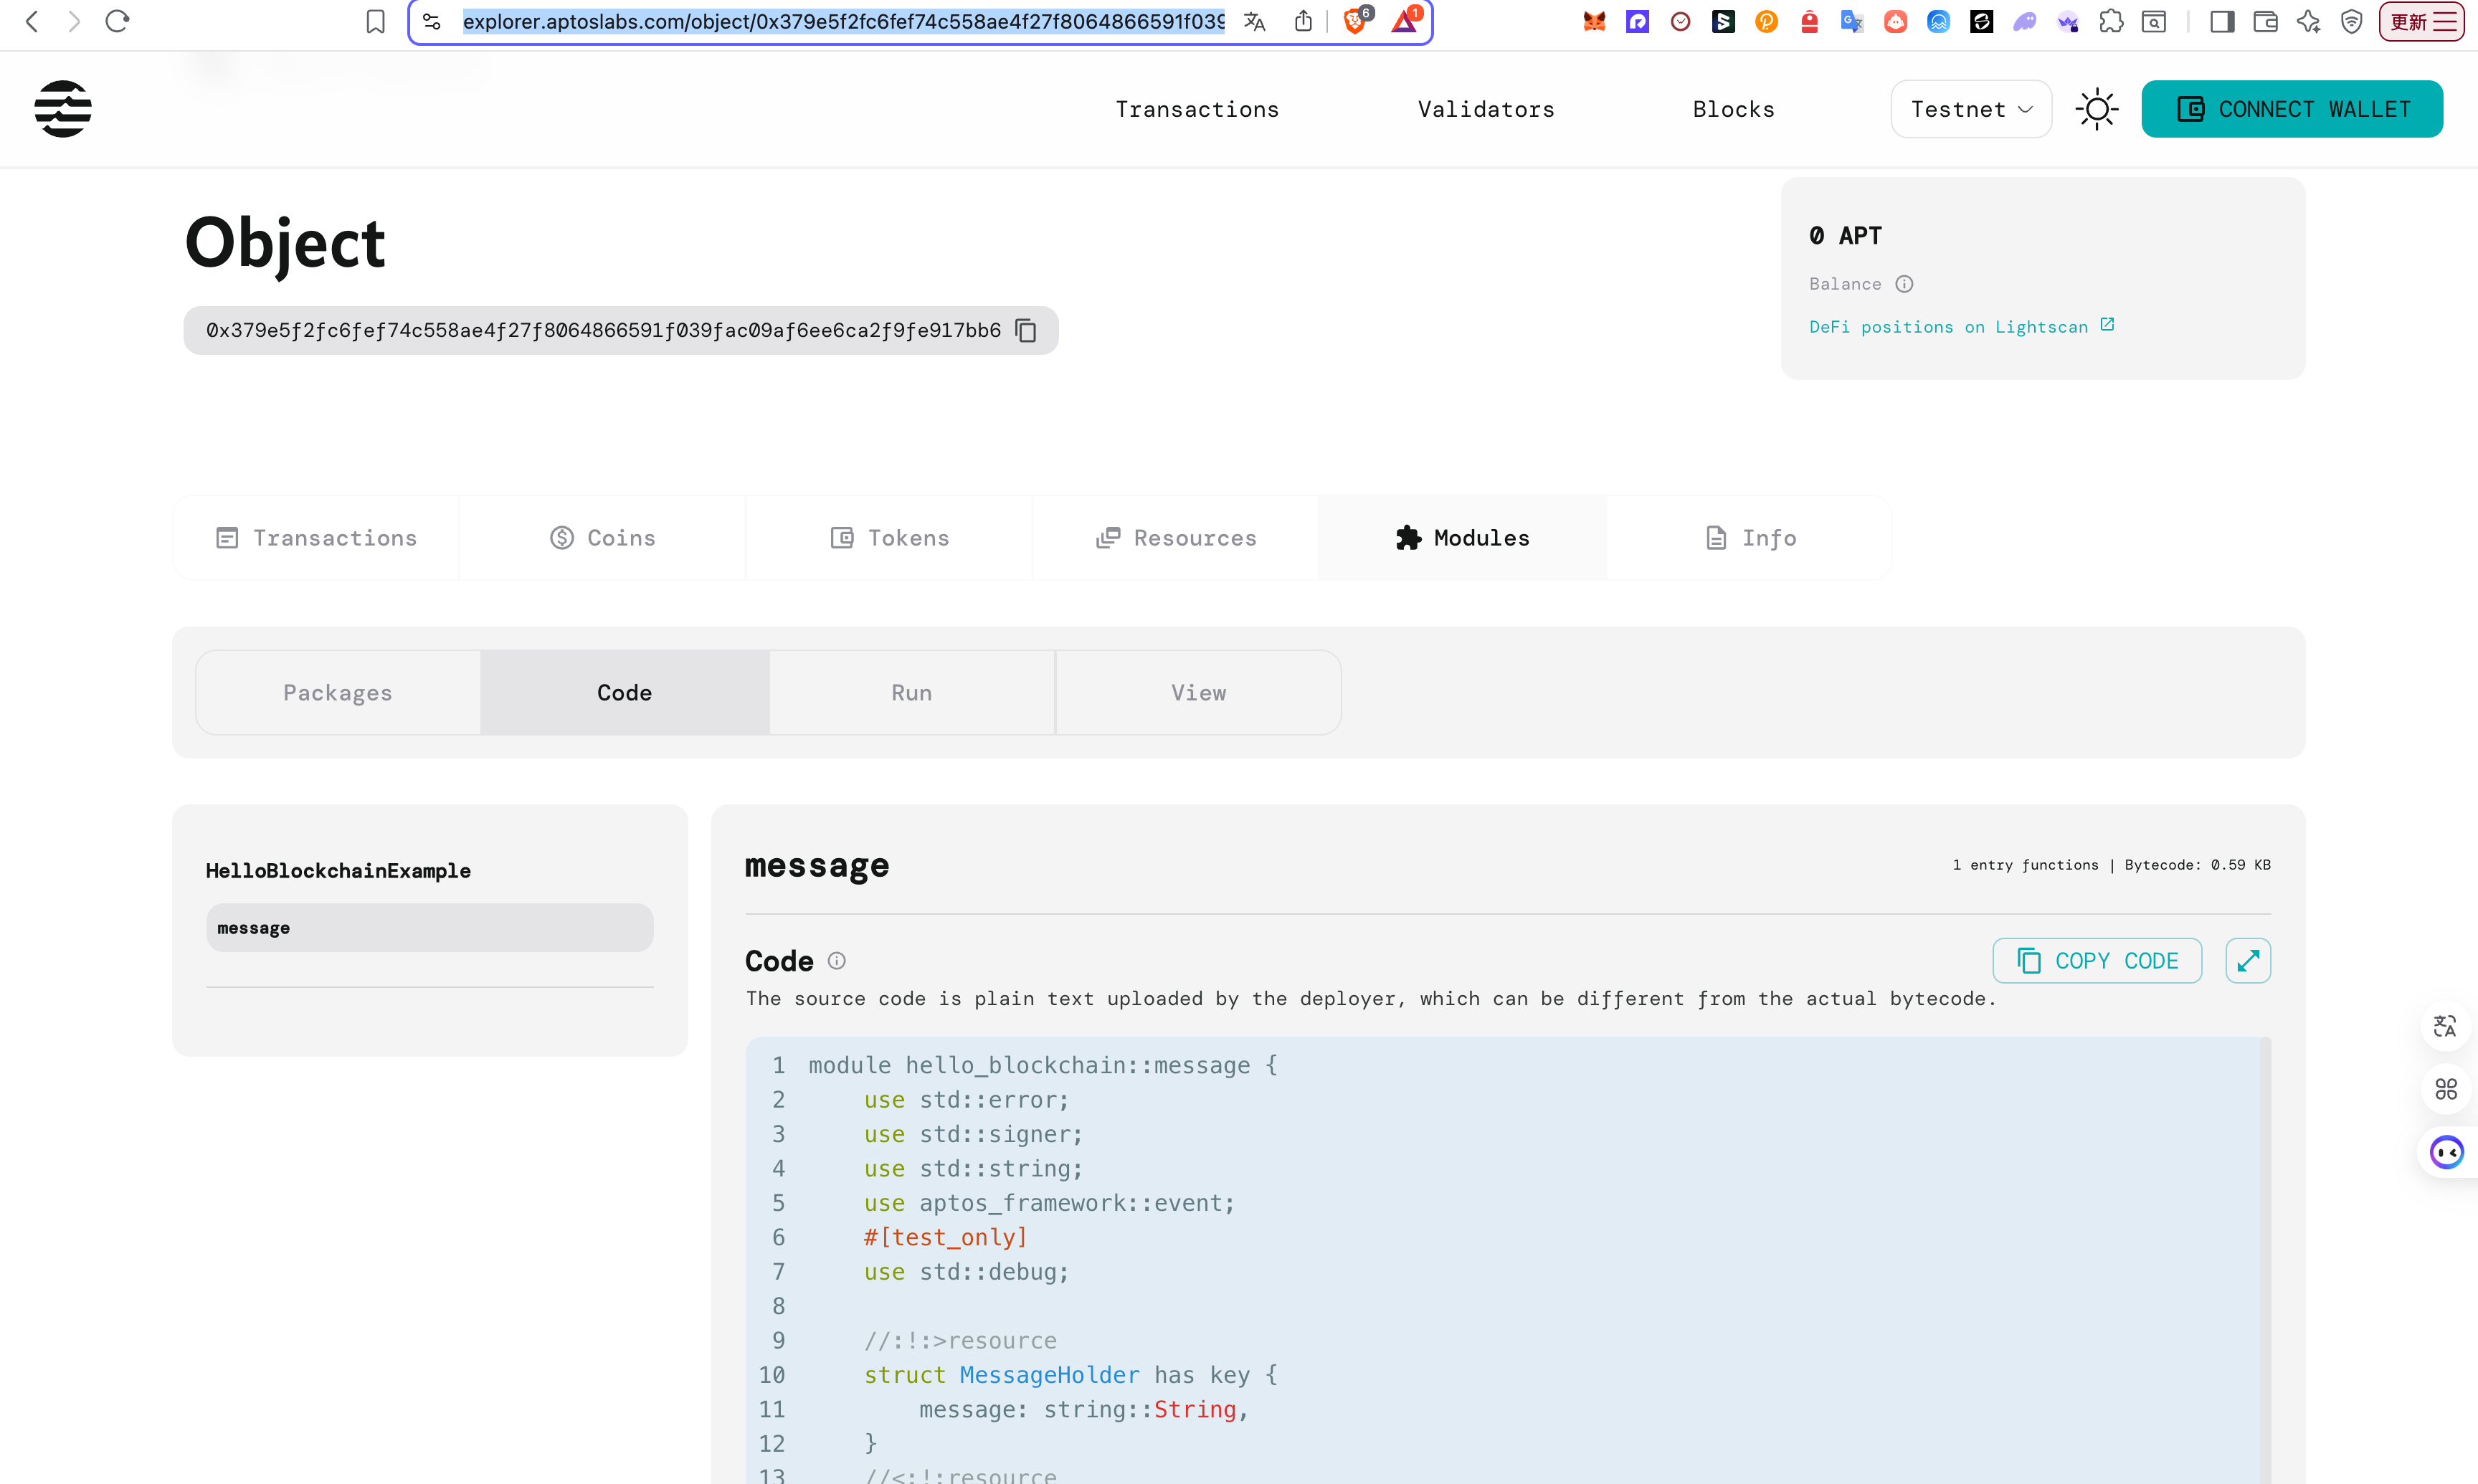
Code was successfully deployed to object address 0x379e5f2fc6fef74c558ae4f27f8064866591f039fac09af6ee6ca2f9fe917bb6
{
  "Result": "Success"
}
太棒了,恭喜你!🥳 这次部署成功了。
这个输出日志清晰地展示了部署智能合约的完整流程。我们来分解一下关键信息,这样你就能完全理解每一步的含义了。
部署日志解读
Do you want to deploy this package at object address 0x379e...- 含义: 这是在最终确认你要将代码部署到哪个对象地址。这个地址是 CLI 根据你的账户为你计算出来的,现在它将成为你链上代码的“家”。
Do you want to submit a transaction for a range of [265700 - 398500] Octas at a gas unit price of 100 Octas?- 含义: 这是交易费用(Gas Fee)的预估和确认。
Octas: 这是 APT 代币的最小单位,类似于人民币的“分”。1 APT = 100,000,000 Octas。[265700 - 398500] Octas: CLI 估算出,完成这次部署交易,大约需要花费 26.5万 到 39.8万 Octas。因为你之前已经通过水龙头领了钱,所以现在有足够的余额来支付这笔费用。
Transaction submitted: https://explorer.aptoslabs.com/txn/0x4ee6...- 含义: 这是最重要的部分之一。你的部署请求已经被提交到 Aptos testnet(测试网),并且网络已经确认了这笔交易。
0x4ee6...: 这是你的交易哈希 (Transaction Hash),是这次操作在区块链上的唯一凭证,就像一张收据的编号。https://explorer...: 这是一个区块链浏览器的链接。你可以点击这个链接,在网页上看到这次部署交易的所有细节,比如谁部署的、部署了什么代码、花了多少 gas 费等等。
Code was successfully deployed to object address 0x379e...- 含义: 这是最终的成功确认信息,告诉你代码已经成功地部署到了之前确认的那个对象地址上。
{ "Result": "Success" }- 含义: Aptos CLI 工具执行完毕,告诉你整个流程圆满成功。
现在你的第一个智能合约已经成功活在 Aptos 测试网上了!🎉
查看合约

总结
至此,我们完整地走完了在 Aptos 网络上开发并部署第一个 Move 智能合约的全流程。回顾整个过程,我们不仅成功地安装了开发工具、初始化了项目、编写并测试了合约代码,更重要的是,我们亲身经历并解决了一个每个新手都会遇到的核心问题:账户需要有足够的 Gas 费才能在链上执行操作。
从最初因余额为零而部署失败,到学会查询账户、使用测试网水龙头获取资金,再到最终看到部署成功的喜悦,这个过程远比一帆风顺的教程更加宝贵。它让我们深刻理解了区块链交易的基本经济模型,也验证了动手实践是学习新技术的最佳路径。
现在,你的第一个智能合约已经成功“活”在了 Aptos 测试网上,这仅仅是探索 Web3 世界的开始。希望这篇详尽的实录能为你铺平道路,助你更有信心地迈出下一步。
