Let's move - Sui Dapp Kit Hello Sui交互
- stom698
- 发布于 2024-03-06 10:33
- 阅读 2800
Sui Dapp Kit Hello Sui交互
1.1 安装pnpm
#安装nvm
wget https://github.com/nvm-sh/nvm/archive/refs/tags/v0.39.7.tar.gz
tar -zxvf v0.39.7.tar.gz
cd nvm-0.39.7/
./install.sh
source ~/.bashrc
#通过nvm安装nodejs
nvm install node
#安装pnpm
npm install -g pnpm
1.2 创建前端模板
创建一个hello_sui的模板
(base) root@DESKTOP-8UK78GU:~/sui_dappkit/hello_sui# pnpm create @mysten/dapp --template react-client-dapp
.../share/pnpm/store/v3/tmp/dlx-431104 | +97 ++++++++++
.../share/pnpm/store/v3/tmp/dlx-431104 |
#这里命令为hello_sui,然后会新建一个hello_sui的文件夹
✔ What is the name of your dApp? (this will be used as the directory name) · hello_sui
#创建之后移动到hello_sui文件夹下
(base) root@DESKTOP-8UK78GU:~/sui_dappkit/hello_sui# cd hello_sui/
#然后安装所需要的依赖
(base) root@DESKTOP-8UK78GU:~/sui_dappkit/hello_sui/hello_sui# pnpm install @mysten/sui.js @mysten/dapp-kit @tanstack/react-query
added 266 packages, and audited 267 packages in 27s
47 packages are looking for funding
run `npm fund` for details
found 0 vulnerabilities安装完之后的结构如下图
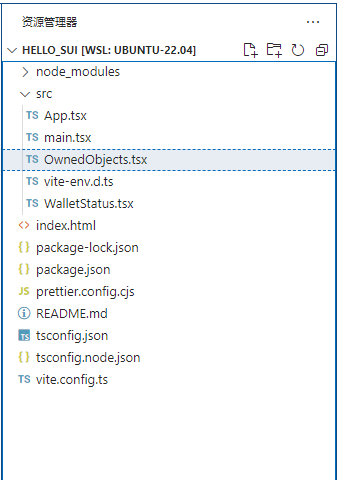 如果之前已经在chrome安装了钱包的话就可以直接执行查看一下效果。
#启动服务
npm run dev
(base) root@DESKTOP-8UK78GU:~/sui_dappkit/hello_sui/hello_sui# npm run dev
> hello_sui@0.0.0 dev
> vite
VITE v4.5.2 ready in 330 ms
➜ Local: http://localhost:5173/
➜ Network: use --host to expose
➜ press h to show help通过http://localhost:5173/在chrome访问。
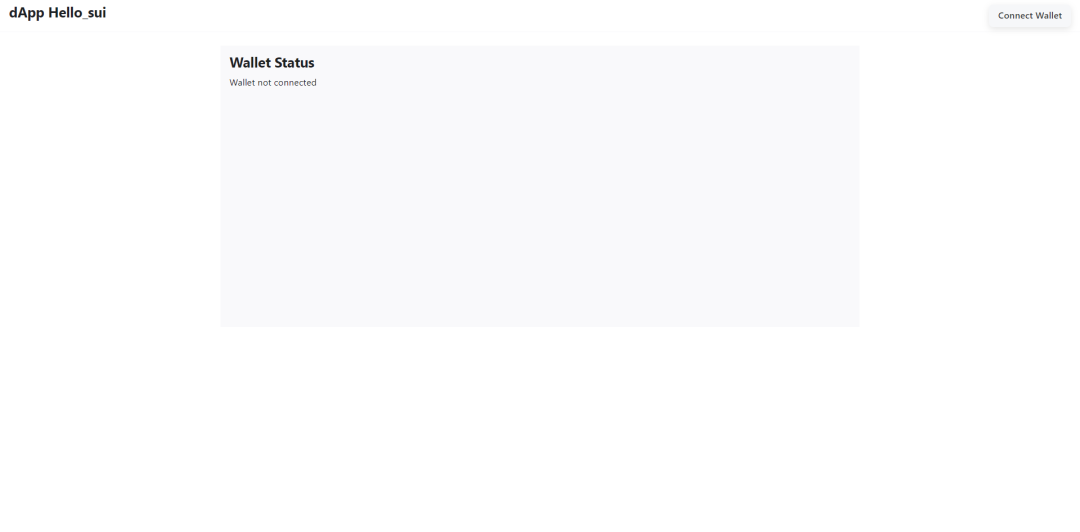
右上角可以连接钱包,连接效果如下:
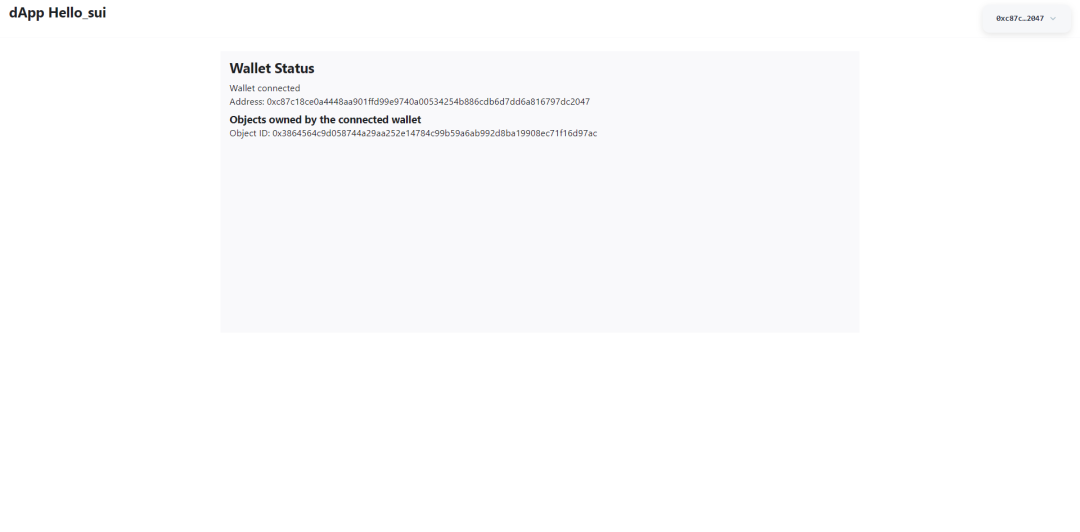
1.3 创建hello_sui合约
用sui cli创建一个hello_sui合约模板
sui move new hello_sui创建后效果如下
#注意新建文件时记得加上.move后缀。
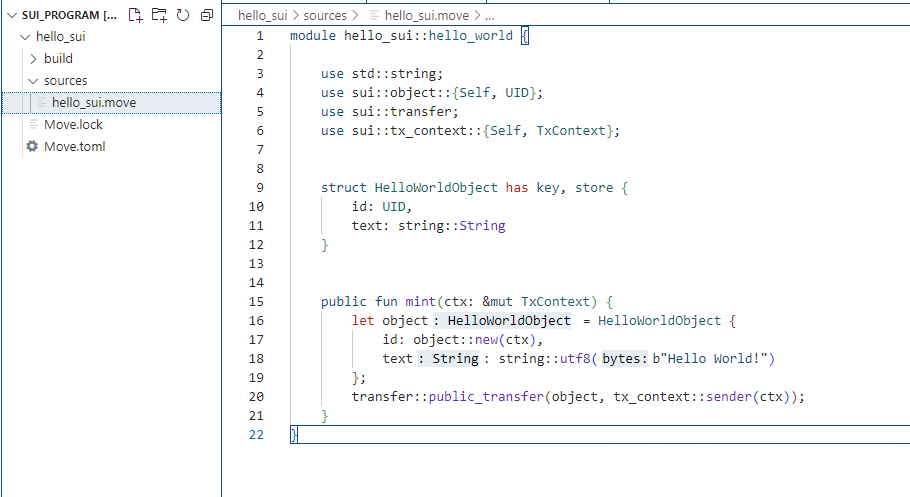

# hello_sui.move
module hello_sui::hello_world {
use std::string;
use sui::object::{Self, UID};
use sui::transfer;
use sui::tx_context::{Self, TxContext};
struct HelloWorldObject has key, store {
id: UID,
text: string::String
}
public fun mint(ctx: &mut TxContext) {
let object = HelloWorldObject {
id: object::new(ctx),
text: string::utf8(b"Hello World!")
};
transfer::public_transfer(object, tx_context::sender(ctx));
}
}# move.toml
[package]
name = "hello_sui"
version = "0.0.1"
[dependencies]
Sui = { git = "https://github.com/MystenLabs/sui.git", subdir = "crates/sui-framework/packages/sui-framework", rev = "framework/mainnet" }
[addresses]
hello_sui = "0x0"
然后部署合约
sui client publish --gas-budget 100000000 --skip-dependency-verification1.4 修改前端模板进行交互
在src/下新建constants.ts文件,将部署的合约packageid填入。
export const HELLO_SUI_PACKAGE_ID =
  "0xee45cf4702d67fc1b67ff91b90c1c3518607f07279d48800a99bab9d3856c89f";
然后在src/下新建mint.tsx文件,用来调用合约中的mint函数。
import { useSignAndExecuteTransactionBlock, useSuiClient } from '@mysten/dapp-kit';
import { TransactionBlock } from '@mysten/sui.js/transactions';
import { HELLO_SUI_PACKAGE_ID } from './constants';
import { Flex } from '@radix-ui/themes';
export function Mint({
onCreated,
}:{
onCreated: (id: string) => void;
}) {
const { mutate: signAndExecute } = useSignAndExecuteTransactionBlock();
const client = useSuiClient();
// 创建一个可点击的按钮触发mint()
return (
<Flex direction="column" my="2">
<div>
<button
onClick={() => {
mint();
}}
>
mint
</button>
</div>
</Flex>
);
// 定义一个mint函数然后执行终端中的sui client call的命令
function mint() {
const txb = new TransactionBlock();
// target中的hello_world为合约的模块名,mint为要调用的函数。
txb.moveCall({
target: `${HELLO_SUI_PACKAGE_ID}::hello_world::mint`,
});
signAndExecute(
{
transactionBlock: txb,
options: {
showEffects: true,
showObjectChanges: true,
},
},
{
// 定义如果成功则获取本次交易的objetid
onSuccess: (tx) => {
client
.waitForTransactionBlock({
digest: tx.digest,
})
.then(() => {
const objectId = tx.effects?.created?.[0]?.reference?.objectId;
if (objectId) {
onCreated(objectId);
}
});
},
},
);
}
}然后在src/下新建QueryObject.tsx文件,用来查询本次交易objectid内的信息。
import { useSuiClientQuery } from "@mysten/dapp-kit";
import type { SuiObjectData } from "@mysten/sui.js/client";
export function QueryObject({ id }: { id: string }) {
// 使用useSuiClientQuery钩子来获取对象的详细信息
const { data, isPending, error } = useSuiClientQuery('getObject', {
id: id,
options: {
showContent: true, // 设置true来显示对象详细信息
},
});
// 如果数据仍在加载
if (isPending) return <div>Loading object information...</div>;
// 如果加载出现了错误
if (error) return <div>An error occurred: {error.message}</div>;
// 如果没有查询到数据
if (!data || !data.data) return <div>No object data found.</div>;
// 用于渲染对象信息的辅助函数
const renderObjectData = (objectData: SuiObjectData | { [s: string]: unknown; } | ArrayLike<unknown>) => {
return Object.entries(objectData).map(([key, value], index) => (
<li key={index}>{`${key}: ${JSON.stringify(value)}`}</li>
));
};
// 展示本次交易obeject中的内容。
return (
<div>
<h3>Object Details:</h3>
<ul>
{renderObjectData(data.data)}
</ul>
</div>
);
}最后修改App.tsx文件内的内容。
import { ConnectButton, useCurrentAccount } from "@mysten/dapp-kit";
import { Box, Container, Flex, Heading } from "@radix-ui/themes";
import { WalletStatus } from "./WalletStatus";
import { Mint } from "./mint";
import { useState } from "react";
import { isValidSuiObjectId } from "@mysten/sui.js/utils";
import { QueryObject } from "./QueryObject";
function App() {
const currentAccount = useCurrentAccount();
const [counterId, setCounter] = useState(() => {
const hash = window.location.hash.slice(1);
return isValidSuiObjectId(hash) ? hash : null;
});
return (
<>
<Flex
position="sticky"
px="4"
py="2"
justify="between"
style={{
borderBottom: "1px solid var(--gray-a2)",
}}
>
<Box>
<Heading>dApp Hello_sui</Heading>
</Box>
<Box>
<ConnectButton />
</Box>
</Flex>
<Container>
<Container
mt="5"
pt="2"
px="4"
style={{ background: "var(--gray-a2)", minHeight: 500 }}
>
<WalletStatus />
{/* 这段代码首先检查用户是否已经连接了他们的钱包。如果已连接(currentAccount存在),它继续检查是否有一个counterId。
如果counterId已经设置,意味着已有计数器,那么渲染带有这个ID的QueryObject组件。如果没有counterId,则呈现Mint组件,
允许用户创建一个新的计数器。当新计数器被创建时,会通过回调更新URL的哈希部分,并设置计数器状态。如果用户的钱包尚未连接,
它将显示一个提醒用户连接钱包的消息。*/}
{currentAccount ? (
counterId ? (
<QueryObject id={counterId} />
) : (
<Mint
onCreated={(id) => {
window.location.hash = id;
setCounter(id);
}}
/>
)
) : (
<Heading>Please connect your wallet</Heading>
)}
</Container>
</Container>
</>
);
}
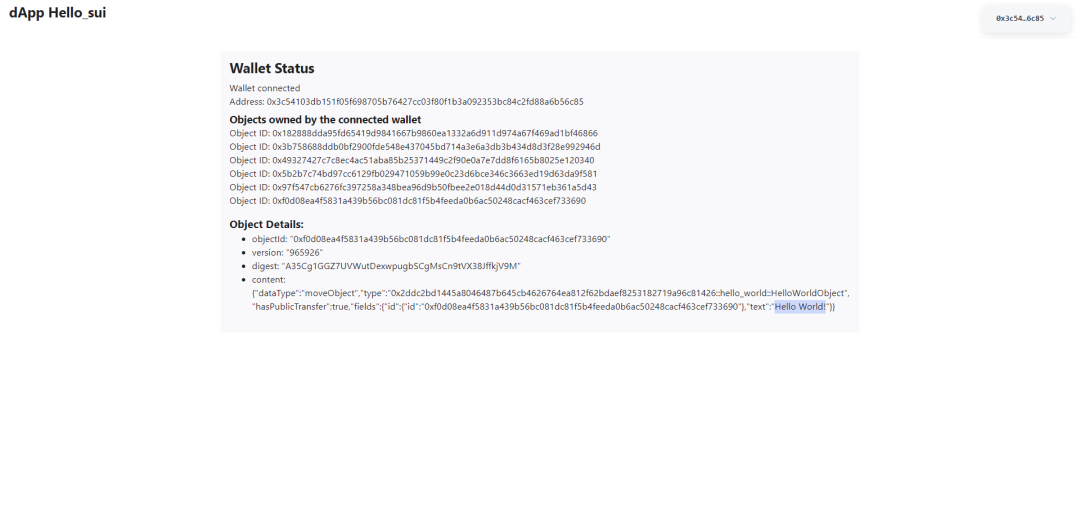
export default App;修改后保存,然后再查看浏览器,当我点击mint按钮然后钱包完成交易之后,则会展示出本次的objectid的信息,成功查看到输出了合约中的Hello World!。
源码:https://github.com/baicaiyihao/hello_sui
Sui move_cn社交账号
telegram: https://t.me/move_cn
X(twitter): https://twitter.com/move_cn
QQ群: 79489587
微信公众号:Move中文
Sui中文开发群: https://t.me/sui_dev_cn
- 学分: 2
- 分类: Move
- 标签:
点赞 0
收藏 0
分享
本文参与登链社区写作激励计划 ,好文好收益,欢迎正在阅读的你也加入。
0 条评论
请先 登录 后评论
