深入理解EVM - Part 2 - 内存
从opcode角度讲解EVM的内存机制,包括数据结构,空闲内存指针与变量赋值等
原文链接:https://noxx.substack.com/p/evm-deep-dives-the-path-to-shadowy-d6b?s=r
本系列的第二篇文章,我们会继续学习基础知识,以期成为“shadowy super coder”。如果没看过本系列的第一篇的话,建议看一下,有些前置的知识。在第一篇里,我们知道了EVM如何根据字节码找到调用的函数,对调用栈,calldata,函数签名和opcode有了一定了解。在第二篇我们学习一下合约的内存(memory)是怎么在EVM里工作的。
A Trip Down Memory Lane
第一篇出现的1_Storage.sol contract又来营业了。
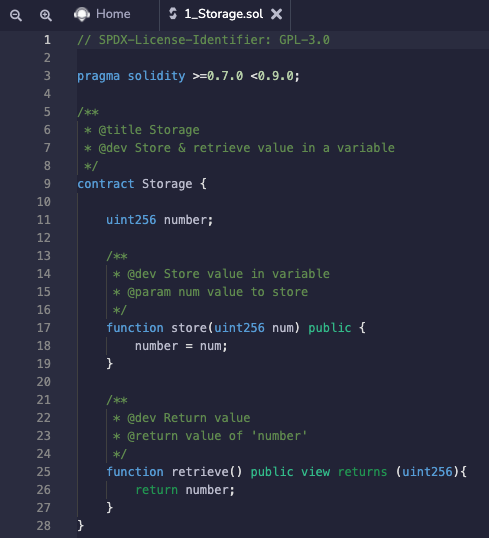
还是像上次一样,生成字节码然后把相关的截出来,在这篇里我们着重看一下前五字节。
6080604052
60 80                       =   PUSH1 0x80
60 40                       =   PUSH1 0x40
52                          =   MSTORE
这五个字节表示初始化“空闲内存指针”(free memory pointer)。要想完全理解它的含义,我们必须先对管理合约内存的数据结构有一定了解。
内存的数据结构
合约的内存是一个很简单的字节数组,可以储存32字节或者1字节的数据块,也可以读取32字节的数据块。如下图所示:
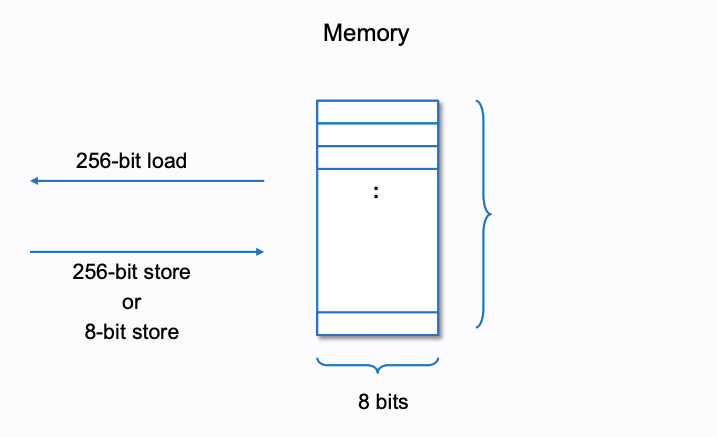 来源: https://takenobu-hs.github.io/downloads/ethereum_evm_illustrated.pdf
这个功能是3个管理内存的opcode决定的
- MSTORE (x, y) - 以“x”处为起点,写入32字节的数据“y”
- MLOAD (x) - 从“x”处取出32字节的数据加载到调用栈。
- MSTORE8 (x, y) - 以“x”处为起点,写入1字节的数据“y”(调用栈的最低有效字节)
你可以简单把内存位置理解成数组的索引,如果要读写超过1字节的数据,只需在下一个索引继续读写。
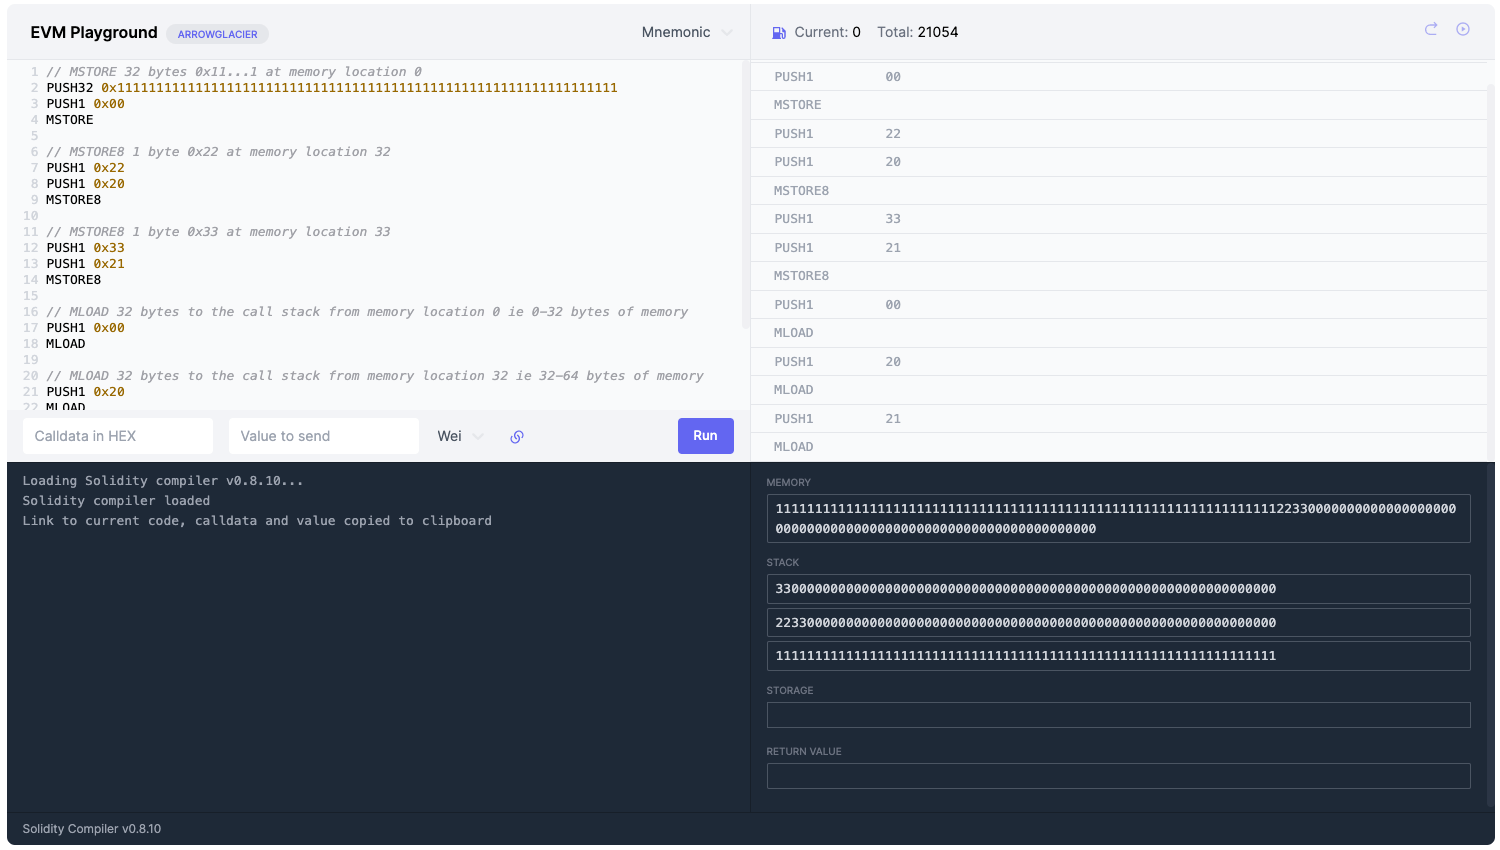
EVM Playground
这个EVM playground 可以巩固理解这三个opcode和内存是怎么工作的。点击Run和右上角的弯箭头一步一步执行,可以看到调用栈和内存的变化(每一部分都有注释)。
使用这个的时候你会发现一些奇怪的事情,首先当我们用MSTORE8把一个单字节数据0x22写进内存时,内存从这样

变成了这样
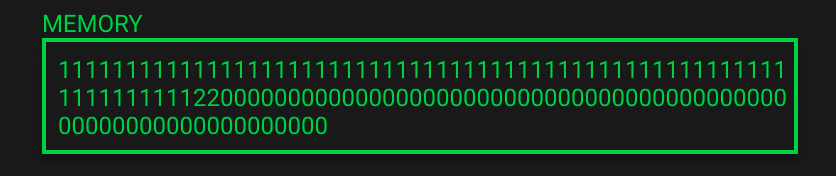
你可能会问,我只加了一字节,怎么补了这么多的0?
内存扩展
合约往内存里写数据是要根据数据大小付费的,如果要写在之前没写过的区域,还会收取首次使用的附加费用。没写过的区域是会按照32字节的增量增加的。
前724字节,内存扩展的花费成线性增长,后边按照二次方增长
因为我们刚刚初始化所以到处都是初始化为0的内存区域,又因为增量是32字节,就看到了内存被追加写入了2200000000000000000000000000000000000000000000000000000000000000
牢记内存是个字节数组
在33 (0x21)处跑MLOAD发现了第二件事,调用栈返回了这个
3300000000000000000000000000000000000000000000000000000000000000
牢记内存就是一个字节数组,我们可以在任何位置读写它,不一定是32的倍数,它记录线性的、字节级别的位置
内存只能被函数创建。可以是复杂类型比如数组和结构体的实例化,也可能是从存储区(storage)复制过来的引用变量。
了解了内存的数据结构之后我们老看一下空闲内存指针。
空闲内存指针
空闲内存指针就是一个简单的指向未使用内存开始处的指针,它可以确保智能合约可以记录哪些内存位置被写入了、哪些没被写入。这避免了合约用本应申请新内存的其他变量去覆盖老数据。当变量需要被写入内存时,合约会根据空闲内存指针确认数据应该写到哪里。
写入之后空闲内存指针会更新,根据写入数据大小确定新指针位置。像这样用一个简单的两数相加,算出新的空闲内存从哪开始:
freeMemoryPointer + dataSizeBytes = newFreeMemoryPointer
字节码
根据上文所题,空闲内存指针是在字节码最前边的五个opcode声明的
60 80                       =   PUSH1 0x80
60 40                       =   PUSH1 0x40
52                          =   MSTORE
这实际上是在说空闲内存指针在0x40(十进制64)位置上,有一个值0x80(十进制128)。那么0x40和0x80是怎么来的呢?我们可以在下边表格看到:
Solidity的内存布局将前4个32字节的插槽保留:
0x00-0x3f(64 bytes): 暂存空间(Scratch space)0x40-0x5f(32 bytes): 空闲内训指针0x60-0x7f(32 bytes): 0值插槽
我们可以看到0x40是Solidity定下的空闲内存指针的位置,而紧接着这四个保留值的内存地址即为0x80。
我们快速过一遍这四个保留值分别是干什么的:
- 暂存空间, 用来给hash方法和内联汇编使用。
- 空闲内存指针, 记录当前已分配的内存大小,空闲内存的起点,初始值0x80。
- 0值插槽,用作动态内存数组的初始值,不会被写入。
合约里的内存
我们巩固一下上边学到的知识,从真实的Solidity代码中看一下内存和空闲内存指针是如何更新的。我故意创建了一个很简单的MemoryLane合约,只有一个函数,里边声明了长度分别为5和2的梁哥数组,然后把b[0]赋1,尽管很简单,在这三行代码运行时依然发生了很多事。
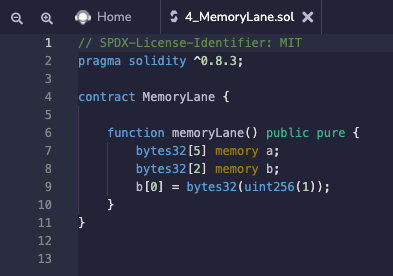
我们把代码复制到remix里,看看这段solidity代码在EVM里的工作细节。复制之后,把它编译部署了,运行memoryLane()函数然后进debug模式,能看见这个合约的opcodes。
我把opcodes简化了一下,删除JUMP和其他与内存操作无关的代码。代码中添加了注释,以提供上下文。代码分为6个不同的部分。大家可以把这六部分合在一起,在EVM Playground里跑一下。
空闲内存指针初始化(EVM Playground Lines 1-15)
////////////////////////////////////////
// Free Memory Pointer Initialisation //
////////////////////////////////////////
// value to store for free memory pointer 0x80 = 128 in decimal
PUSH1 0x80
// location for free memory pointer 0x40 = 64 in decimal
PUSH1 0x40
MSTORE
// jump location (required to prevent stack underflow)
PUSH2 0xffff
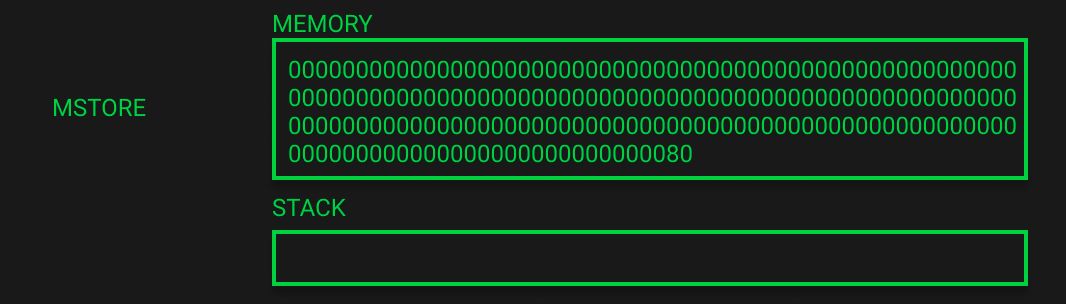
首先,按照上边所讲的,初始化空闲内存指针,把0x80压进栈里,这是solidity内存布局规定的。在这段时间里,我们内存里什么都没有。

然后我们再按照内存布局把空闲内存指针的地址0x40压栈。

最后我们调用MSTORE把栈顶的0x40弹出来,0x40处的值为0x80,把它写入内存。
现在调用栈空了但是我们需要处理一些内存,这些内存是16进制,每一个字符对应4个比特位。现在我们有了192个16进制字符,也就是96字节(1字节=8位=2个十六进制字符)。
前边讲过前64字节是solidity布局规定的暂存空间,紧接着的32字节是空闲内存指针,正如下边所表示的这样:(译者注:这个Memory并不是显示MSTORE存进去什么,而是从头到位显示,直到后边全是未分配内存,所以把前边的暂存空间也显示出来了)
变量 a 的内存分配和空闲内存指针更新 (EVM Playground Lines 16-34)
//////////////////////////////////////////////////////////////////
// Memory Allocation Varibale “a” & Free Memory Pointer Update ///
//////////////////////////////////////////////////////////////////
// load free memory pointer
PUSH1 0x40
MLOAD
// duplicate free memory pointer
DUP1
// 0xa0 = 160 in decimal, 32 * 5 = 160 first array is length 5
PUSH1 0xa0
// free memory pointer (0x80) + space for array (0xa0) = new free memory pointer
ADD
// Save this new value 0x120 to the free memory location
PUSH1 0x40
MSTORE
剩下的部分,在剩下的部分中,我们将跳过到每个部分的结束状态,并简要地说一下发生了什么。单独的opcode步骤可以在 EVM playground里自行探索。下一个分配内存的是“a” (bytes32[5]) ,空闲内存指针也更新了。编译器会根据数组大小和元素大小决定分配多大的内存。
牢记内存数组中的元素永远是32字节的倍数(bytes1[]也一样,但是bytes和string不是)。
我们需要根据32字节倍数大小的数组长度算出分配多少内存。
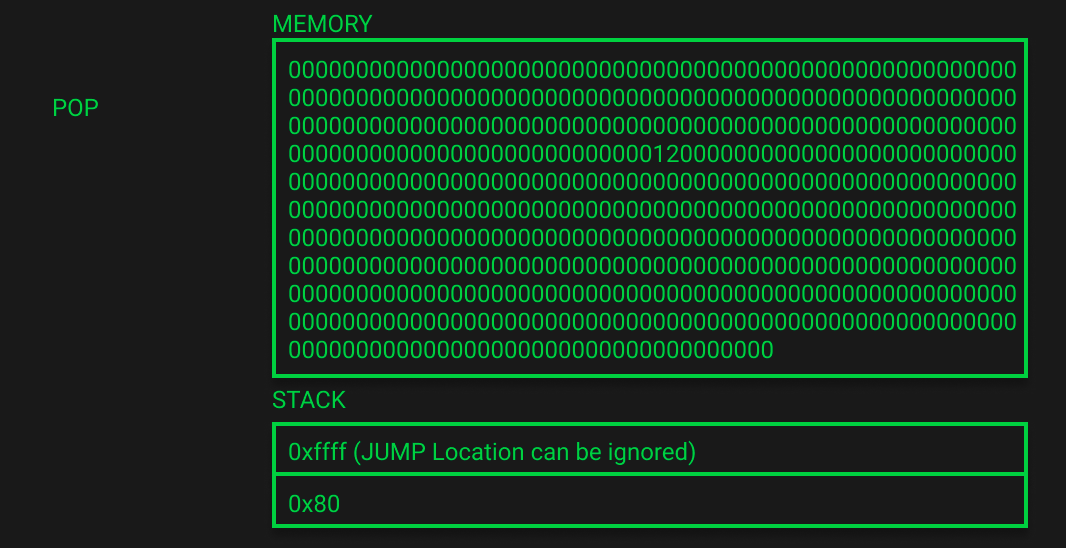
那在这里就是5 * 32 也就是160或者说0xa0。我们可以看到它被压入堆栈并添加到当前空闲内存指针0x80(十进制为128)以获得新的空闲内存指针值。本来空闲内存指针在0x80(十进制128),加上160后等于288,也就是16进制0x120,已经写到Memory上了。
调用栈里有变量a的内存起始地址0x80,以后可能会用到,0xffff是一个JuNP地址,跟内存操作无关可以忽略。

变量 a 的内存初始化 (EVM Playground Lines 35-95)
/////////////////////////////////////////
// Memory Initialisation Varaible “a” ///
/////////////////////////////////////////
// duplicate 0x80
DUP1
// push 0x05 = 5 in decimal (array length)
PUSH1 0x05
// Swap the top 2 items on the stack in this case 0x05 and 0x80
SWAP1
// push 0x20 = 32 in decimal (array item size)
PUSH1 0x20
// Duplicate the 3rd item on the stack in this case 0x05 to the top of the stack
DUP3
// 0x05 * 0x20 = 5 * 32 in decmial = 160 on top of the stack (size of array in bytes)
MUL
// Duplicate 0xa0 = 160 in decimal
DUP1
// Returns size of calldata in bytes currently just function signature = 0x04 or 4 in decmial
CALLDATASIZE
// duplicate 4th item on stack (0x80)
DUP4
// 0x80 (byte offset in the memory where the result will be copied.), 0x04 (byte offset in the calldata to copy.), 0xa0 (byte size to copy.)
// this offsets the 4 bytes in our call data with a size of 0xa0 which yeild a 160 bit set of 0's to be stored at the free memory pointer location
// this effectively initialises our array in memory
CALLDATACOPY
// The remaining lines in this section manipulate the stack to ensure we have the memory location of variable "a" and removes any items that are no longer needed
// duplicate 0xa0
DUP1
// duplicate 0x80
DUP3
// new free memory pointer as before
ADD
// swap 1st (0x120) item on the stack and 3rd (0x80)
SWAP2
// pop top item off stack (0x80)
POP
// pop top item off stack (0xa0)
POP
// Swap top 2 items 0x120 & 0x05
SWAP1
// pop top item off stack (0x05)
POP
// pop top item off stack (0x120)
POP
// swap top 2 items 0x80 & 0xb6 (jump location)
SWAP1
// simulating a JUMP remove the top item off stack with POP
POP
// Simulated jump location
PUSH2 0xffff
// Simulated jump location
PUSH2 0xffff
// simulating a JUMP, remove the top item off stack with POP
POP
现在内存已经被分配了,空闲内存指针也更新了,我们需要初始化变量a的内存空间。变量只是声明却没被赋值,会被初始化为0。
为此EVM使用CALLDATACOPY,有三个参数:
- memoryOffset (数据拷贝的目标地址)
- calldataOffset (待拷贝数据在calldata里的偏移量)
- size (需要复制的大小)
在这个例子里,memoryOffset是变量 a 的内存位置0x80。calldataOffset是待复制数据在calldata中的起点,因为我们反正不想复制任何calldata,就用0值初始化。最后size就是0xa0(十进制160)。
我们可以看到内存已经扩展到288字节了,调用栈又拿到了a的内存位置,还有一个无关痛痒的JUMP地址。
变量 b 的内存分配和空闲内存指针更新 (EVM Playground Lines 96-112)
/////////////////////////////////////////////////////////////////
// Memory Allocation Varibale “b” & Free Memory Pointer Update //
/////////////////////////////////////////////////////////////////
// free memory pointer load in
PUSH1 0x40
MLOAD
// duplicate free memory pointer (0x120)
DUP1
// 0x40 = 64 in decimal, 32 * 2 = 64 second array is length 2
PUSH1 0x40
// free memory pointer (0x120) + space for array (0x40) = new free memory pointer
ADD
// save new free memory pointer value at free memory location 0x40
PUSH1 0x40
MSTORE
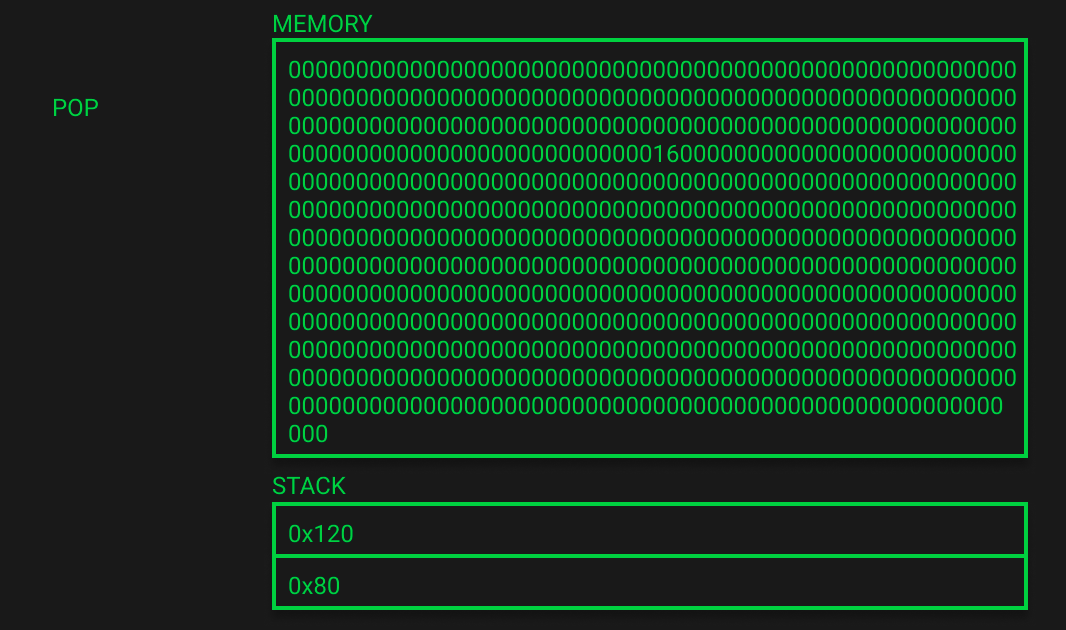
和 a 一样,对“bytes32[2] memory b”也要做内存申请和更新空闲内存指针。空闲内存指针更新到0x160(即十进制的352 = 288 + 2 * 32)。内存里显示空白内存指针已更新,栈上也有了变量 b 的内存地址0x120。

变量 b 的内存初始化 (EVM Playground Lines 113-162)
////////////////////////////////////////
// Memory Initialisation Variable “b” //
////////////////////////////////////////
// duplicate 0x120 (memory start location for variable "b")
DUP1
// 0x02 = 2 in decimal = array length
PUSH1 0x02
// swap top 2 items 0x02 & 0x120
SWAP1
// 0x20 = 32 in decimal (array item size in bytes)
PUSH1 0x20
// duplicate 3rd item on the stack 0x02
DUP3
// 0x02 * 0x20 = 0x40 = 64 (amount of bytes in memory to initialise)
MUL
// duplicate 0x40 (free memory pointer location)
DUP1
// same as before 4 bytes for function signature 0x04
CALLDATASIZE
// duplicate 4th item on the stack = 0x120
DUP4
// 0x120 (byte offset in the memory where the result will be copied.), 0x04 (byte offset in the calldata to copy.), 0x40 (byte size to copy.)
CALLDATACOPY
// The remaining lines in this section manipulate the stack to ensure we have the memory location of variable "a" and removes any items that are no longer needed
//duplicate the top of the stack 0x40
DUP1
// duplicate 3rd item on the stack 0x120
DUP3
// add together yields free memory pointer value
ADD
// swap 0x160 & 0x120
SWAP2
// pop top item off stack (0x120)
POP
// pop top item off stack (0x40)
POP
// swap 0x160 & 0x02
SWAP1
// pop top item off stack (0x02)
POP
// pop top item off stack (0x160)
POP
// jump location to top of the stack 0xbe
SWAP1
// simulate jump pop jump location off stack
POP
和变量 a 的初始化一样,现在内存已经扩展到352字节,栈里保存着两个变量的内存地址。
b[0]赋值 (EVM Playground Lines 163-207)
//////////////////////////
// Assign Value to b[0] //
//////////////////////////
// push 0x01, value to add b[0]
PUSH1 0x01
// push 0x00
PUSH1 0x00
// left shift operation no shift, first input is 0
SHL
// duplicate 2nd item on stack (0x120)
DUP2
// push 0x00 = [0] where in the array should this item go
PUSH1 0x00
// push 0x20 = 64 bytes the length of the array
PUSH1 0x02
// duplicate 2nd item on stack (0x00)
DUP2
// 0x00 < 0x20 = true = 0x01 (check the user is not trying to store a value at a location that doesn't exist in the array)
LT
// jump location
PUSH2 0x00d7
// 2 POPs since this is a JUMPI (checking if LT returned true or false)
// simulate JUMPI
POP
// simulate JUMPI
POP
// push 0x20 (32 bytes aray item size)
PUSH1 0x20
// 0x20 * 0x00 = 0x00 = 0 in decimal (array item size * index to determine byte offset)
MUL
// 0x00 + 0x120
ADD
// duplicate 2nd on stack 0x01 (value for b[0])
DUP2
// duplicate 2nd on stack 0x120 (memory location for b[])
DUP2
// store 0x01 at memory location 0x120
MSTORE
// clean up stack
POP
POP
POP
POP
最后一步我们需要给数组 b 的索引0处赋值,代码显示b[0] = 1。那么0x01压栈,紧接着一个左移opcode,但是参数是0,相当于没移。
接下来数组索引0也就是0x00会被压入栈中,然后检查这个值是否比数组长度0x02小,如果不是的话会跳到异常处理的部分。MUL和ADD可以根据数组的索引算出写入内存的位置,一个元素32,索引为0,则在0x00的偏移量开写。
0x20 (32 in decimal) * 0x00 (0 in decimal) = 0x00
偏移量加上起始位置,最终算出来该值应该在0x120被写入。
0x00 + 0x120 = 0x120 (288 in decimal)
最后,我们把0x01写进0x120。
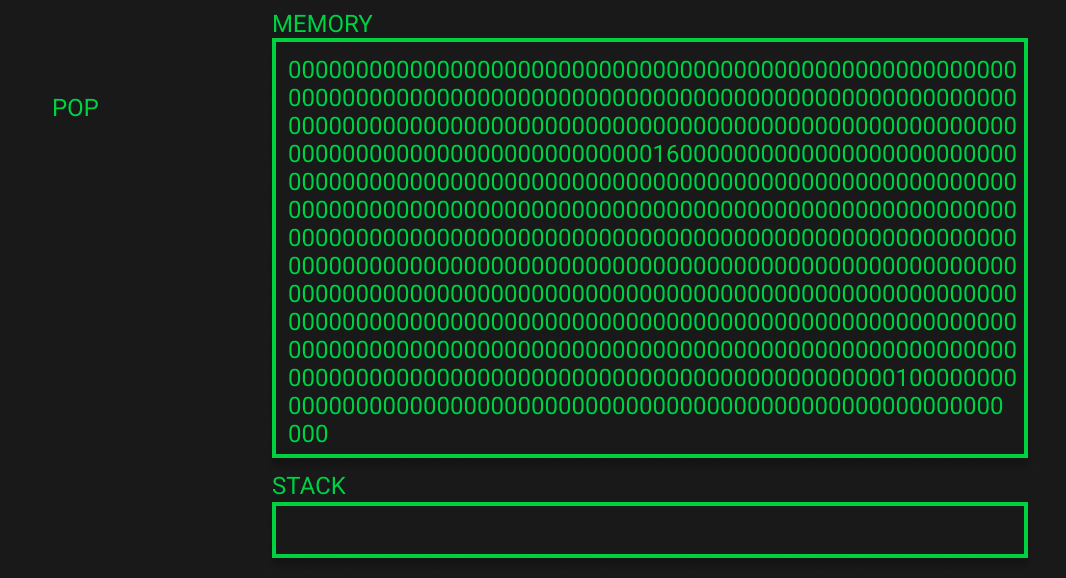
下图展示了这个函数执行完成后的状态,栈被弹空了。
实际上在用remix中调用栈上还是会有一些条目,一个跳转地址和函数签名,但是与内存操作无关,就被EVM省略了。
我们的内存被更新成了b[0]=1,在倒数第三行。你也可以验证一下数据位置是否正确,b[0]应该在0x120 - 0x13f (289-320字节)。
成了!这里信息量很大但我们现在理解已经很深刻了,下次写代码的时候也会有不小的帮助!以前挨行跑opcode的时候经常看见内存不断弹出0x40,现在知道为什么了。
这个系列的下一篇,我们会揭开存储插槽的神秘面纱。
 GitHub 登录
 Web3 钱包登录
