Web3系列教程之进阶篇---6. 在Etherscan上验证您的智能合约
- 李留白
- 发布于 2022-08-18 11:39
- 阅读 6013
了解以太坊生态系统,这样你就不会每次都重新发明轮子。使用Chainlink, ENS, The Graph, IPFS, Ceramic, Polygon, NEAR等开发吧!
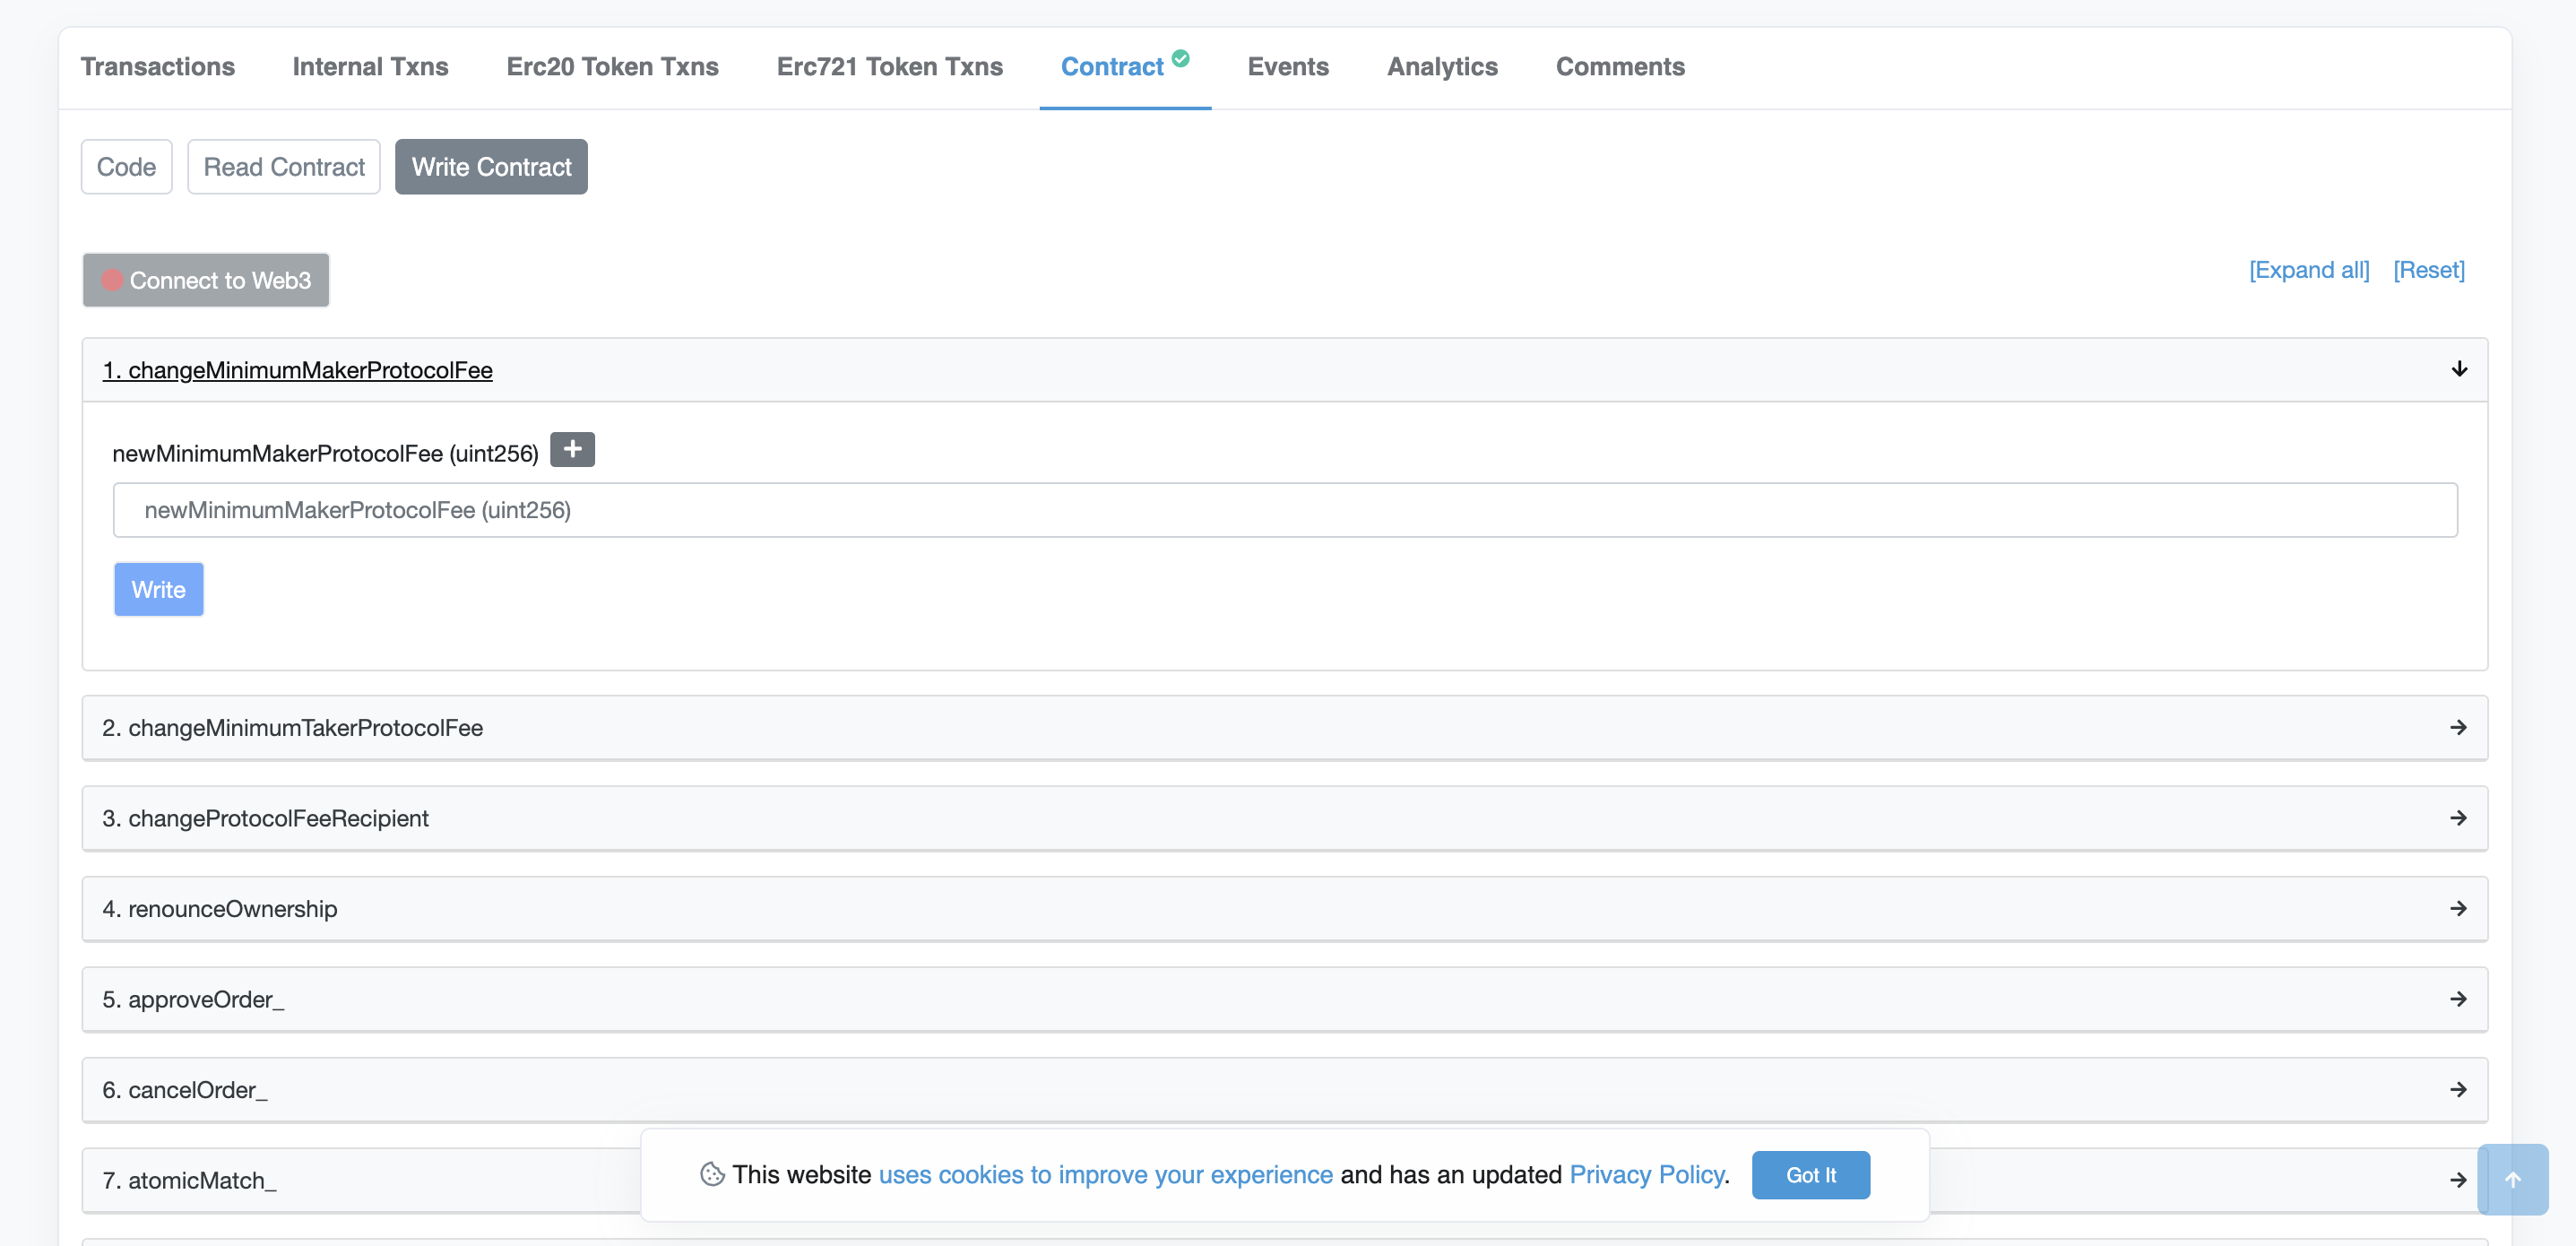
如果你打开这个etherscan 链接,你可以看到你可以直接通过 etherscan 与这个智能合约的功能进行交互,类似于你以前在 Remix 上的操作方式。

你是否想知道为什么你的合同没有发生这种情况?
- 原因是上面提到的合约是在 etherscan 上验证的,而你的不是。
因此,让我们了解为什么以及如何在 etherscan 上验证合约🚀
为什么?
- 验证合约很重要,因为它可以确保代码正是部署到区块链上的内容
- 它还允许公众阅读和审计你的智能合约代码
- 经过验证的合同被认为比未经验证的合同更值得信赖
- 它还为您提供了与合约交互的 UI 界面
为什么使用hardhat etherscan验证?
- 在 etherscan 上手动验证代码非常困难,因为您需要确保不仅验证主合同,而且验证您继承或与主合同一起使用的合同。
- 如果您部署了合同进行测试,并且已经对合同进行了最轻微的更改并对其进行了验证,那么您将不得不再次经历随着时间的推移变得乏味的手动过程。
构建
现在让我们学习如何利用hardhat仅通过几行代码来验证智能合约。
让我们开始🚀🚀🚀
写一些代码来验证
- 打开终端并执行这些命令
mkdir hardhat-verification
cd hardhat-verification- 您现在需要设置您的hardhat项目
npm init --yes
npm install --save-dev hardhat- 在安装 Hardhat 的同一目录中运行:
npx hardhat- 选择
Create a Javascript project - 按回车键已指定
Hardhat Project root - 如果您想添加一个问题,请按 Enter 键
.gitignore - 按回车键
Do you want to install this sample project's dependencies with npm (@nomicfoundation/hardhat-toolbox)?
现在你有一个hardhat项目准备好了!
如果您在 Windows 上,请执行此额外步骤并安装这些库:)
npm install --save-dev @nomicfoundation/hardhat-toolbox- 现在在目录中创建一个
contracts名为Verify.sol.
//SPDX-License-Identifier: Unlicense
pragma solidity ^0.8.4;

contract Verify {
    string private greeting;

    constructor() {
    }

    function hello(bool sayHello) public pure returns (string memory) {
        if(sayHello) {
            return "hello";
        }
        return "";
    }
}- 我们将安装
dotenv包以便能够导入 env 文件并在我们的配置中使用它。打开指向hardhat-verification目录的终端并执行此命令
npm install dotenv- Mumbai 网络是 Polygon 上的测试网之一。今天我们将学习如何在Mumbai 验证我们的合同。
- 现在在hardhat-verification文件夹中创建一个.
env文件,并添加以下几行,使用注释中的说明来获得你的ALCHEMY_API_KEY_URL、MUMBAI_PRIVATE_KEY和POLYGONSCAN_KEY.如果你的MetaMask上没有mumbai ,你可以按照这个来把它添加到你的MetaMask上,确保你获得mumbai 私钥的账户有mumbai Matic资金,你可以从这里得到一些。
  // Go to https://www.alchemyapi.io, sign up, create
  // a new App in its dashboard and select the network as Mumbai, and replace "add-the-alchemy-key-url-here" with its key url
  ALCHEMY_API_KEY_URL="add-the-alchemy-key-url-here"

  // Replace this private key with your Mumbai account private key
  // To export your private key from Metamask, open Metamask and
  // go to Account Details > Export Private Key
  // Be aware of NEVER putting real Ether into testing accounts
  MUMBAI_PRIVATE_KEY="add-the-mumbai-private-key-here"

  // Go to https://polygonscan.com/, sign up, on your account overview page,
  // click on `API Keys`, add a new API key and copy the
  // `API Key Token`
POLYGONSCAN_KEY="add-the-polygonscan-api-token-here"- 让我们将合约部署到
mumbai网络。创建一个新文件,或替换现有的默认文件,deploy.js在该scripts文件夹下命名。请注意我们如何使用代码来验证合约。
const { ethers } = require("hardhat");
require("dotenv").config({ path: ".env" });

async function main() {
  /*
  A ContractFactory in ethers.js is an abstraction used to deploy new smart contracts,
  so verifyContract here is a factory for instances of our Verify contract.
  */
  const verifyContract = await ethers.getContractFactory("Verify");

  // deploy the contract
  const deployedVerifyContract = await verifyContract.deploy();

  await deployedVerifyContract.deployed();

  // print the address of the deployed contract
  console.log("Verify Contract Address:", deployedVerifyContract.address);

  console.log("Sleeping.....");
  // Wait for etherscan to notice that the contract has been deployed
  await sleep(10000);

  // Verify the contract after deploying
  await hre.run("verify:verify", {
    address: deployedVerifyContract.address,
    constructorArguments: [],
  });
}

function sleep(ms) {
  return new Promise((resolve) => setTimeout(resolve, ms));
}

// Call the main function and catch if there is any error
main()
  .then(() => process.exit(0))
  .catch((error) => {
    console.error(error);
    process.exit(1);
});- 现在打开
hardhat.config.js文件,我们将在mumbai此处添加网络,以便我们可以将合约部署到mumbai和一个etherscan对象,以便我们可以在polygonscan. 用下面给出的行替换hardhat.config.js文件中的所有行。
require("@nomicfoundation/hardhat-toolbox");
require("dotenv").config({ path: ".env" });

const ALCHEMY_API_KEY_URL = process.env.ALCHEMY_API_KEY_URL;

const MUMBAI_PRIVATE_KEY = process.env.MUMBAI_PRIVATE_KEY;

const POLYGONSCAN_KEY = process.env.POLYGONSCAN_KEY;

module.exports = {
  solidity: "0.8.4",
  networks: {
    mumbai: {
      url: ALCHEMY_API_KEY_URL,
      accounts: [MUMBAI_PRIVATE_KEY],
    },
  },
  etherscan: {
    apiKey: {
      polygonMumbai: POLYGONSCAN_KEY,
    },
  },
};- 编译合约,打开一个指向
hardhat-verification目录的终端并执行这个命令
npx hardhat compile- 要部署,请打开指向
hardhat-tutorial目录的终端并执行此命令
npx hardhat run scripts/deploy.js --network mumbai- 它应该已经打印了一个指向 mumbai polygonscan 的链接,您的合同现在已经过验证。单击polygonscan 链接并在那里与您的合同进行交互🚀🚀🚀
原文: https://www.learnweb3.io/tracks/junior/etherscan-contract-verification

点赞 0
收藏 1
分享
本文参与登链社区写作激励计划 ,好文好收益,欢迎正在阅读的你也加入。
- 区块链如何悄然保护你的在线购物体验 53 浏览
- AI 正热,加密货币遇冷,那又如何? 144 浏览
- Layer Zero 发布 Zero 链:去中心化的多核世界计算机 188 浏览
- 如何在不到一分钟内发现Web3骗局 124 浏览
- 加密货币的长期博弈 249 浏览
- 加密货币的2026年 = 互联网的2002年:黎明前最黑暗的时刻 197 浏览
0 条评论
请先 登录 后评论

